@OKH
Of course, the important things in life... thanx

I have tried the Furniture Editor now, and managed to create a pipe with a circular cut-out, using your coordinates.
BUT: I probably did something wrong at some point, as it appears the cut-out follows both the outer and the inner circle after being sloped.
So I ended up inserting an invisible object into the centre of the pipe, to open up for the light.
This can probably be done easier with the DefaultFurnitureCatalog.properties, so maybe exploring
the DefaultFurnitureCatalog.properties shall be upgraded to one of the "important things in life"...
A nice detail with most downlights, is that they can be angled and pointing in different directions,
which is nice when you want to eliminate shadows. Being left handed, I know the problem only too
well: Windows are always on the left side of the classrooms.
Well, what I wanted to say was that inserting a light source into a sloped pipe can be a trial
– which I have approached like this:

By texturing the pipe with a see-thru texture, it's easy to place the light source inside it.
I often use this technique for placing light sources inside objects.
Another thing I like to mention while I'm at it:
We don't actually need a downlight to place light sources in the ceiling. We just need a hole in the ceiling.
As long as we use hollow floor separators, we can place our light sources in the hollow area,
and let it shine through the holes
– round or square doesn't really matter.
Here is an example:
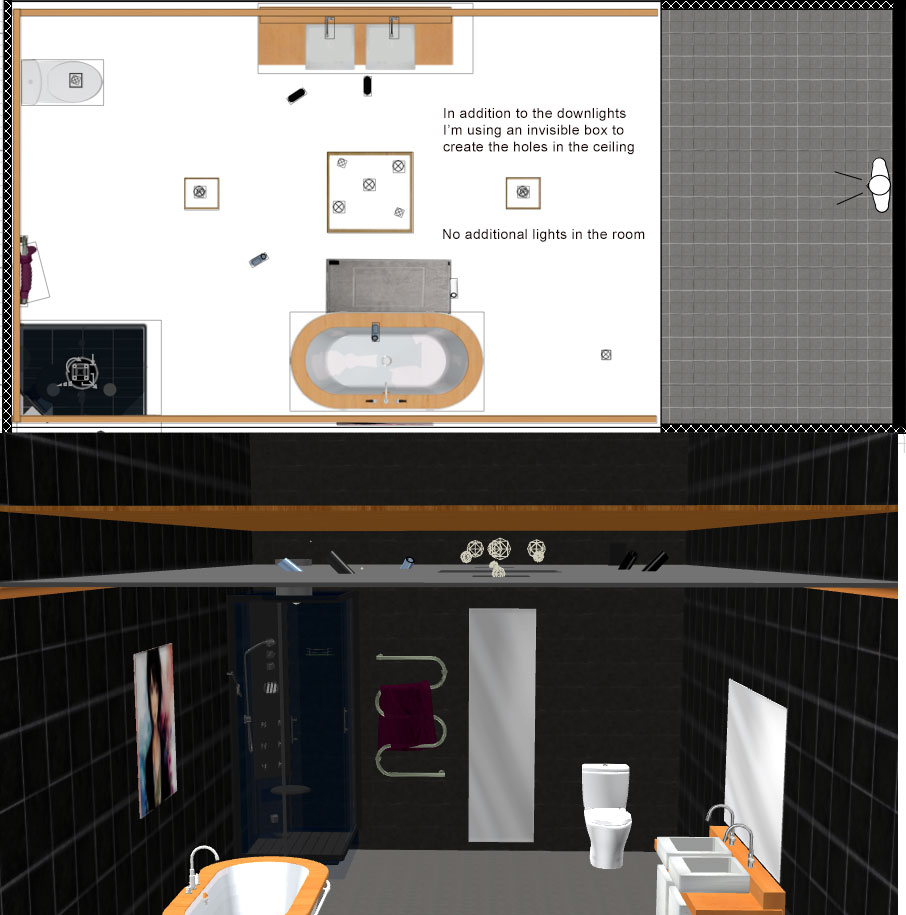
And this is how it renders:

Okay...
cec