
Enkonyito's “Advanced render settings” gave us a new set of parameters for tweaking the Sunflow renderer,
and when IBL-lighting vas introduced shortly after, we got yet another major lighting improvement.
And then we got the resizable render window, an invaluable tool for checking our light settings fast and easy.
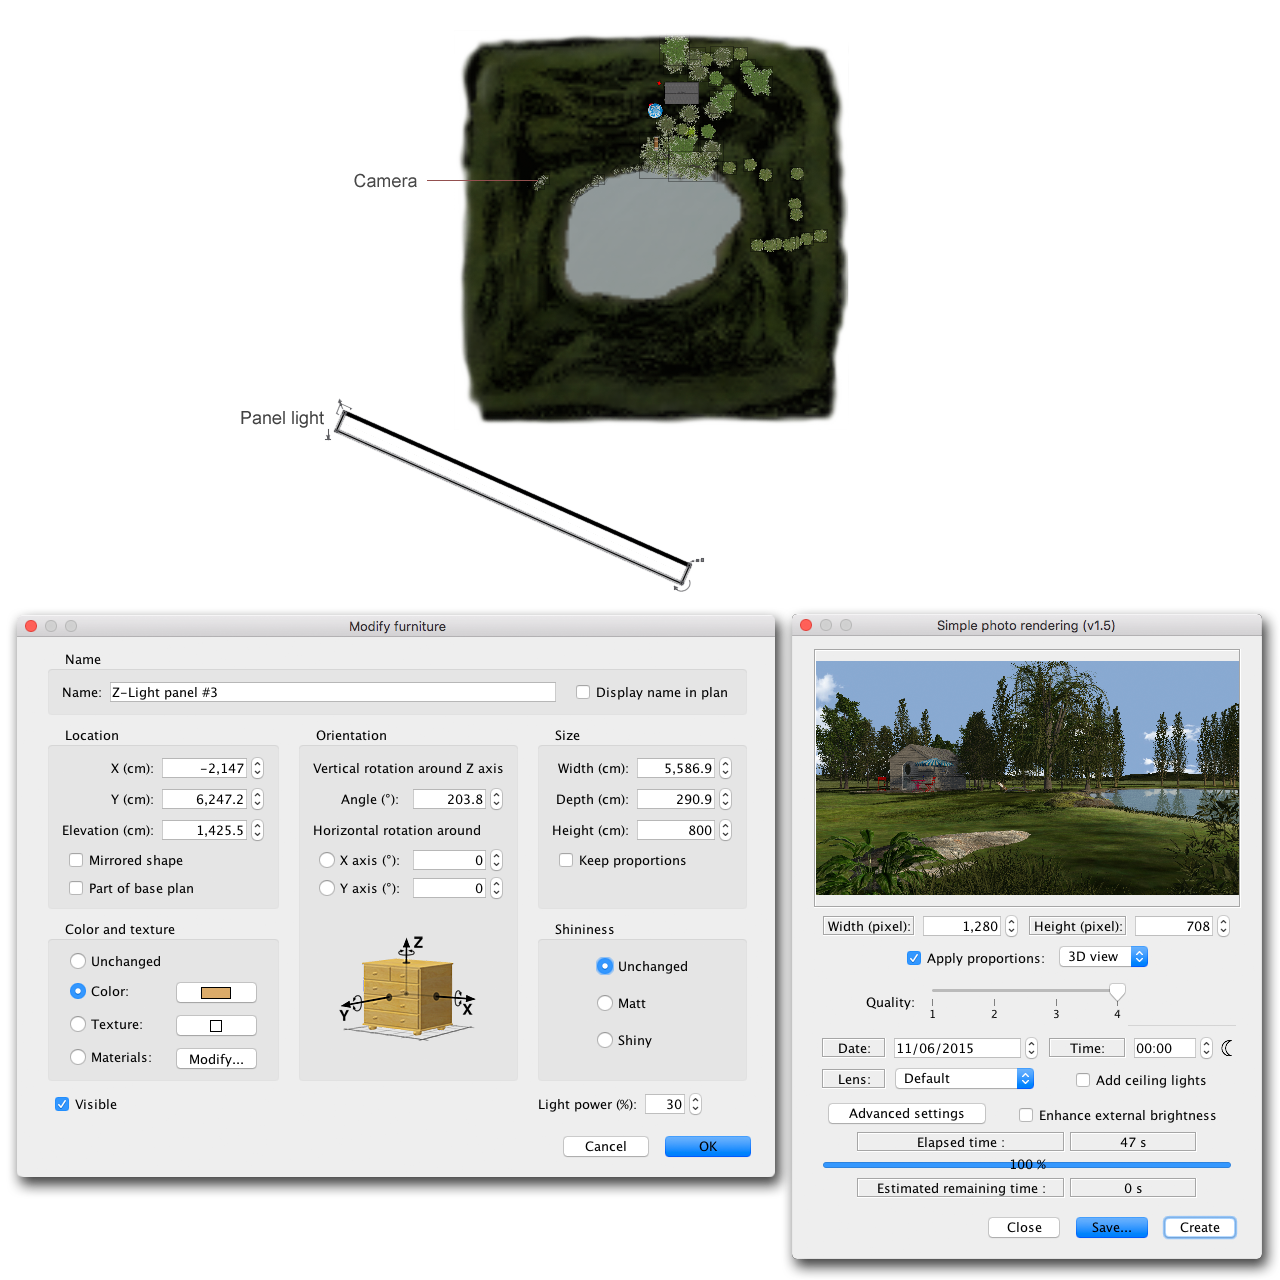
Recently Enkonyito has introduced the panel lights – which have once again lifted SH3D to a new level.
Now Sweet Home 3d v6 is just around the corner.
Great things are happening...
I'm going to play with panel lights in this post.
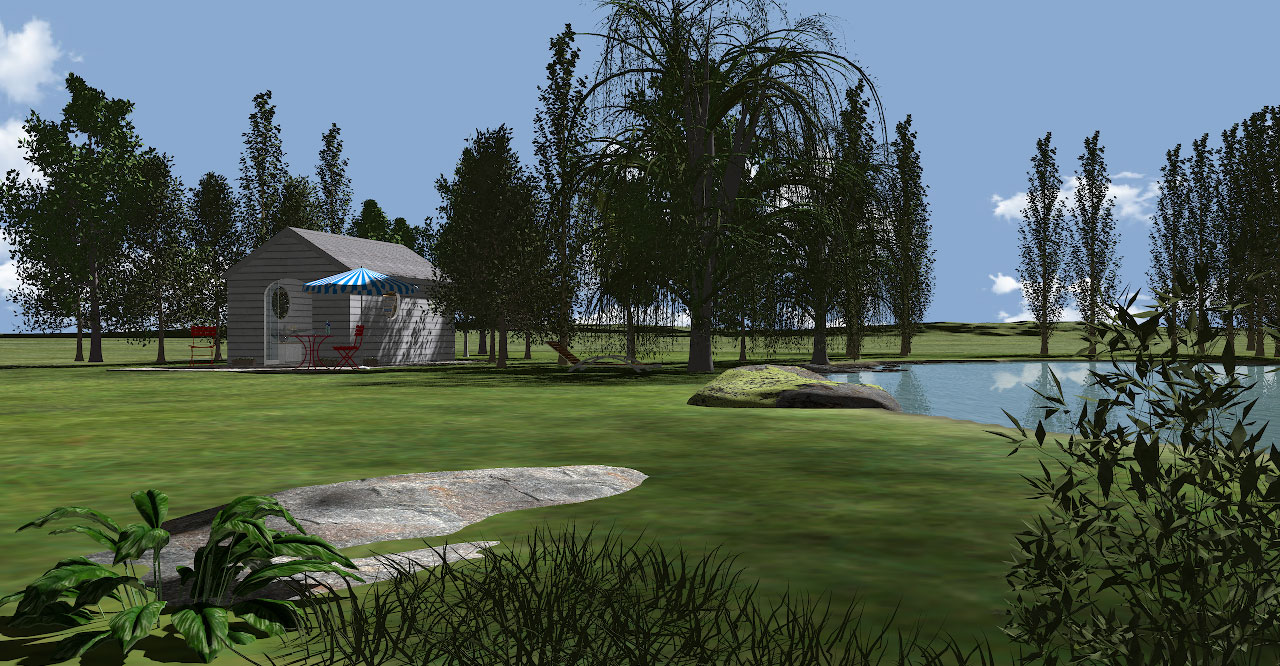
First I will work with SweetHome3DExample9-WoodenShed.sh3d from the gallery – a project file weighing only 13.4 Mb.
I have chosen this file because it is very small, yet quite detailed and with a focus on the surroundings.
I will only deal with the exterior.
Here is a snapshot of the untouched original project file, rendered with the default render settings for Q4:

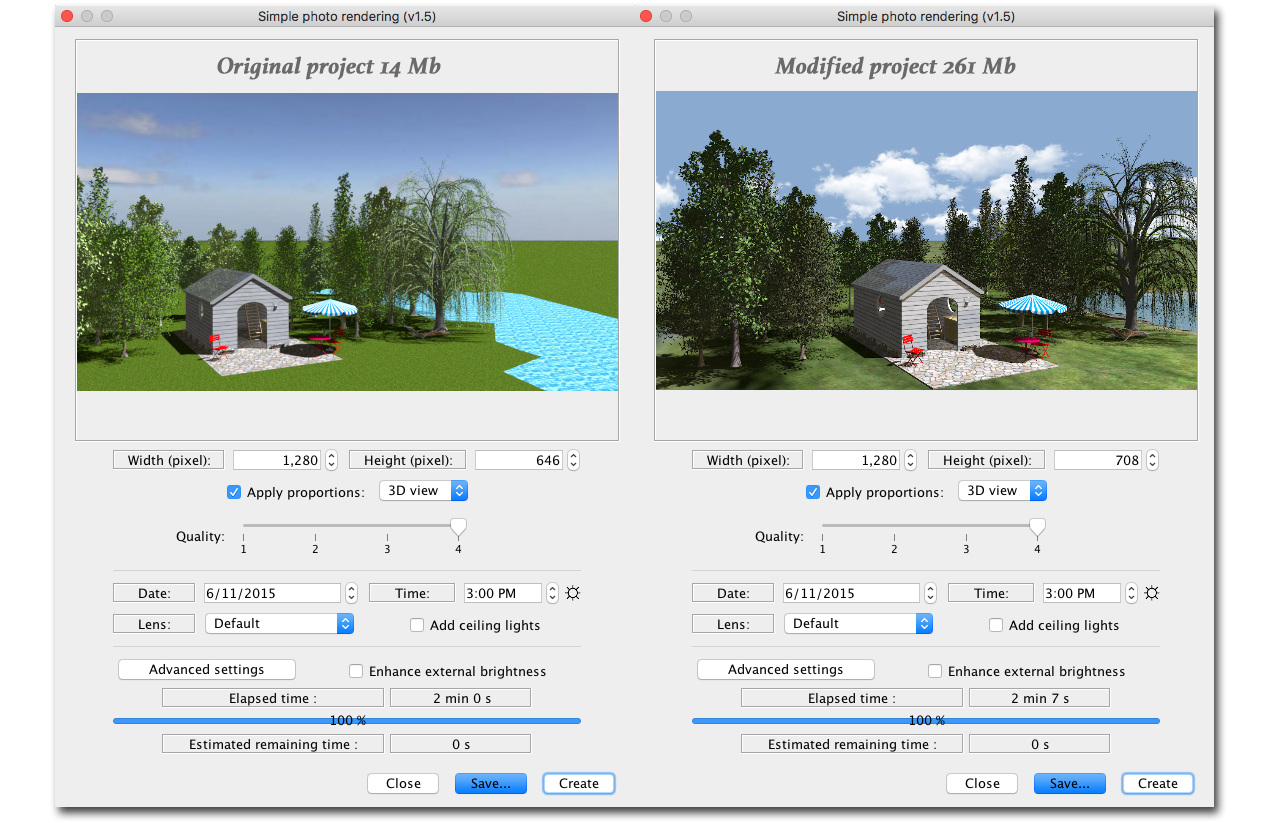
The plan is to make some nasty modifications to the project and create a file that is a lot bigger.
The first thing I will do is to delete the water and add a slightly sloped terrain with an immersed pond at the highest point. That will increase the file size with some 100 Mb.
Then I will add a ground texture and a sky texture, some gras, stones, plants and so on, plus a terrain to cover the horizon, which will add another 40 Mb.
Then I will work on the trees.
I will keep them at their current position, but I will add textures to the leaves and get rid of the shininess that's always present in these models.
There's a lot of trees, so that probably adds another 30 Mb to the file size.
I will also add two new levels: One for the terrain ( at ground level ), and one for things that shall stick up from the terrain, like stones and plants.
Then I will elevate the two original levels by what's necessary to make the house level match the height of the terrain.
At last I will add a high-res hemisphere to cover the entire construction, but I will keep it invisible until I need it.
After doing all this, the project file is 261.8 Mb : SweetHome3DExample9-WoodenShed-CEC.sh3d
This project is made with Version 6 beta 11. It might not render snapshots when opened with older versions.
Everything I have added is marked with a "Z" in front of the name, and will naturally come at the end of a list sorted by name.
The "Z"-marked models are my creations. Feel free to grab anything of interest.
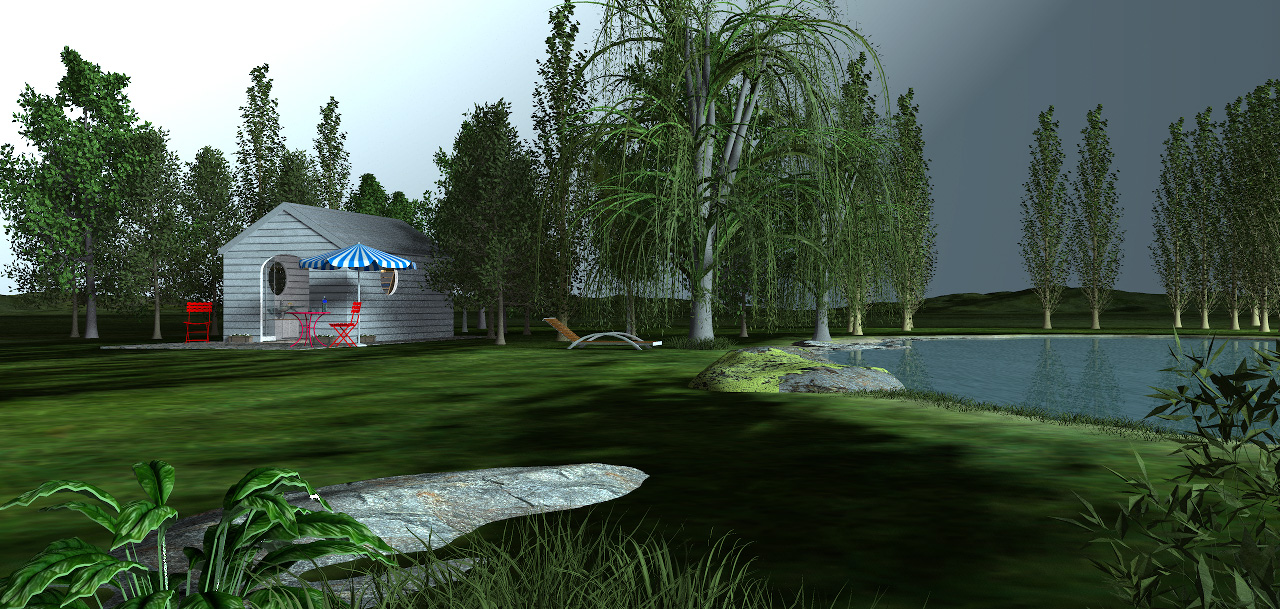
Here is a snapshot of the modified project, shot from the same angle and the same settings as the original:
Then it's time to play with lights:
First I will add an orange panel light to substitute the sunlight, and set the time to midnight.
Here's the result:

Using a light panel to substitute the sun obviously gives a lot of new lighting options, but what if I place a hemisphere over the entire construction?
I can shine a light on it and use it as a sky image...
...and create moods and atmospheres that I sincerely doubt can be created this easily with any other 3D program.

Ahh, yes; what about the rendering time?
Well...
NO SUN

One advantage of using light panels for sunlight, is that you don’t have to adjust the compass to change the direction of the sun.
Another handy feature is that you can easily mimic the sunlight at any time of day, just by changing the colour and intensity of the panel lights,
and rendering with light panels is a lot faster than with the original light sources.
(But there’s absolutely no reason to abandon the sphere-lights. They are still invaluable and I use them a lot in my other projects.)
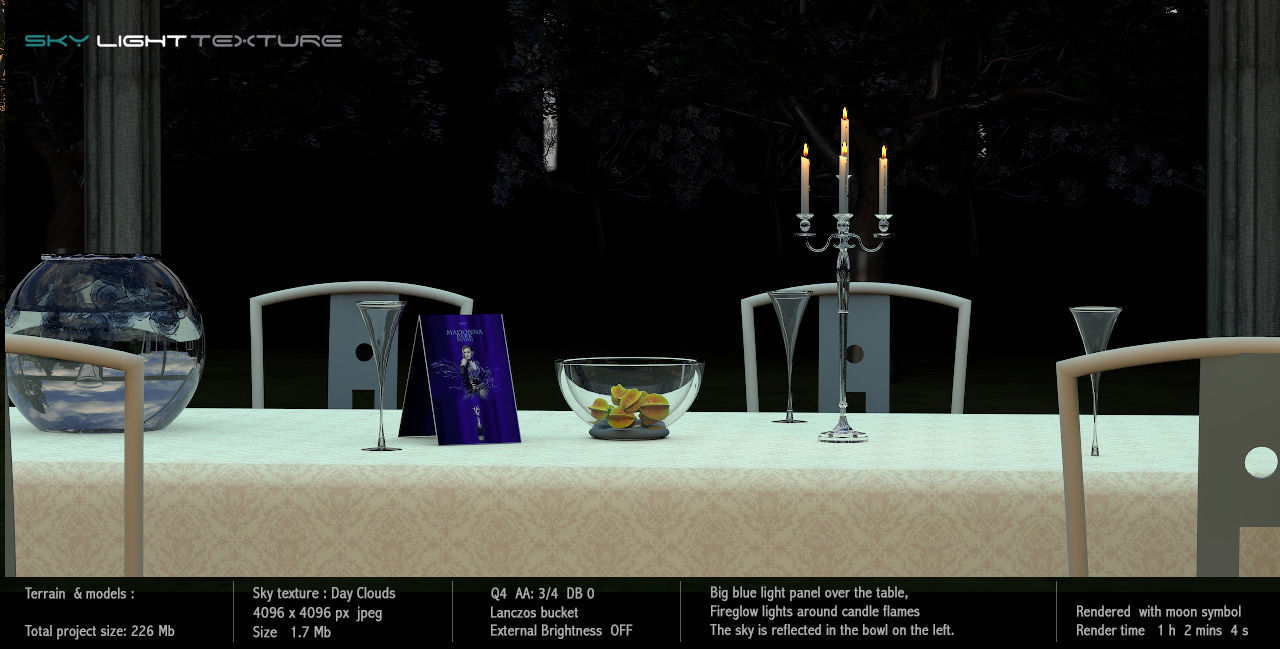
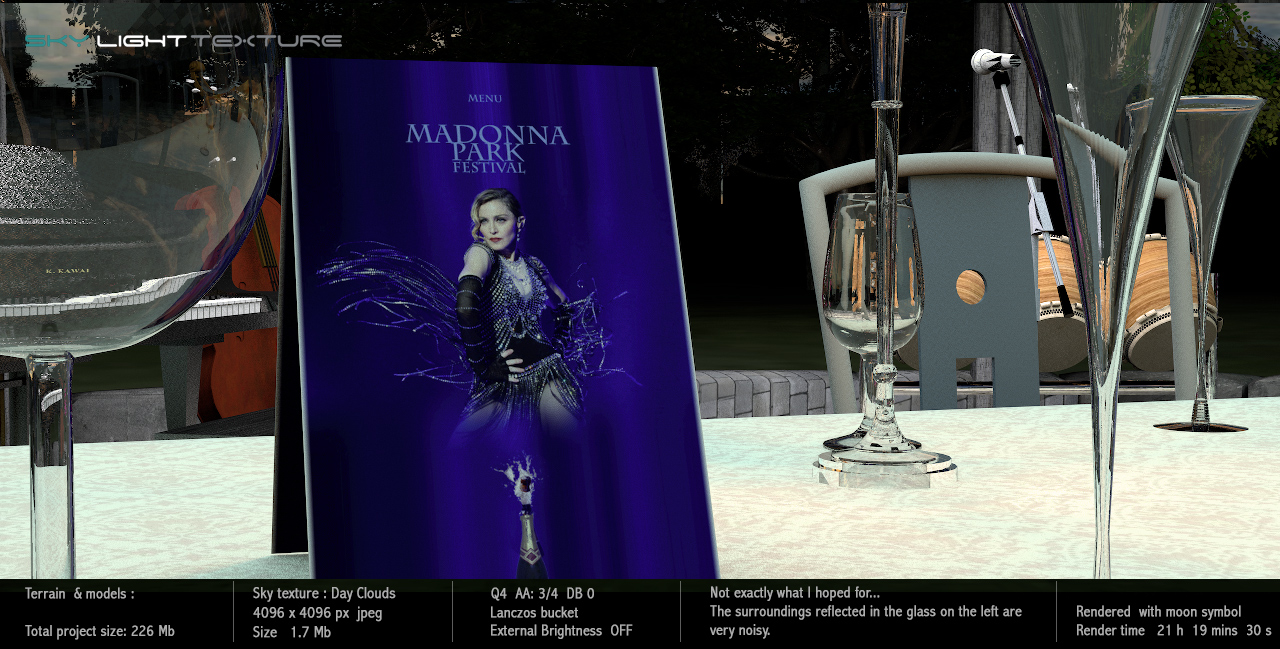
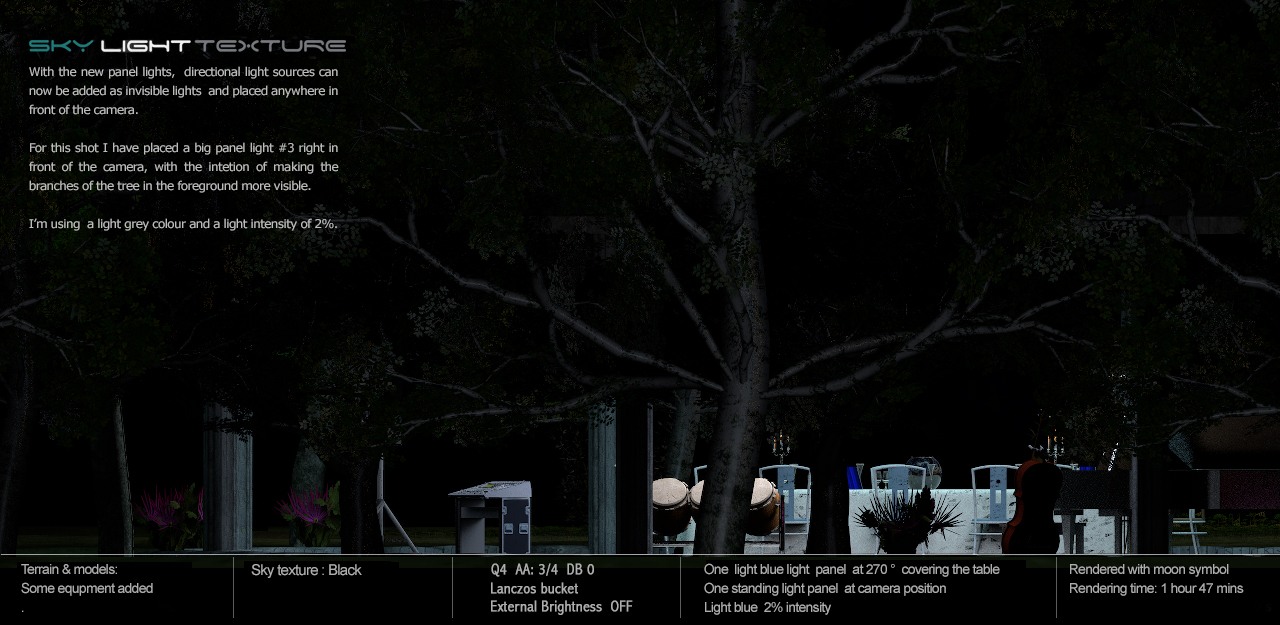
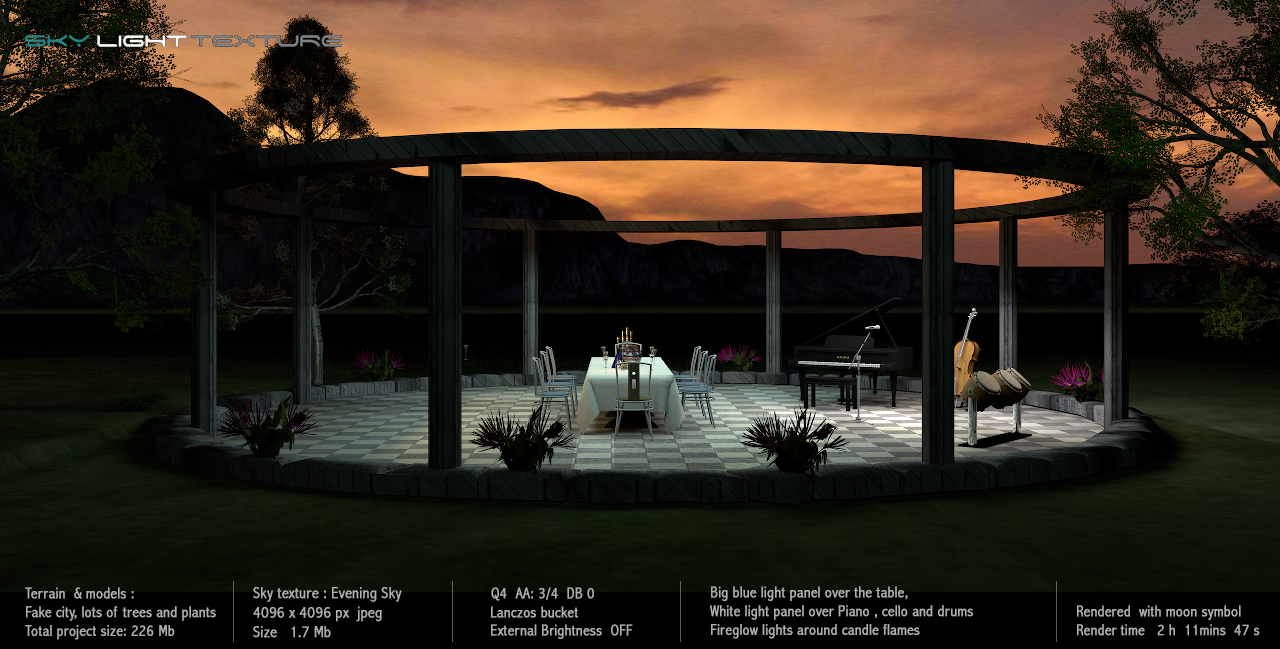
The following snapshots are results of my first experiment with the new light panels.
They are all rendered with no sunlight ( moon symbol), and I’m only using light panels.

_____
This is probably common knowledge
but let me mention it all the same:
Bigger and closer light sources give softer shadows – smaller and farther light sources create sharper shadows.
And just as when using light-filters in real life, variations in the light intensity will alter the effect of the colour-settings.
It’s useful to have the right filters when blending the new light sources with the sphere lights.
The filter temperatures for some of the most used sphere lights that comes with the program can be found here.
Make a note of the RGB-values – never use the eyedropper to sample colours from SRGB jpgs.
_____
In part four I will show some examples and write a few words about creating textures.
Cec