Few more images to show, and an overlap to other topics, so bear with me, please.
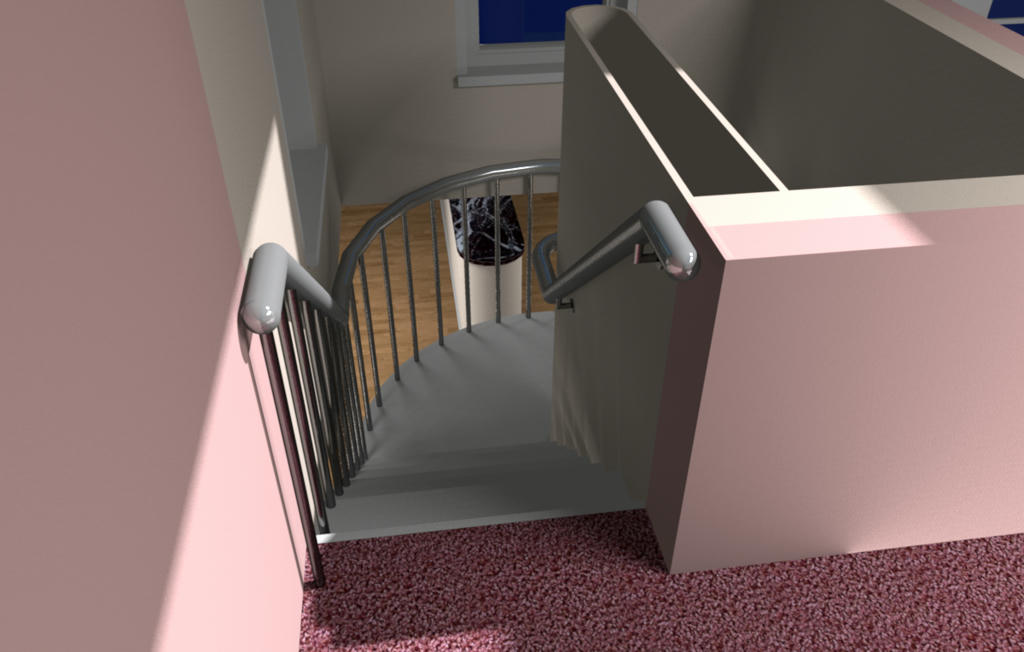
@ bdfd ref. Volunteer needed. I have used these methods before with some success, but i was looking for something a bit neater for this stair, i was just unable to get the cutout i required with either the library editor, kept getting a rhombus, no "back" button for failed attempts, or with Dadv's SH LineTracer , kept getting a kind of broken witch's hat, again, no back button, cancel>reopen.
The solution i found ,that worked for me, more visual than mathematical, was to create a room, the shape and size i wanted, make it completely opaque, export it and import as a staircase, position and elevate.
Here is the result
A cutout that starts exactly on the last tread, even though the handrails extend beyond this point.
And a cutout that starts within the bounds of the stair, 3rd step still gave me approx 2.1 m of headroom clearance.
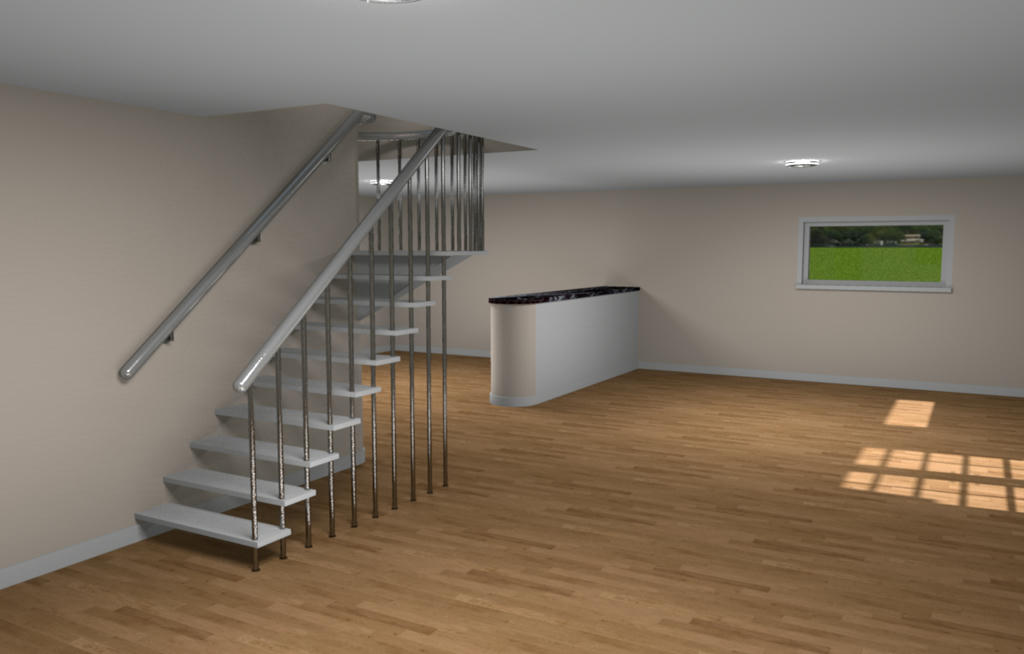
This 3rd image is where the the next overlap occurs.
I mentioned to SARRAVAL HERE that it might be an idea, following some tests that i had done to, and i should have said "divide the room into 4", anyway, split the room into 4 to get better light coverage with photo renderer v1.7 betaTest2a.
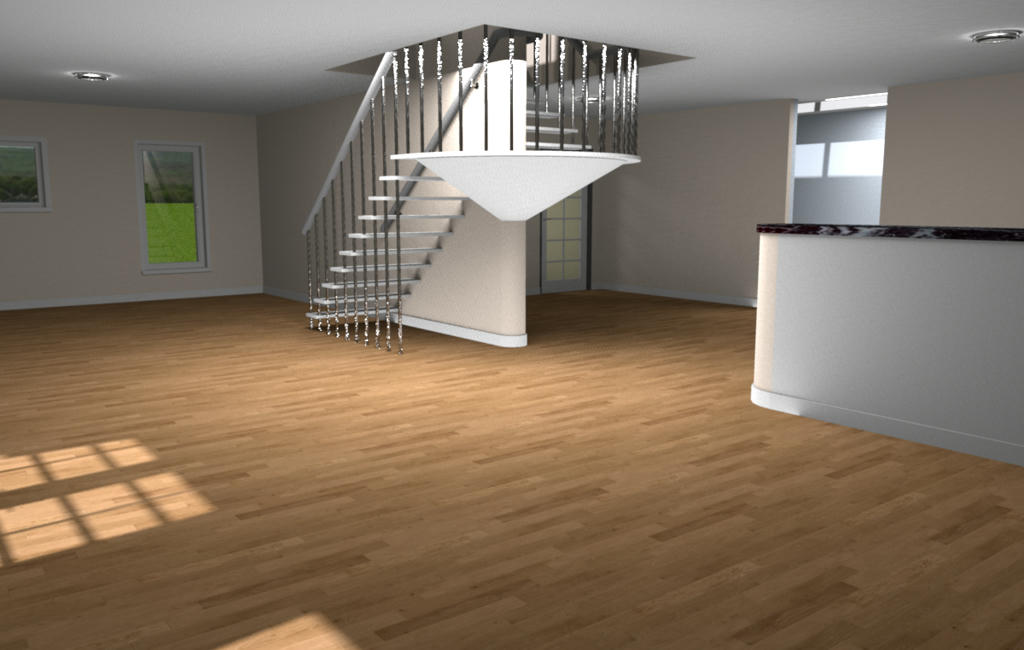
Just to clarify, here is another image of my staircase, in a large room, but with the stair itself occupying a very central position, as does SARRAVALS table and chairs. Incidentally, i had to have "all rooms" checked to get a result here... no ceiling above the source?
As you can see, with the ambient lighting set to 100% to achieve an illuminated ceiling and general brightness and the 4 ceiling lamps set to just 6%, the bulk of the light is focused on the stair, making it rather ugly, and i suspect that similar would happen to SARRAVALS beautiful table.
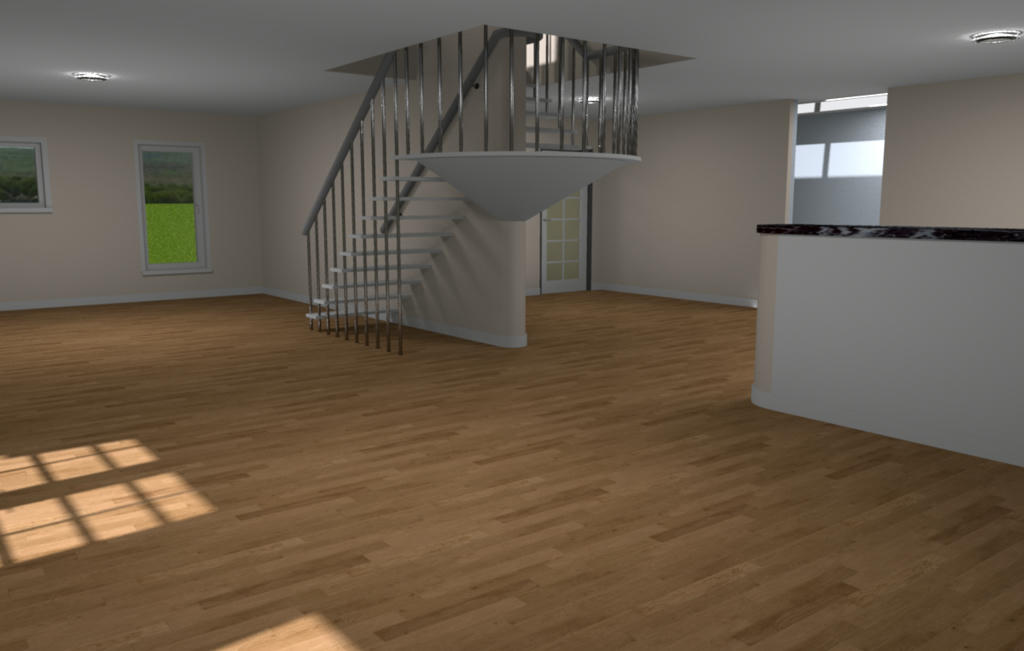
So i cut the room, pasted it elsewhere for safe keeping, drew a wall vertically through the centre of the area, and another horizontally, created 4, fairly equal, rooms, deleted the walls, tweaked the rooms so there were no gaps and made another render in the same location, this time checking the box for "show all ceilings".
This is the result, with "ambient lighting" set to just 50%.
Conclusion...photo renderer v1.7 betaTest2a is an excellent, additional, tool to the armoury, but tool it is, use it, manipulate it, find what best suits your personal preference in ambience, and enjoy the results.
Now i have noticed how bright the centre of the hallway is, i shall investigate.

Thank you again Enkonyito
And after all that, hope you like the new staircase.

Mike