Christmas tree, detailed instructions on how to make it))
Hello everyone, New Year and Christmas are coming soon. It's time to prepare the Christmas tree. You need to download a very useful Landscape Generator tool. Right here https://www.sweethome3d.com/support/forum/viewthread_thread ,10995
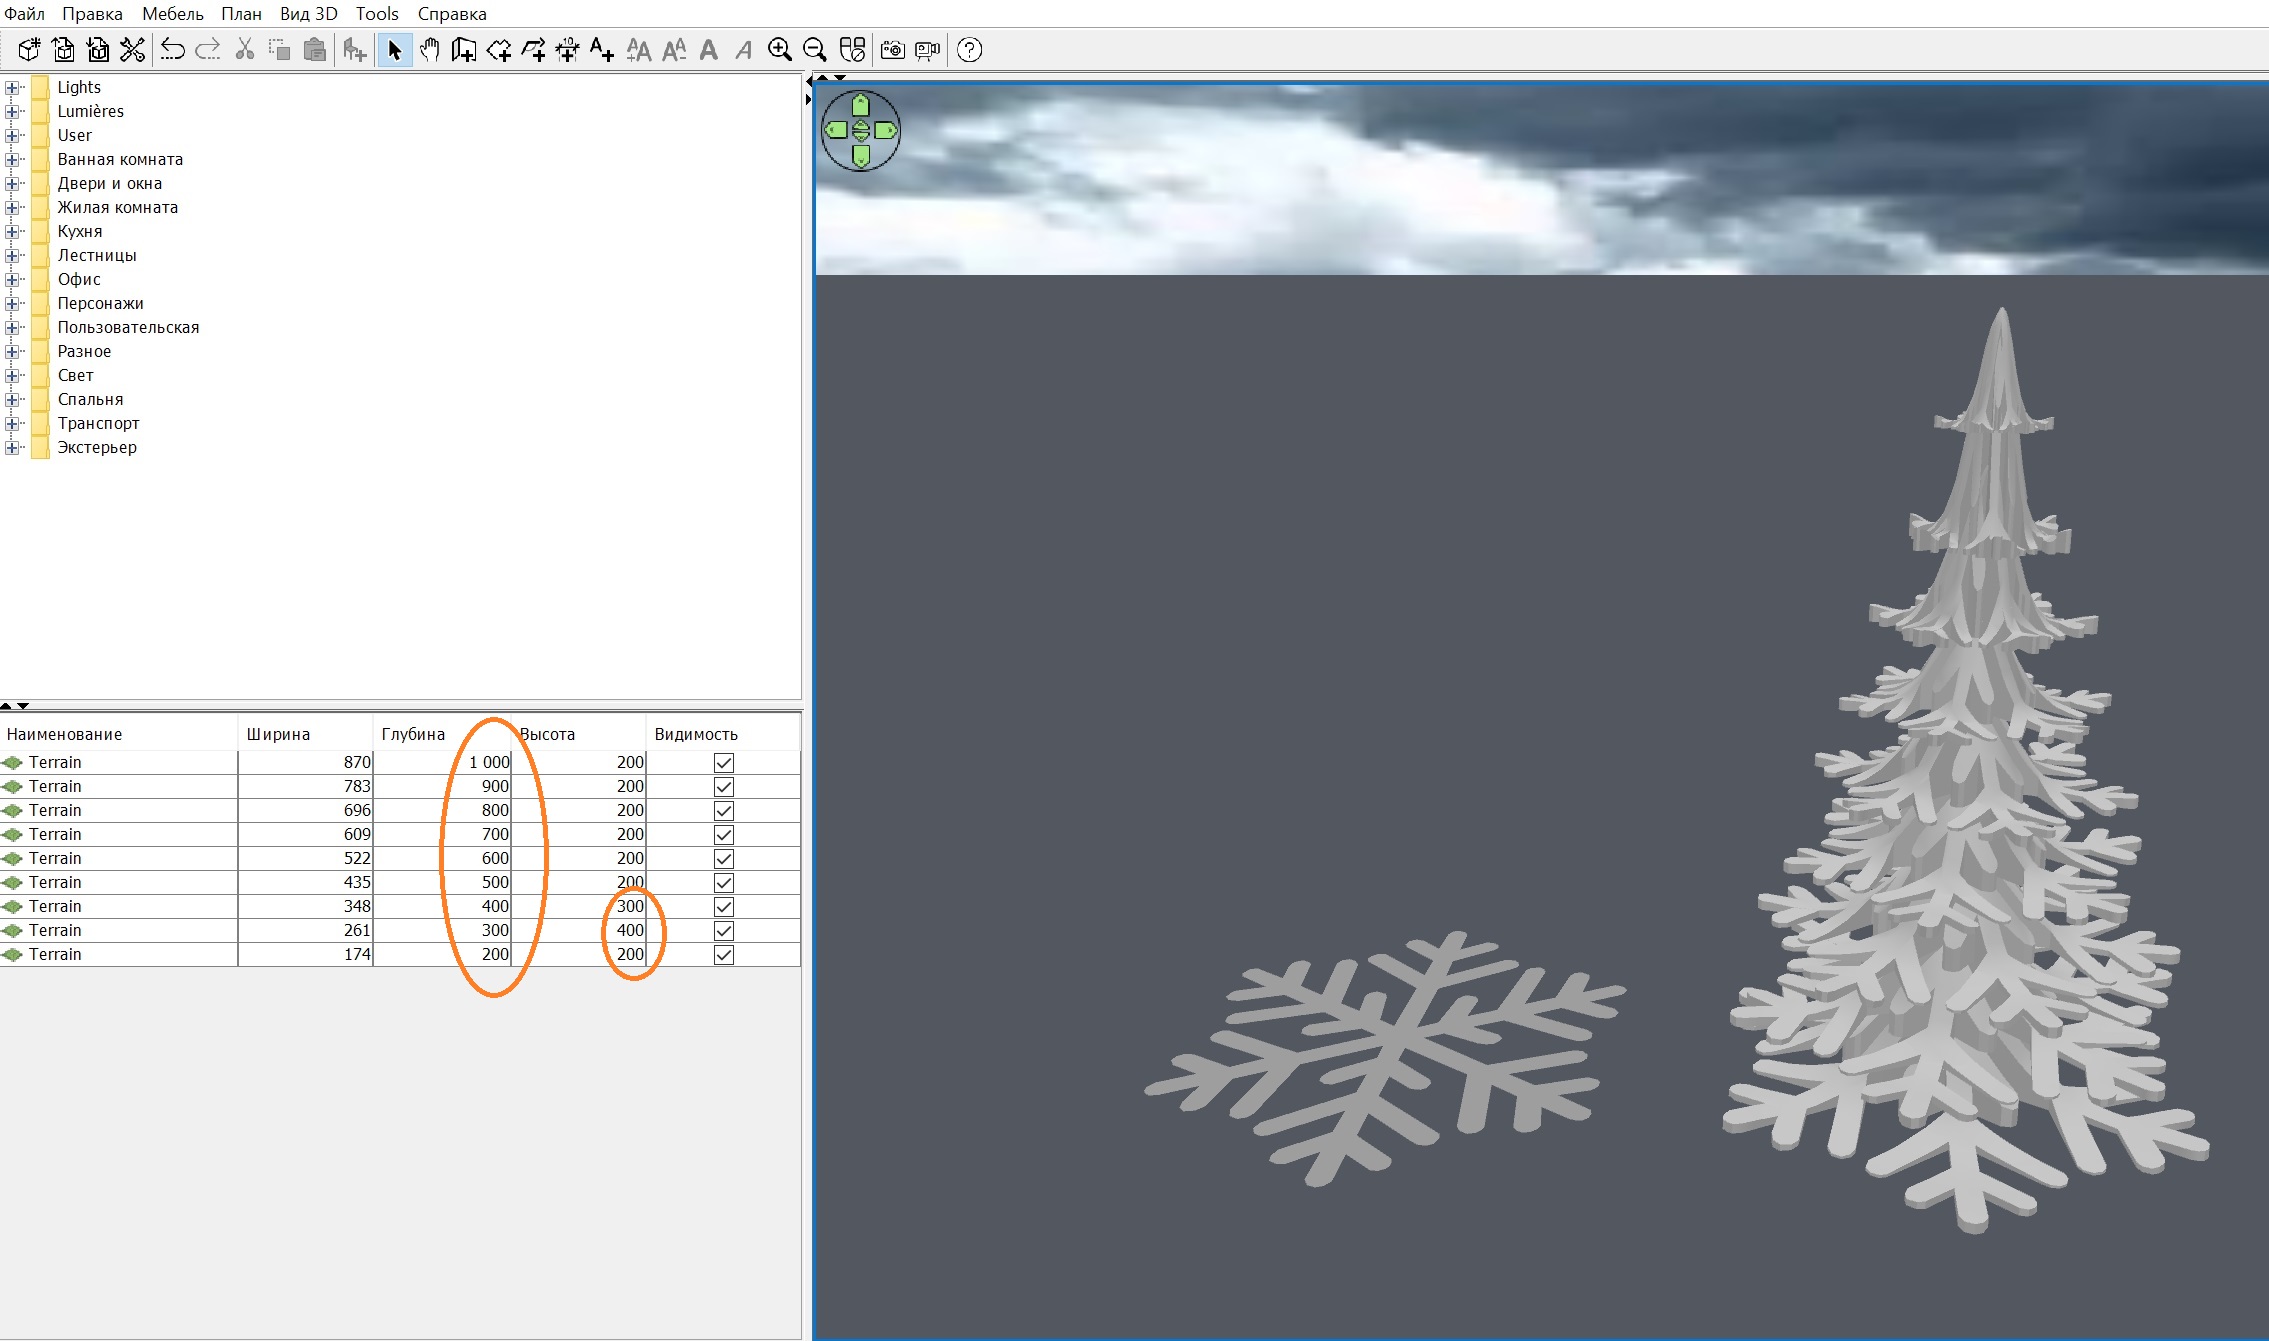
Then you need to pick up a picture of a snowflake and set it as a background image in the plan. The size of this image is 1000 cm. You can do even more. The larger the size, the more interesting it is to change the shape of the model, the grid will be more frequent. Draw a room along the contour of a snowflake, and it won't take more than 10 minutes for you and me.
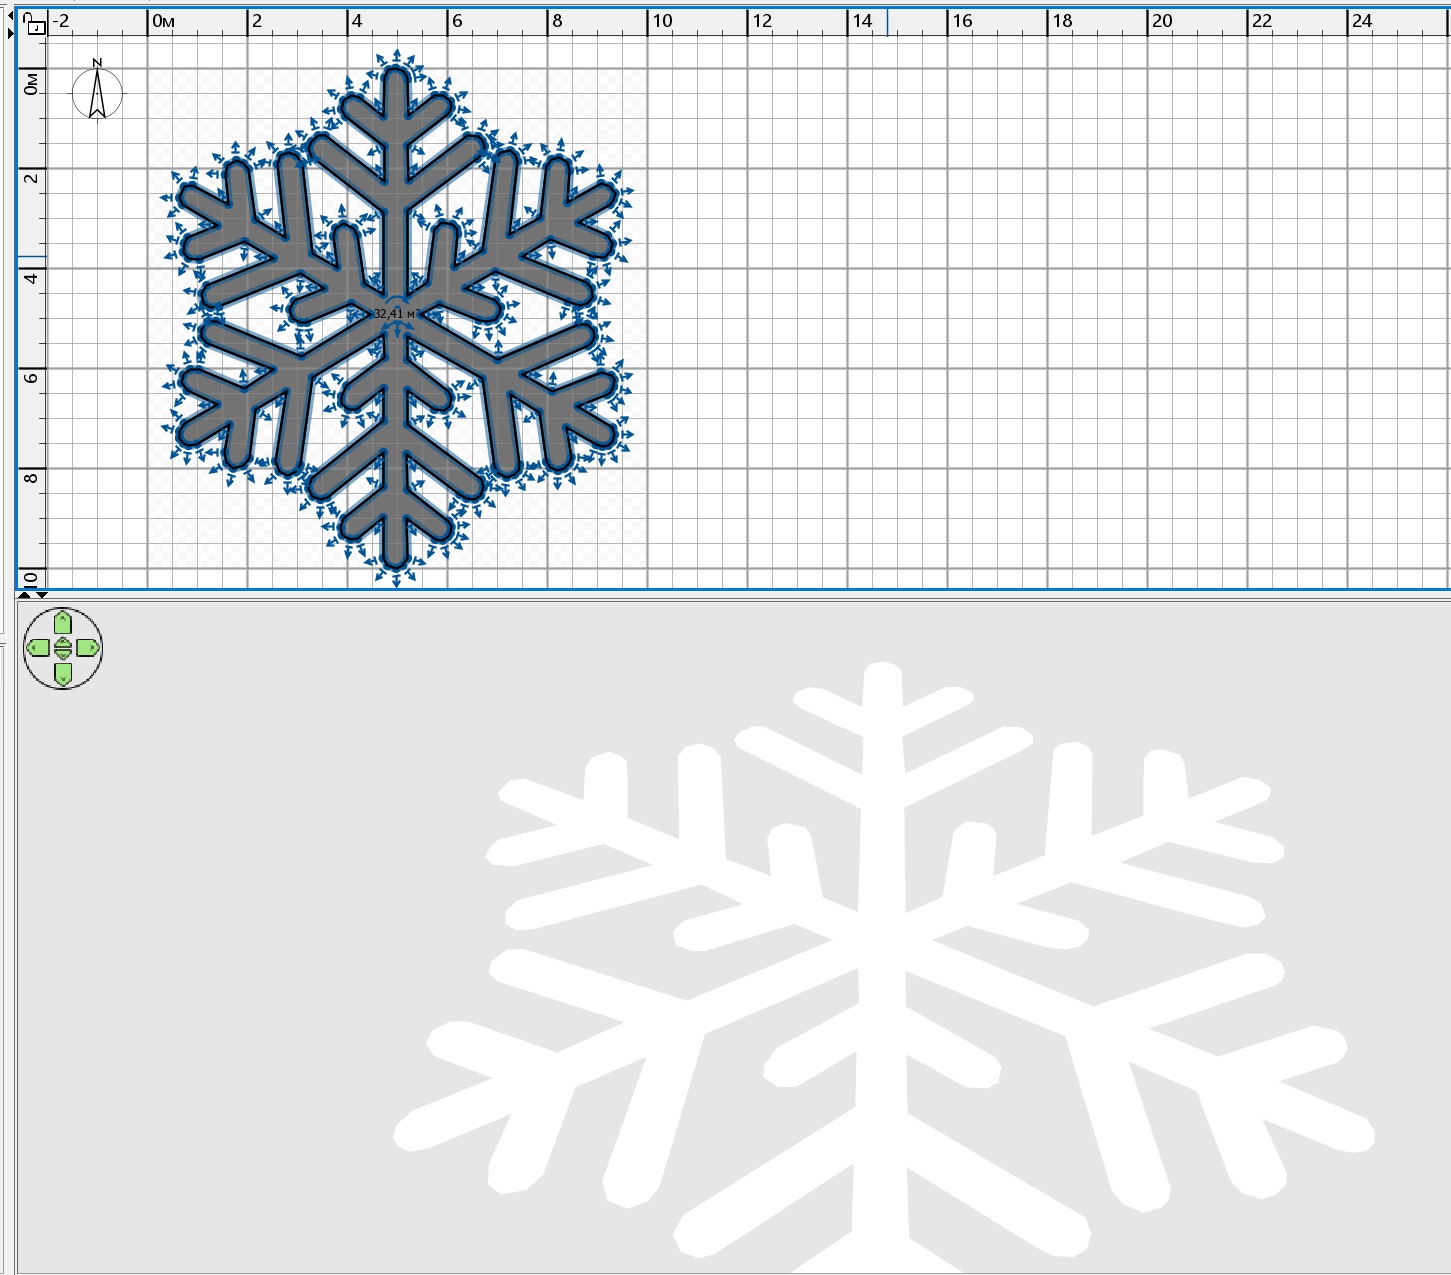
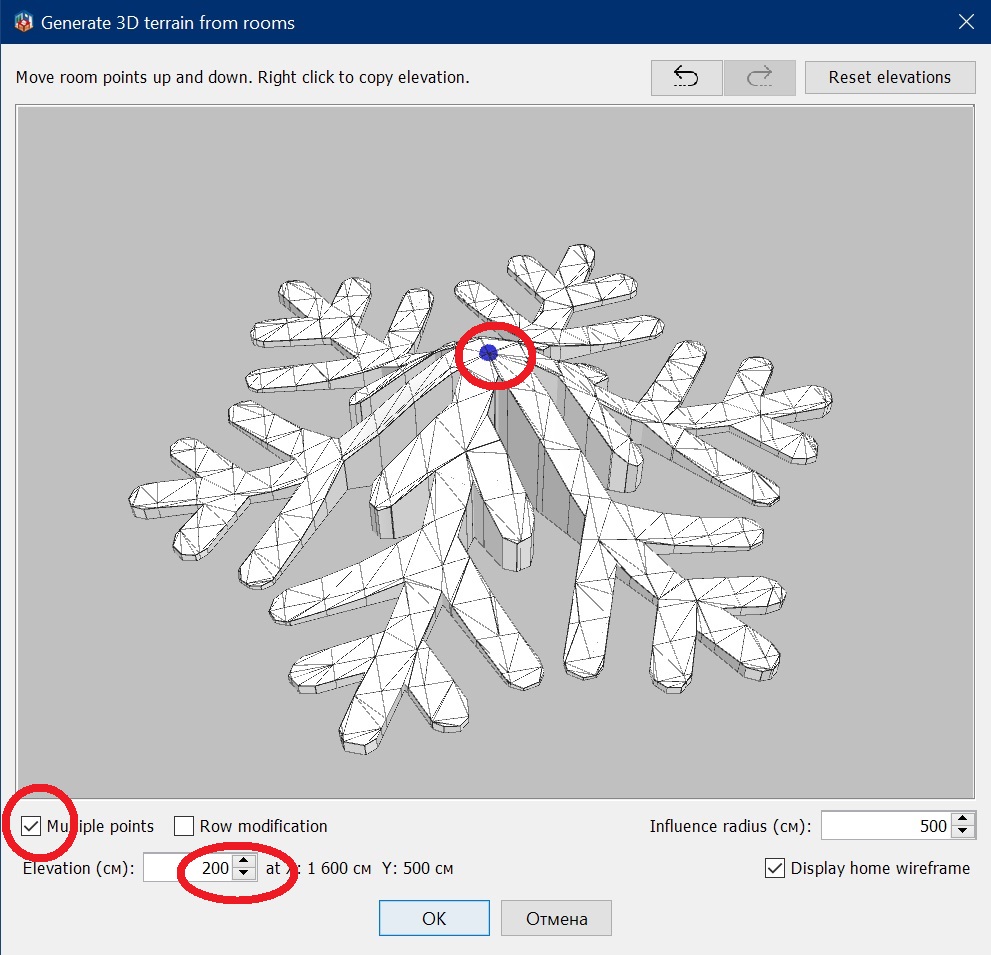
select a room in the form of a snowflake and click on the TOOLS button Generate 3D terrain from rooms.Then you can change the flat snowflake to a three-dimensional one. Poke the center of the snowflake and set the height to 200 cm. Be sure to check the box on Multiple points.
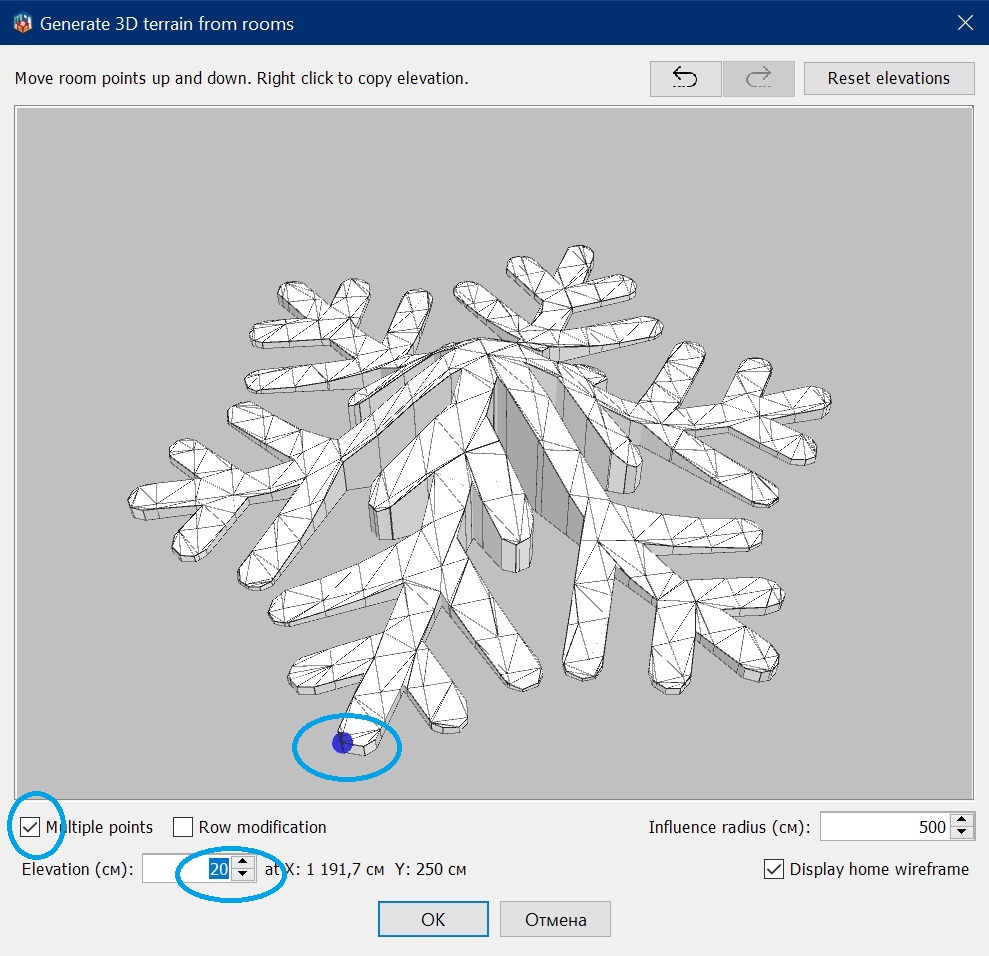
lift all the tips of the snowflake a little, give them a height of 20cm
then you need to copy this volumetric snowflake model several times and set the excess for each new model to 150 cm more than the previous one. Align all models in the plan. Assign all models some kind of even size, for example 1000 and 870. and then in a row in snowflakes, start reducing the large size by 100cm. Put the top two models more creatively so that you still get a sharp milestone of the Christmas tree.
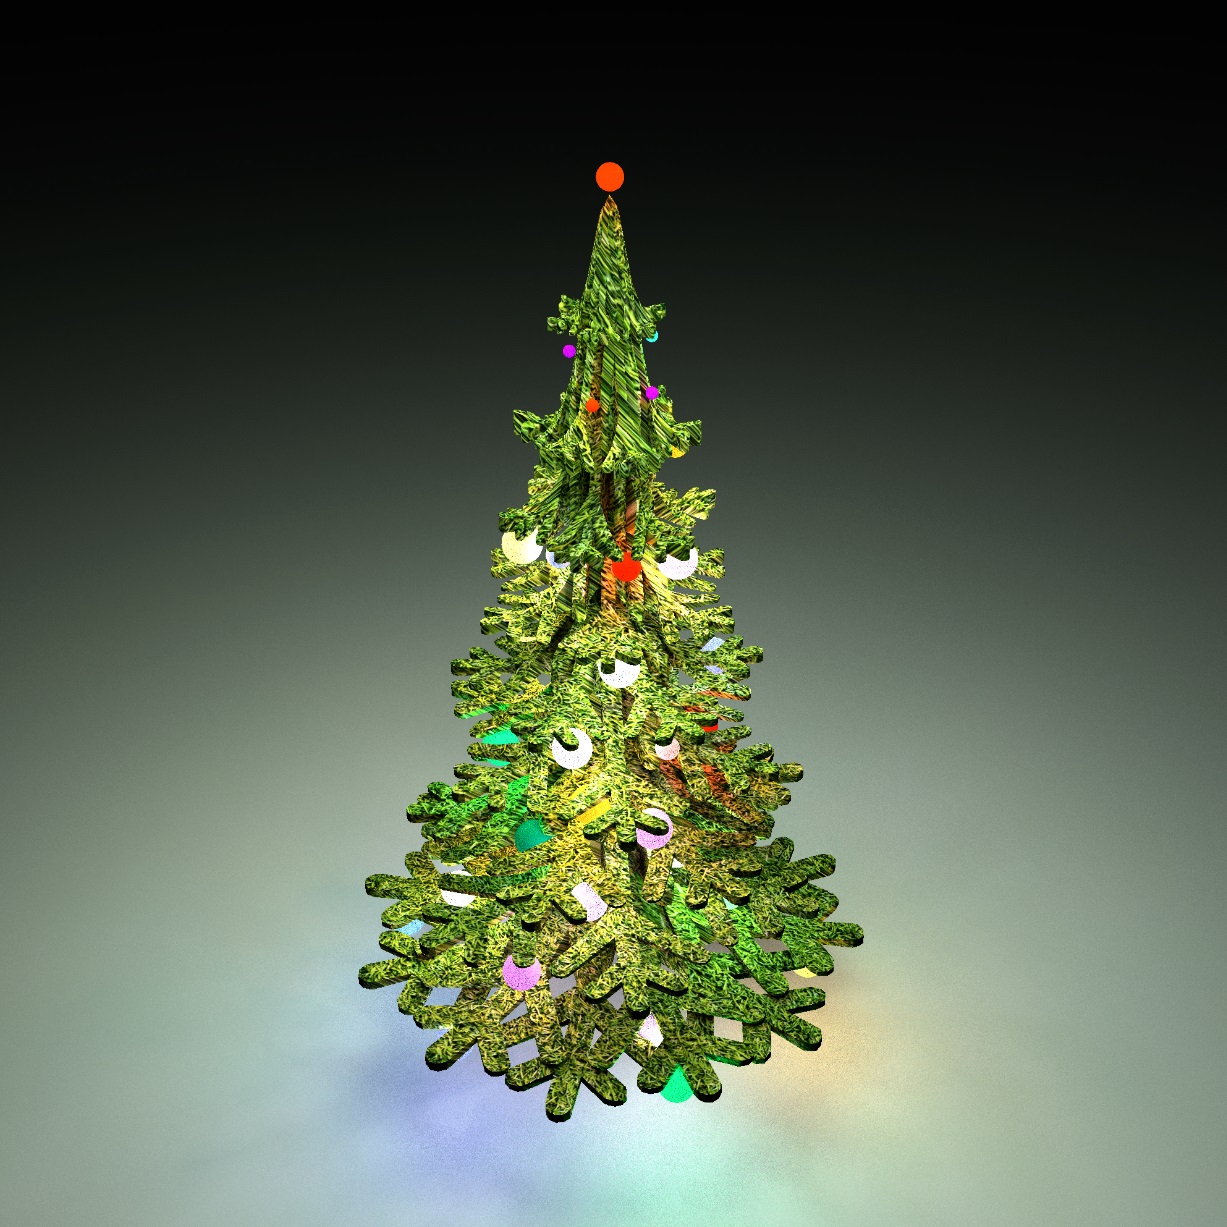
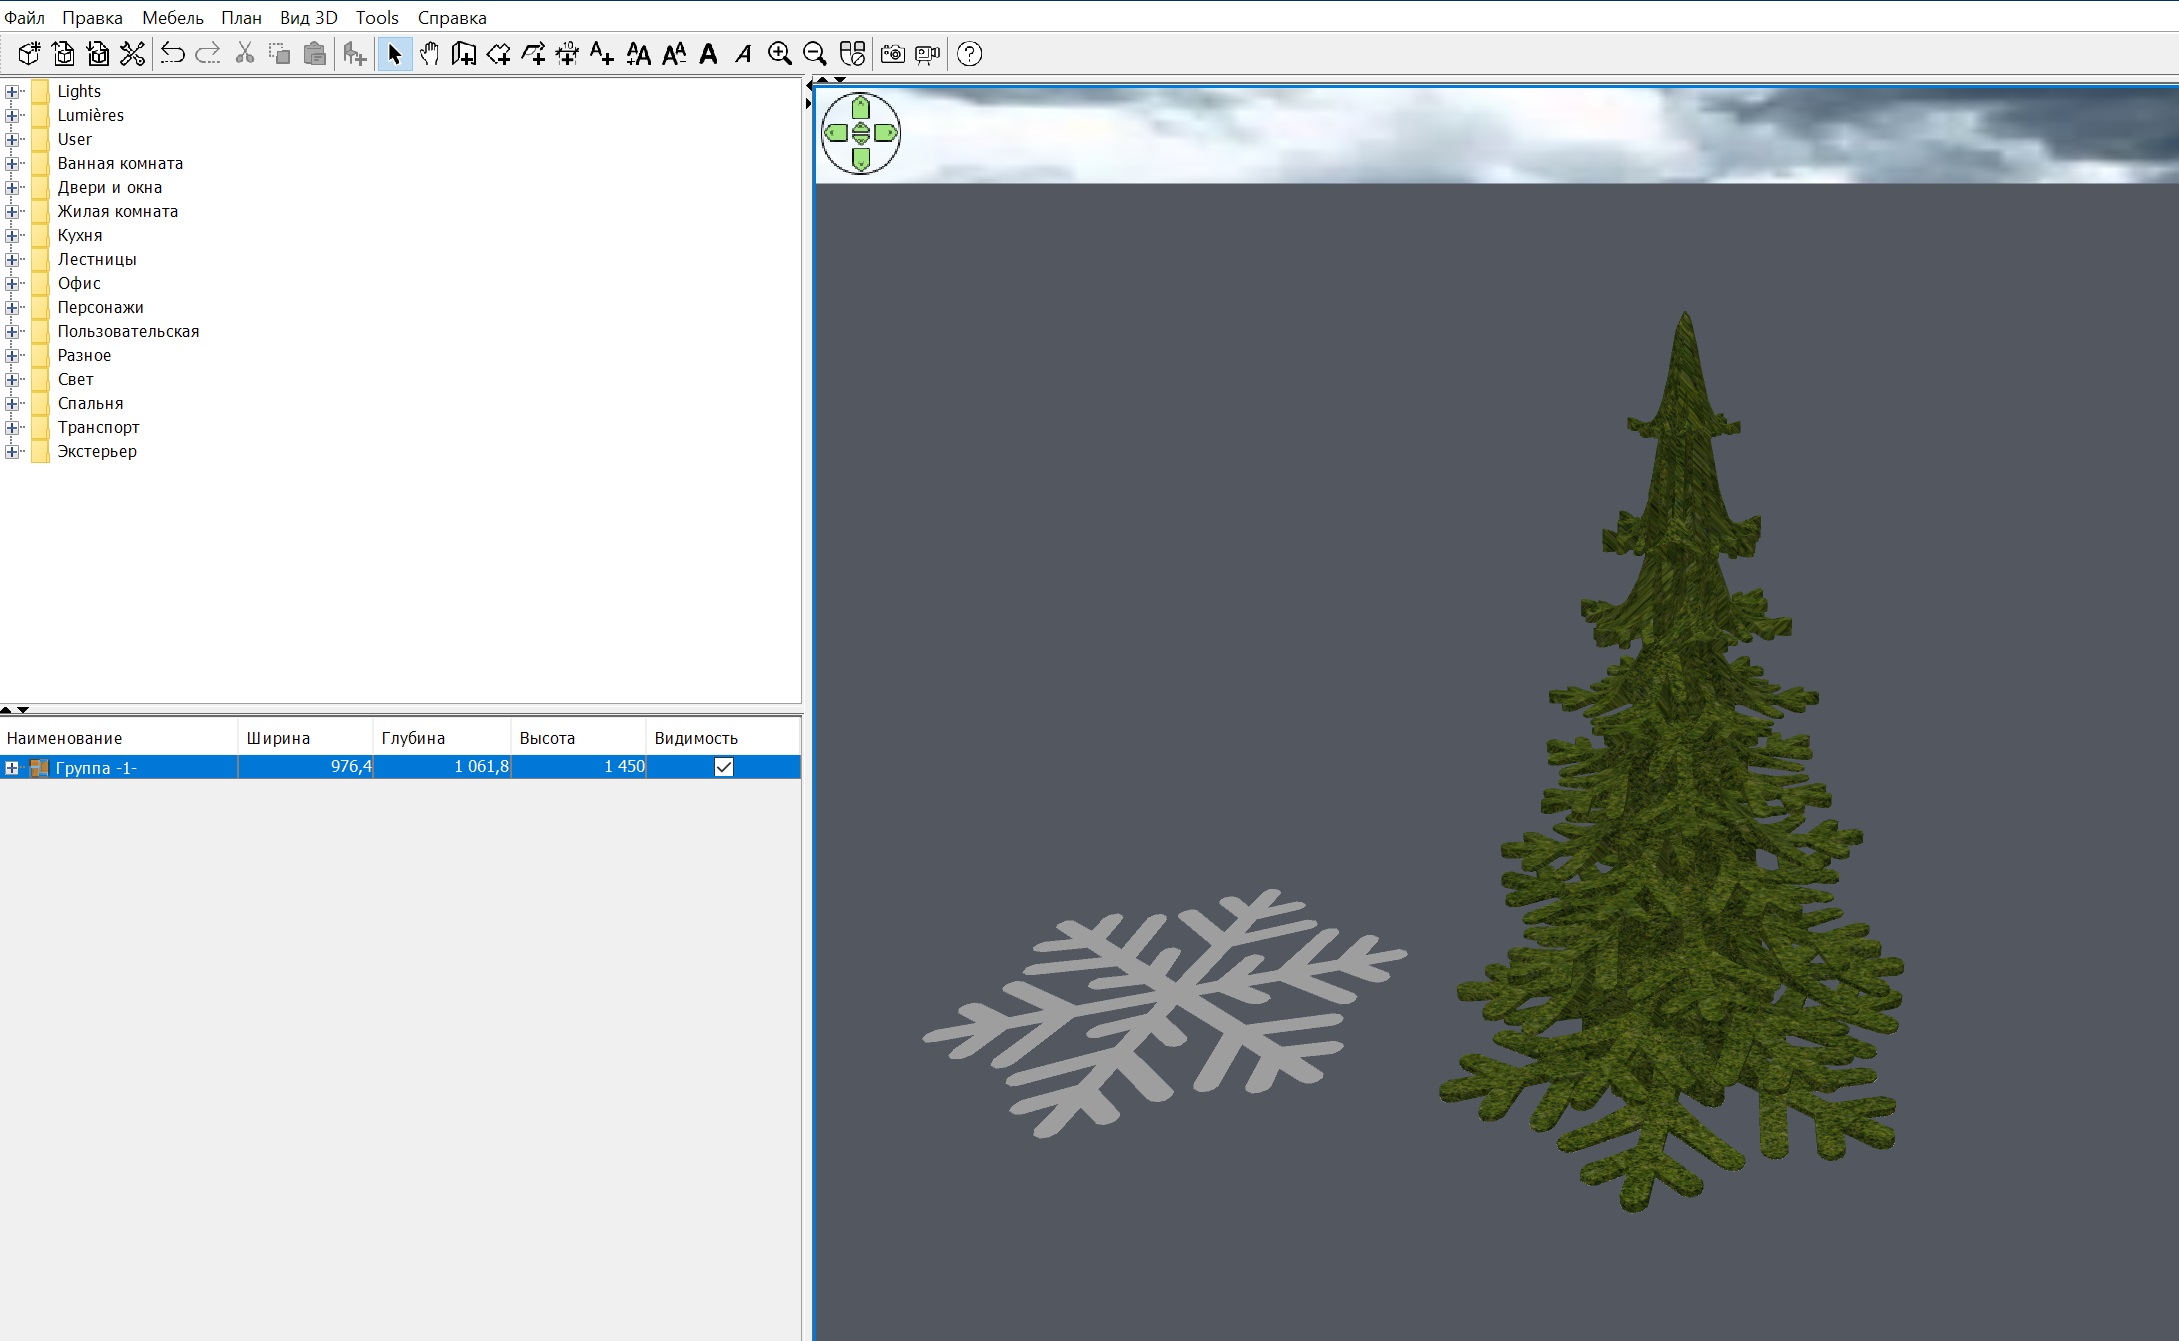
you can continue to work with such a giant tree, and assign a 3000-scale grass texture to the model. But if you need a Christmas tree for your home, then create a group and keep the proportions to give a height of 220 cm. Note that after that you need to change the texture scale to 1000.
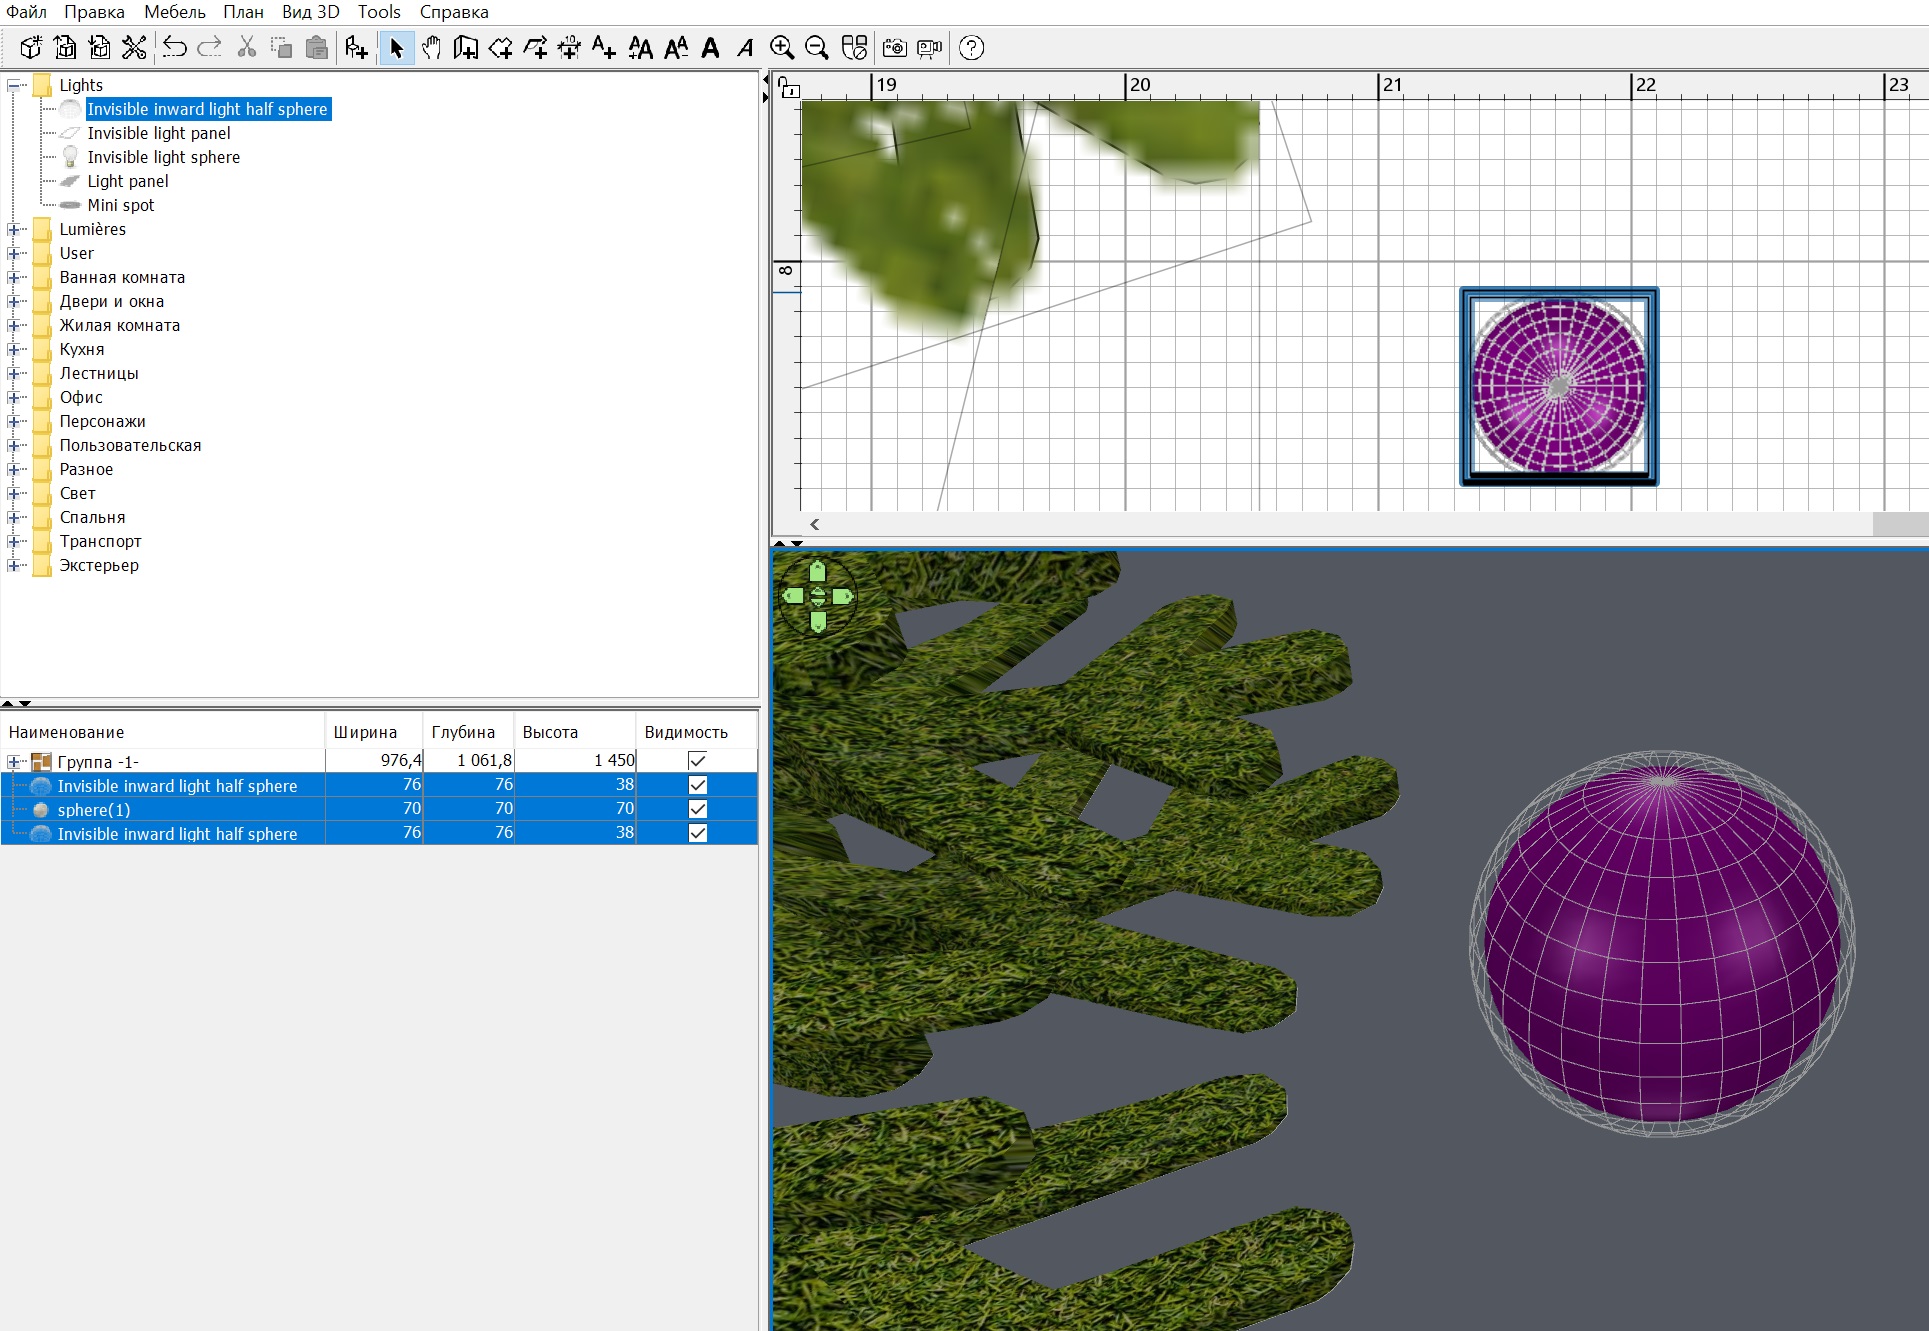
Now comes the hard part. If you left a giant size of the Christmas tree, then make a 70cm ball. And install two hemispheres 76x76x38cm around the ball. Take a calculator, do everything exactly so that the hemispheres connect into a ball and get a smooth lumen. Yes, the lower hemisphere should be rotated 180 degrees along the Y axis. The power of the hemispheres is 30%. Group this sphere+2 hemisphere system into a group.
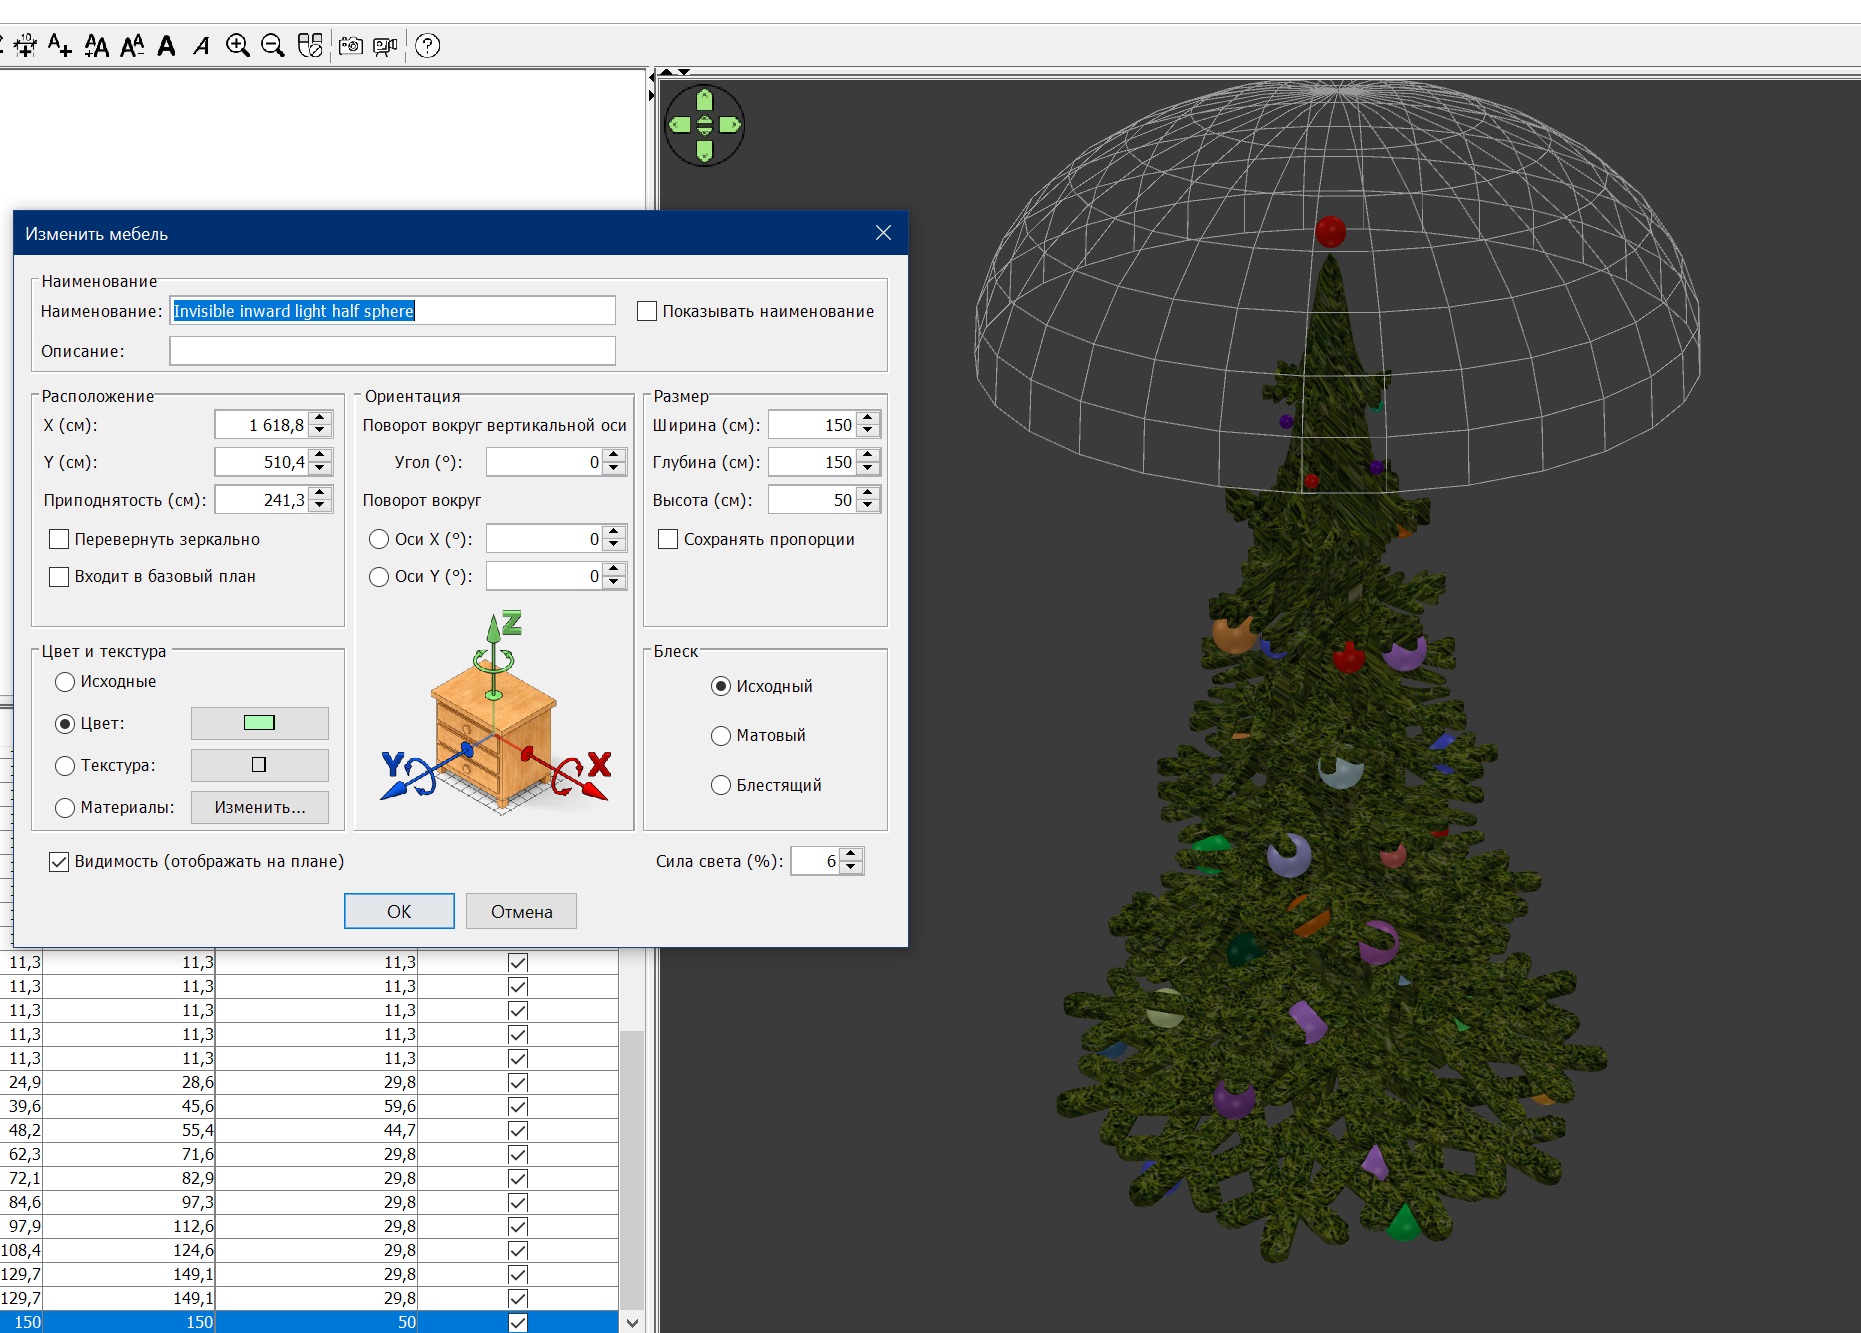
There's not much left. These groups with balls need to be hung on the Christmas tree, and each group should be given its own color entirely. The ball will turn colored and the hemispheres will also shine with this colored light. Make as many of these balls as you want, I made 36 balls of different sizes. Remember that the groups need to be changed while maintaining the proportions, otherwise you will get eggs. And in the end, you need to cover the Christmas tree with a large green hemisphere with a capacity of 6%. Set the color white for the ground (it's snow), assign a height higher than the tree for the viewer. Lift the tree off the ground by 40cm. It's just like in life.
that's all! Merry Christmas and Happy New Year!