I have small victories. I want to share some secrets with you. If you don't have a model of a cabinet with a sink, you can do everything yourself in SH3D. The main thing is that there are no complex curved volumes, but if the shape of the furniture consists of primitives such as boxes and cylinders, everything is OK. Some surfaces can be made using spheres. But in my case, this was not necessary. I took the Oasis factory furniture, the Naxos collection, for work.
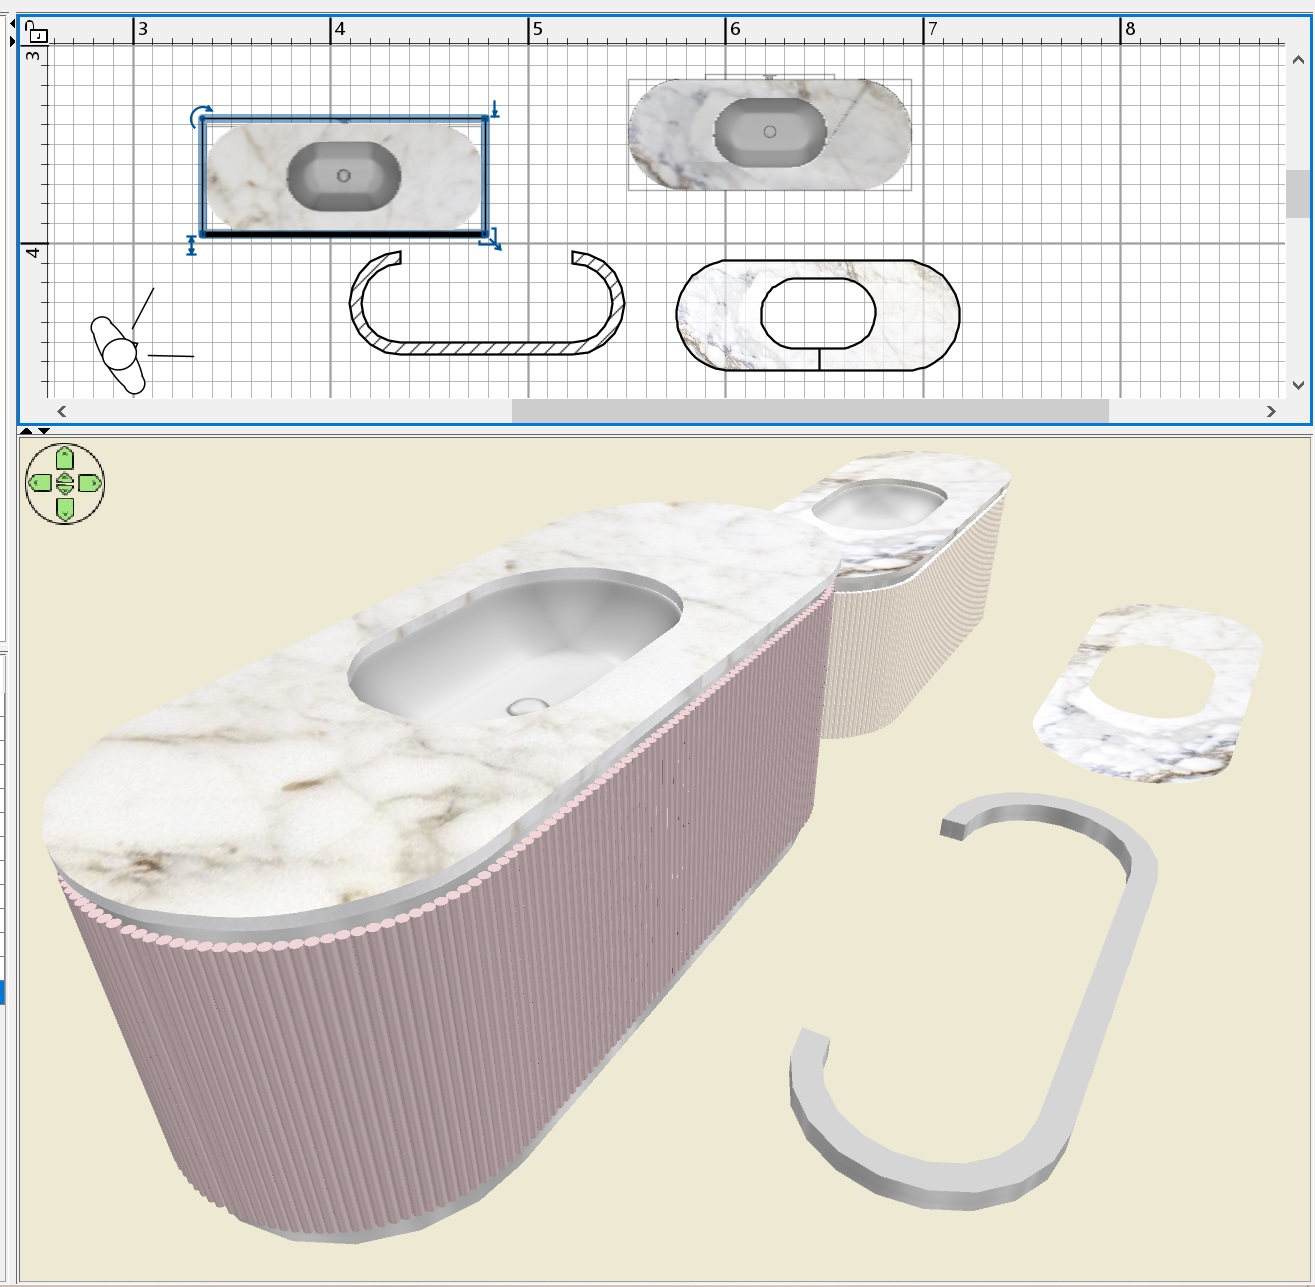
the dimensions of the furniture are 146cm x 56cm, height 55 cm. First, I prepared a composition of walls with smaller dimensions, these will be steel vertical walls of furniture. The facades consist of thin 1.5 cm cylinders that touch each other. It is necessary to turn off the magnet and carefully place these chains of cylinders on the surface of walls 47 cm high. The cylinders are 42cm high, do not forget about the gaps that the doors have. You will get furniture. Assign the same color to the cylinders. For interior walls, the texture. Now you need to place the oval shell model exactly in the center, I found it on the Free website 3d.io
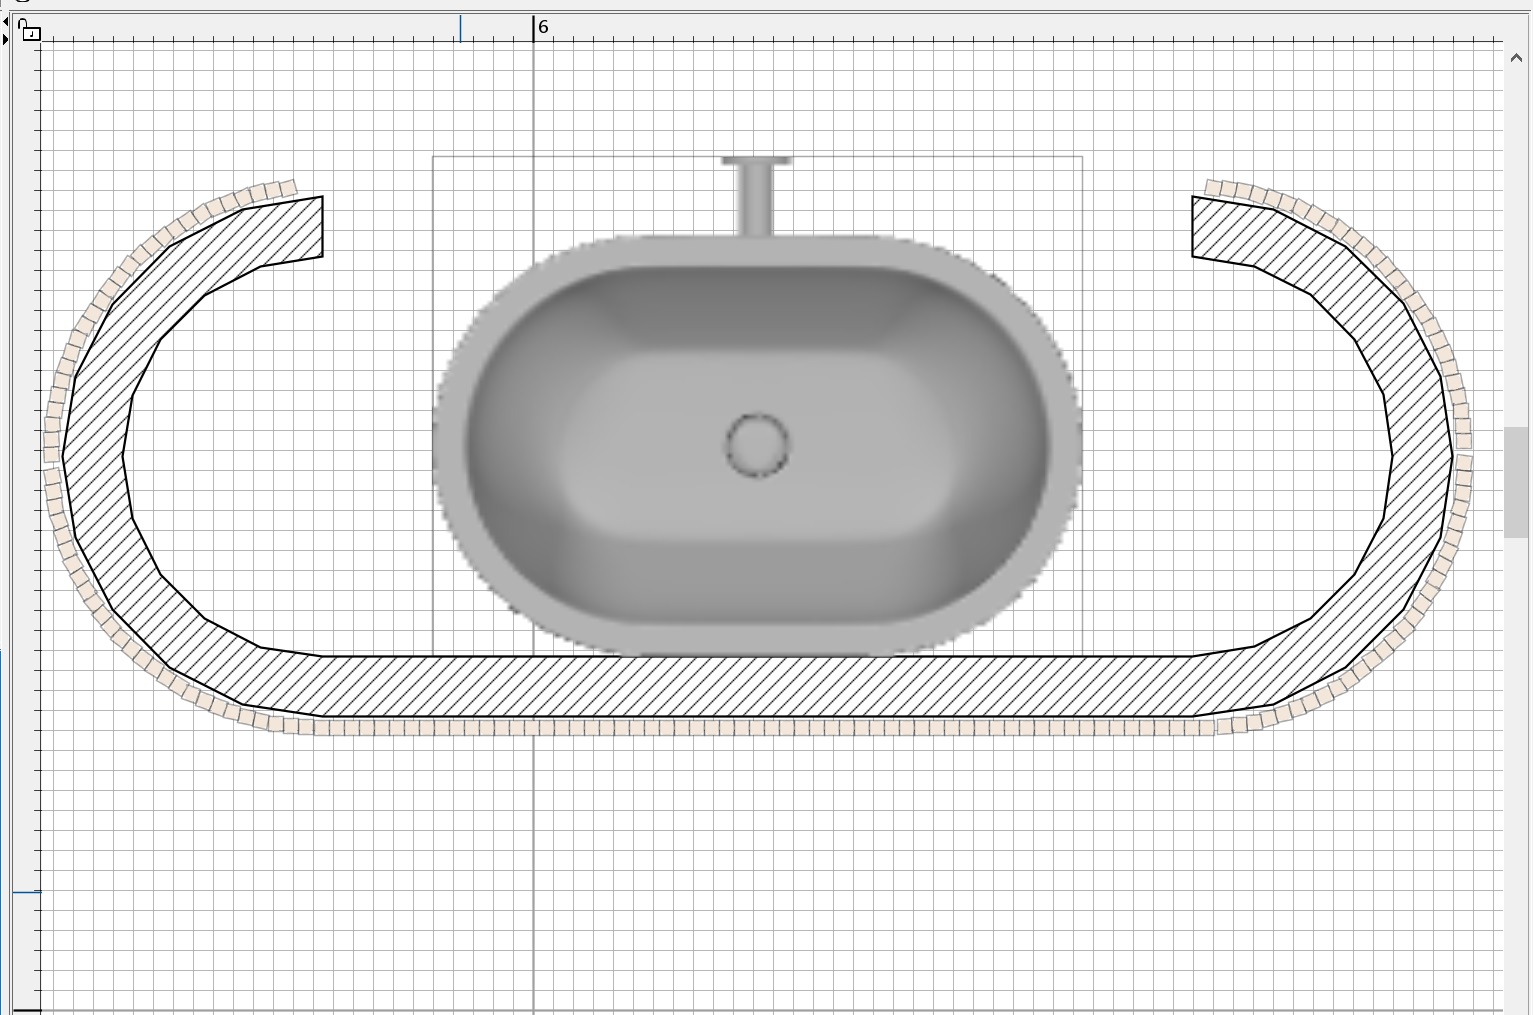
now you need to make a countertop with an oval cutout, exactly repeating the shape of the sink. The advice of the Captaincooc wizard is great for this. You need to create a room right on top of all the objects, be sure to turn off the magnet in curved places. This needs to be done carefully, but if something is crooked, you can fix it later by moving the bad points to the right places. You should get a room like this, assign it a texture, remove the ceiling check box. Copy the room, drag it to the side and turn on the Terrain Generate tool. You need to give some point in the middle a height of 2 cm. You will get a countertop with textures on all surfaces. The generator outputs slightly different heights along the edge, but this can be ignored, it looks fine.

Put it all together and save it in OBJ. From below, then you need to add walls 5 cm high, with the same texture and at the same texture scale as high walls. I have assigned a metal texture, you can make pure chrome, now I will tell you everything about chrome.
You can use any models (almost all!!!) that are not loaded in the usual way in SH3D. I take this model and unpack it. It is necessary to find a suitable file inside that the program can open. If there is such a file, fine. You need to save the gray model in OBJ. If there are no such files, but you need to try to convert, for example, the FBX format to OBJ, converters often refuse and act up, but there are some who do it. After saving, you need to make a magic transformation of ALL G groups into mirrored ones, you need to add the prefix sweethome3d_window_mirror_
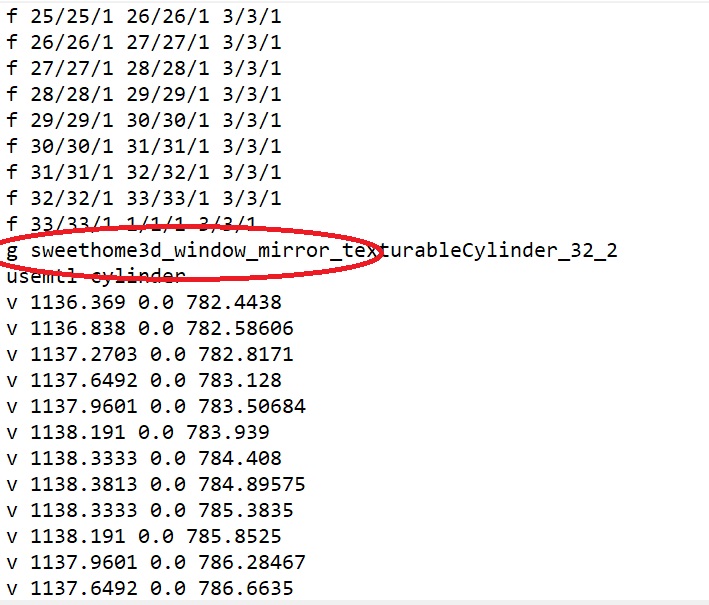
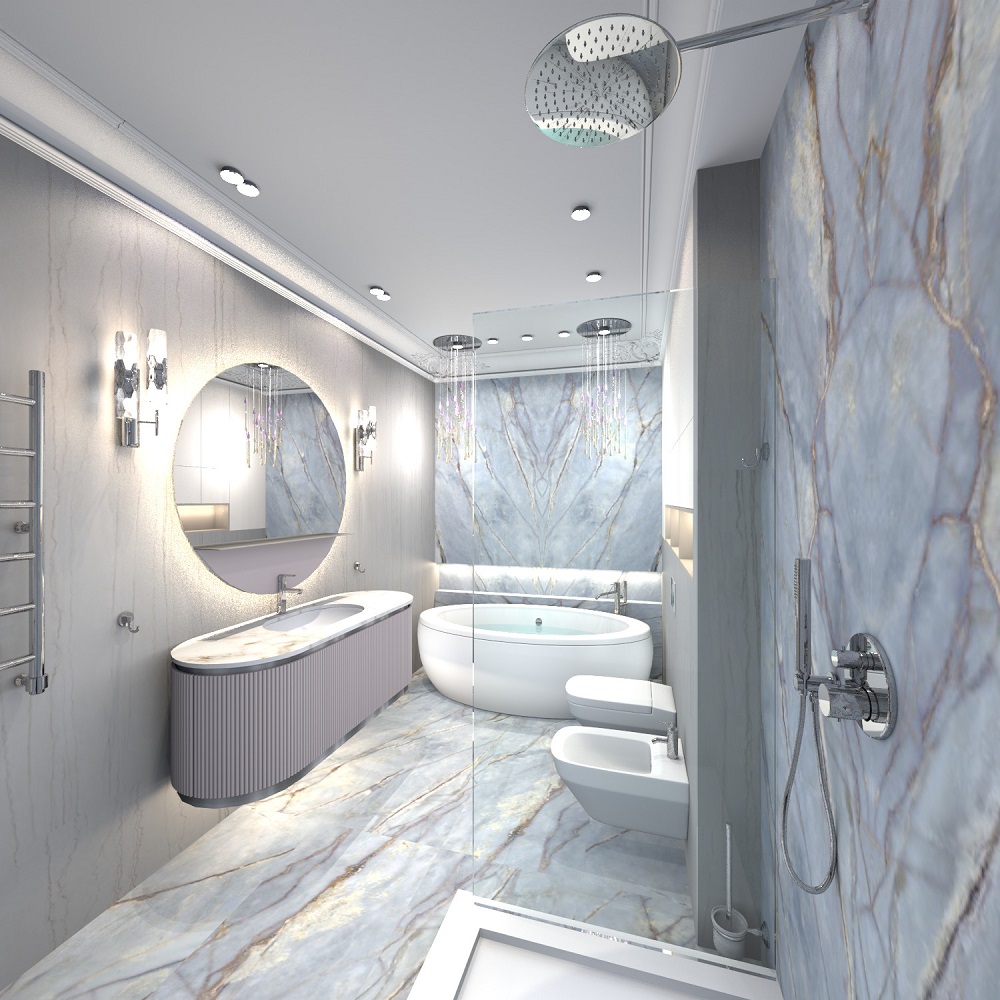
in this huge array of strings, the necessary string of group G is always between F and V, you need to fix everything, it takes time. Save this text file and import the OBJ model again with the necessary changes. If you can figure out which group is not chrome, but for example rubber, fine, you need to skip it and not fix it with a mirror prefix. But if you make all the groups mirrored, it's also good. It is necessary to assign an average gray color in the final model. You'll get great chrome on the render. If you need gold, you need a yellow-brown color. Polished metal is obtained even at the third level of rendering quality. But chrome is best obtained at the maximum fourth level, there is no noise at all. The final render at the fourth quality level is like this. The fourth level slightly darkens the whole picture and there are no reflections in glossy surfaces, but chrome chrome turns out best. This picture was loaded for 14 hours (1500x1500), level 4. At the third level, you need to set a resolution higher (3000x3000) in order to remove noise in chrome as much as possible.