Re: a technique for inserting any piece of furniture into an interior without a model.
Hi! Very impressive examples! Of course, textures on boxes using photos are the right way to achieve a realistic rendering image. The model always looks right. Yes, correcting the curve of a photo using a special program is the right way. Make a rectangle out of a trapezoid and apply it as a texture to the box. Yes. Everything can be done for simple rectangular furniture in this way, I agree. But if you don't have the strength to model a cabinet, if you need to insert it quickly into the interior, then you don't have to make the model in the right way. And insert the photo so that no one notices)))). Yes, you have to agree here. that you become a hostage to the photographer's shooting height. Otherwise, there will be perspective distortions in the lines and shapes in the interior photo. I made a room with a grid of tiles that doesn't allow lying, and I couldn't insert a photo without making mistakes. Although it is probably possible to achieve excellent results even using uneven photos. My sideboard was taken by hand, without a tripod. And the program has all the buttons to align the box in space! No need to have other programs. There is a tilt, a rise, a decrease in height, a rotation of the texture within 1-2-3 degrees, everything can be adjusted and get an even picture of the furniture as a result. But sometimes it's not enough, I agree. And a ready-made buffet model would be better. Or make such a model yourself using SH3D tools. But it's interesting to try all the ways. Moreover, I am still sure that if you combine the photos on the boxes and real 3D objects, you can get a complex interior. And the program can handle it, it may not be able to handle all the models. You have to be careful here. I already know the limits that I can't go beyond, and I'm looking for ways to simplify the scene without compromising the design. Photos on the boxes as a replacement for the model is one of the ways.
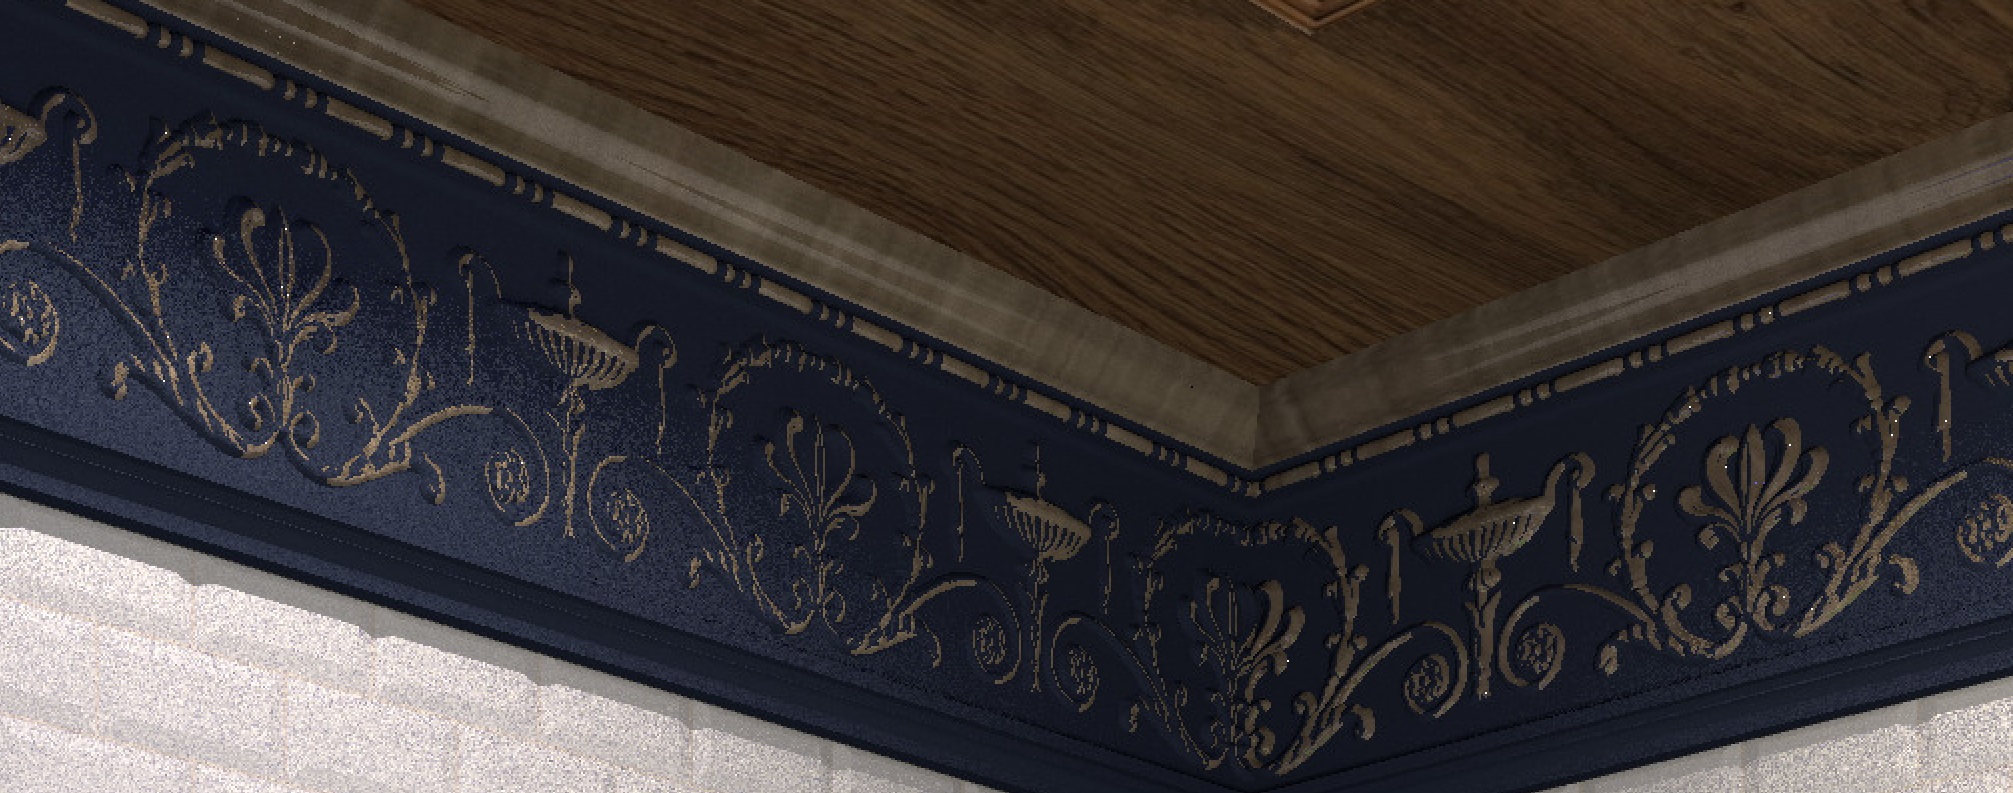
I also used an interesting way to make a gilded relief on the cornice. I made two models of the cornice (they are ready-made). One blue model is ordinary with a relief, and the second is gold with a slightly thicker thickness. If we now connect these two models and move the golden model a little deeper, then the viewer will see only the top of the relief in gold. And a golden relief pattern will appear with the upper sections wiped out. I first learned this method from Emanuel when he told me how to make snow on a car. A very interesting way to duplicate a model is to get the effect of painting in protruding places or snow on objects.