|
Posted by okh
at Sep 26, 2017, 11:51:57 AM
|
Re: How to create a down light embedded in the ceiling
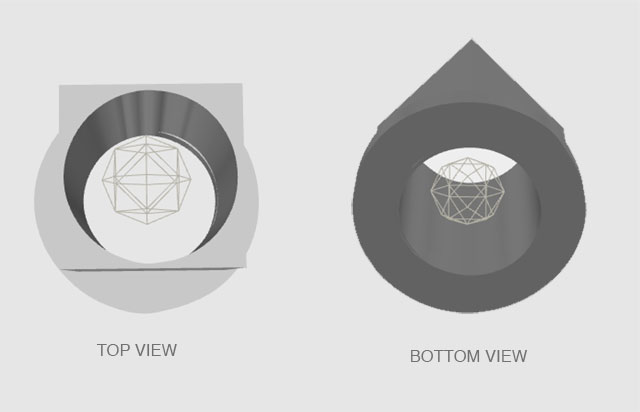
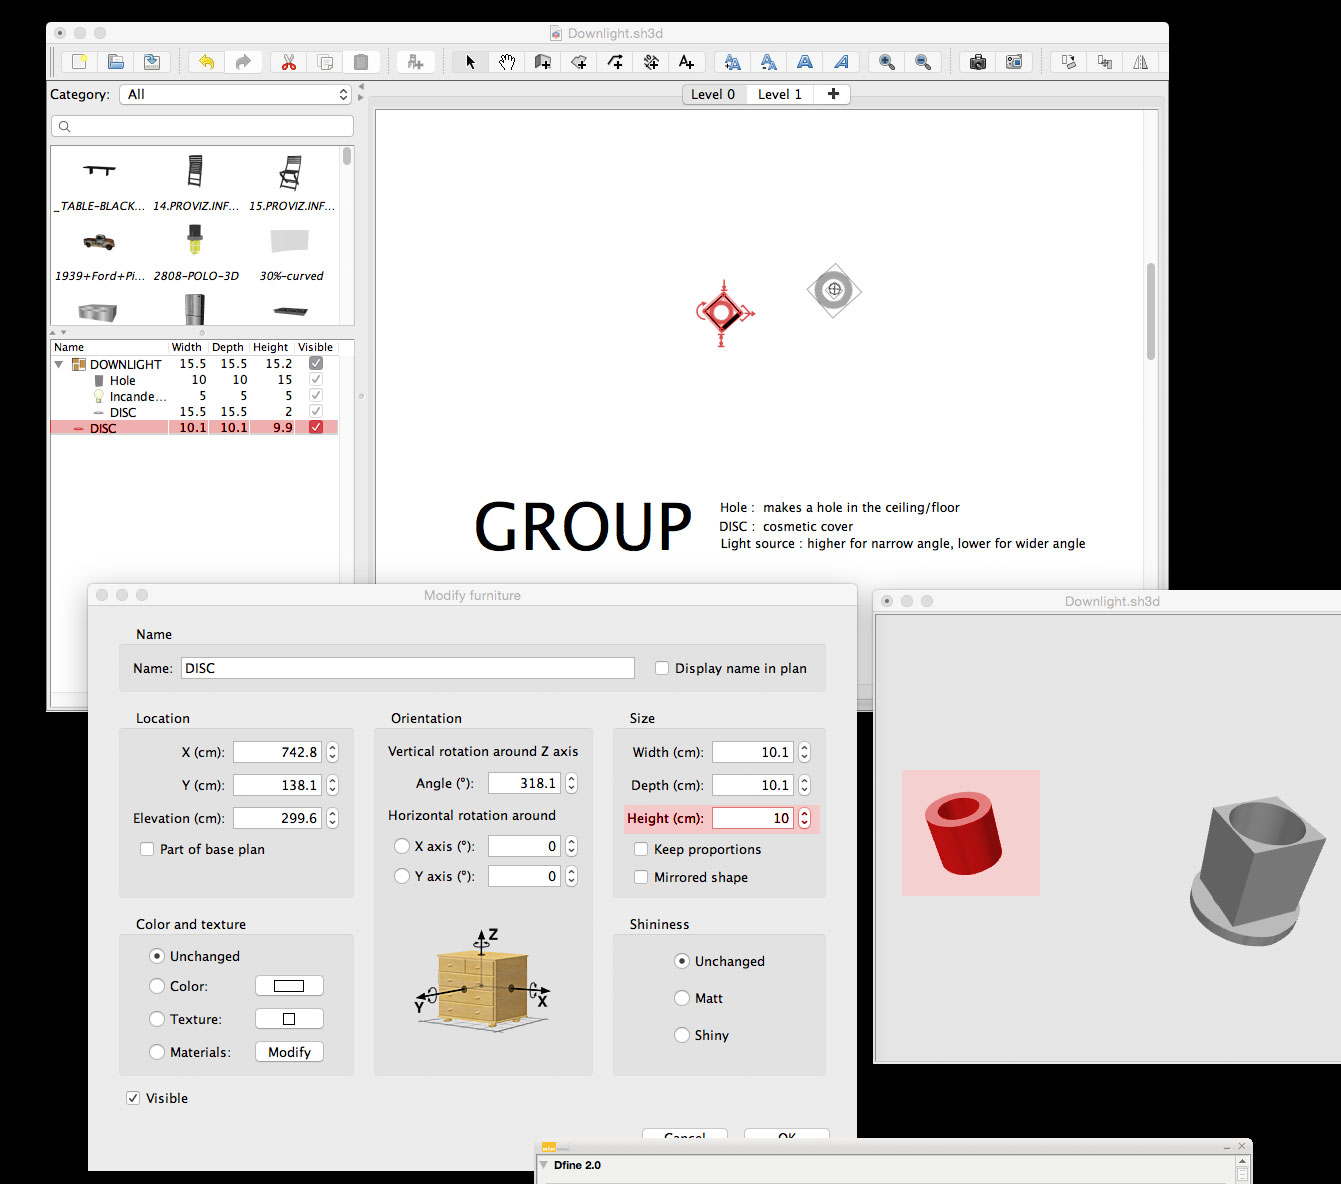
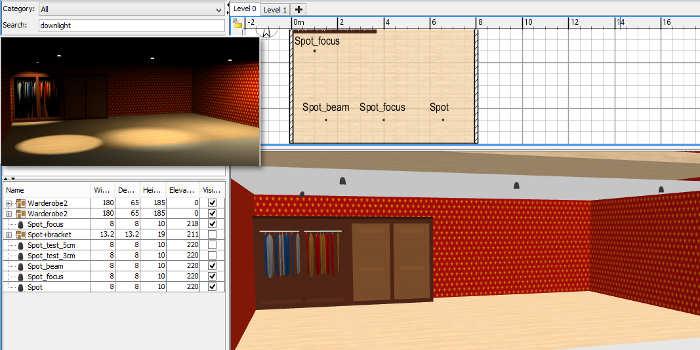
The reason I chose a square was that whether I insert a square or a cylinder into a ceiling, it will make a square hole anyway.
I know there are ways of fixing that, but I haven't yet had time to explore the hidden... Forgive me if I am missing the point here as I have not studied the thread in detail. But if the idea is to create a circular cutout for an object in a ceiling, you will need to add a (circular) SVG cutout path to the object with the Furniture Library Editor.
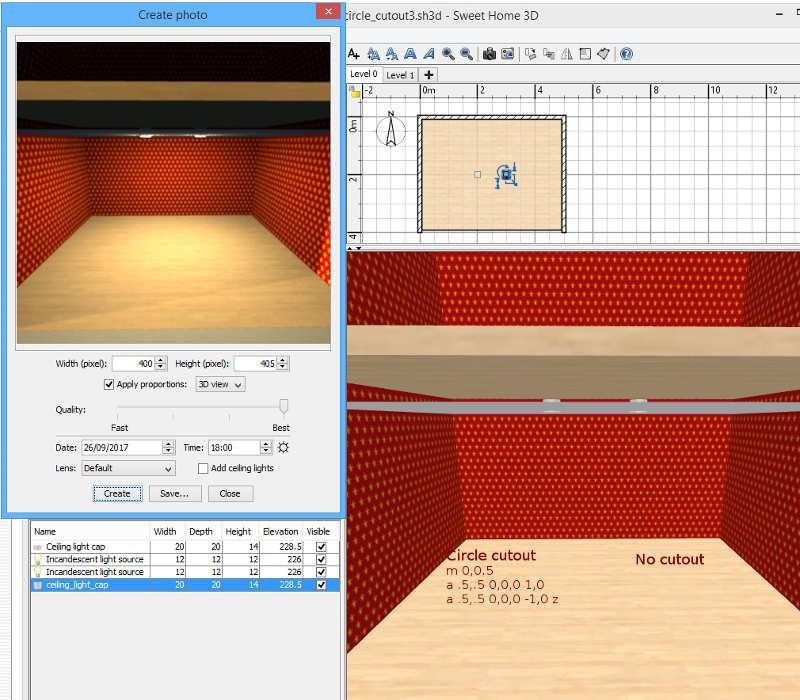
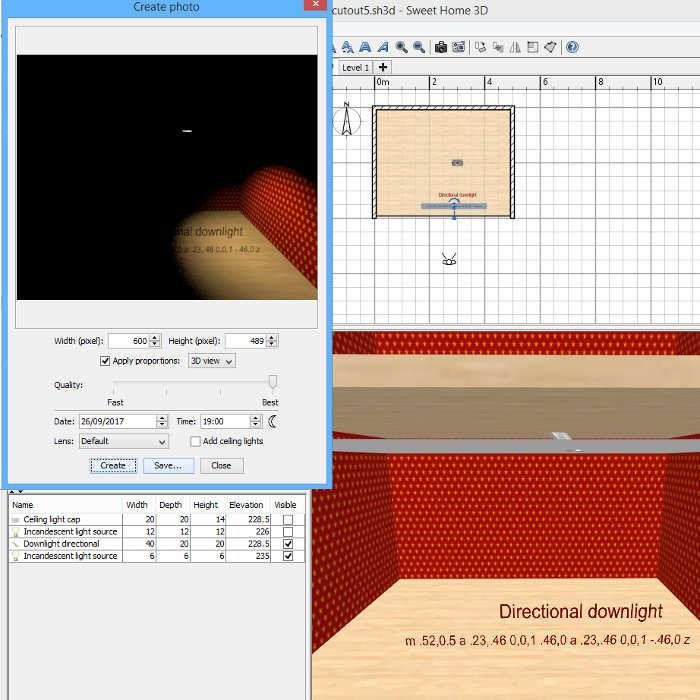
Just noticed that a full circle is not really described in the mini-manual, but using the following staircase cutout path, should do the trick for a circle:
m 0,0.5 a .5,.5 0,0,0 1,0 a .5,.5 0,0,0 -1,0 z
The cutout above follows the edges of the model, and if the model is scaled with different proportions (oval), the cutout should follow the object.
A couple of additional notes for users who wish to explore the details of how this works (no need to read on for most users):
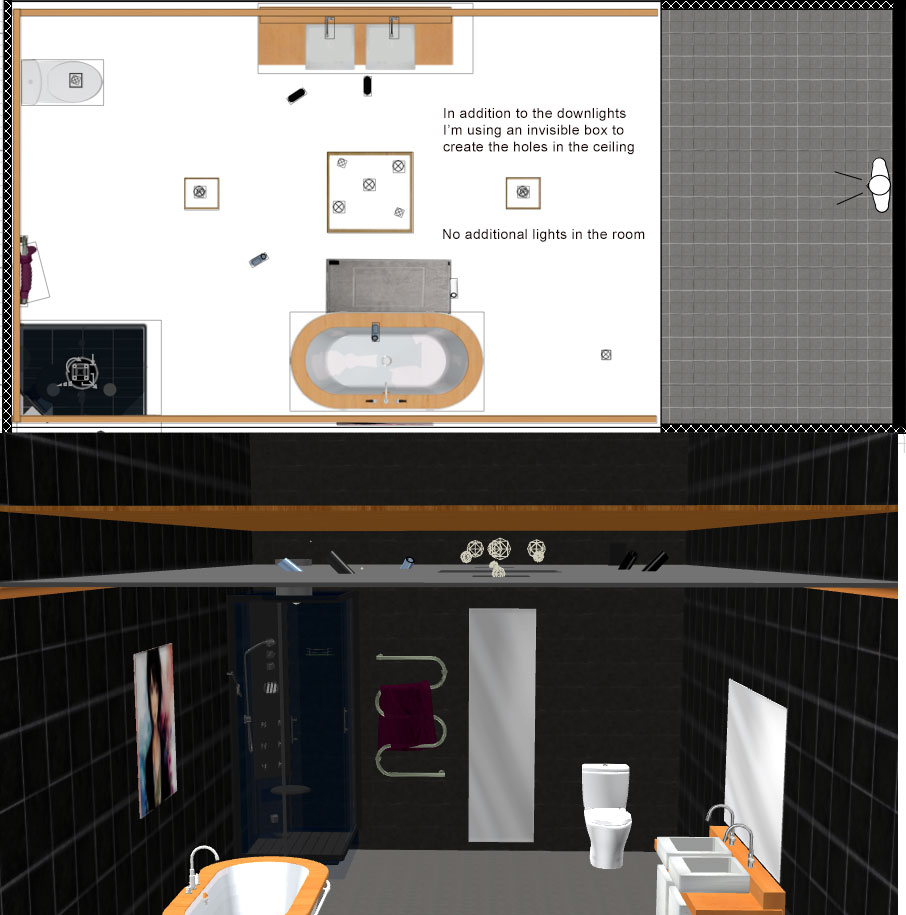
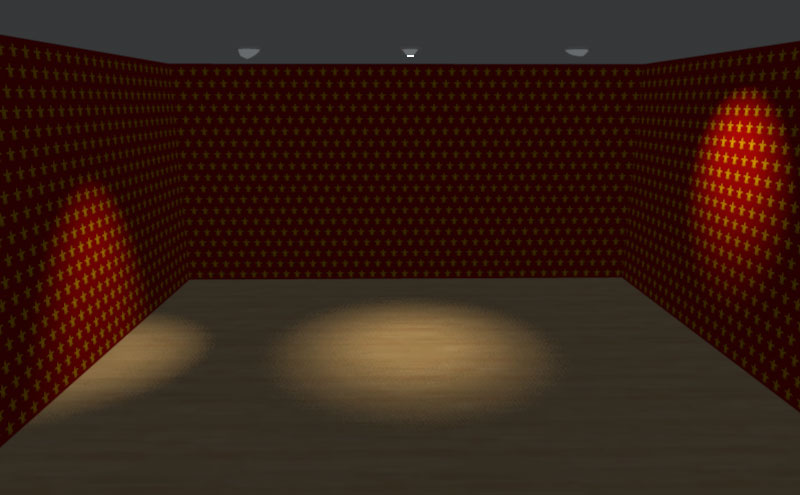
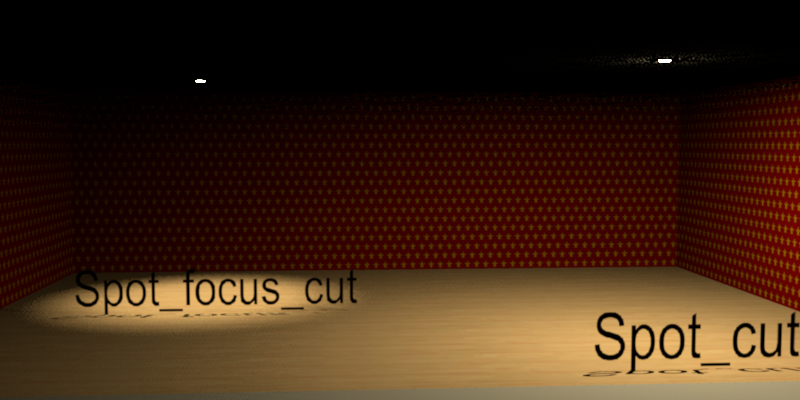
- As far as I remember, it is not possible to add both light-source properties AND staircase properties to one object, which means that a cutout model needs to be used with a separate light source.
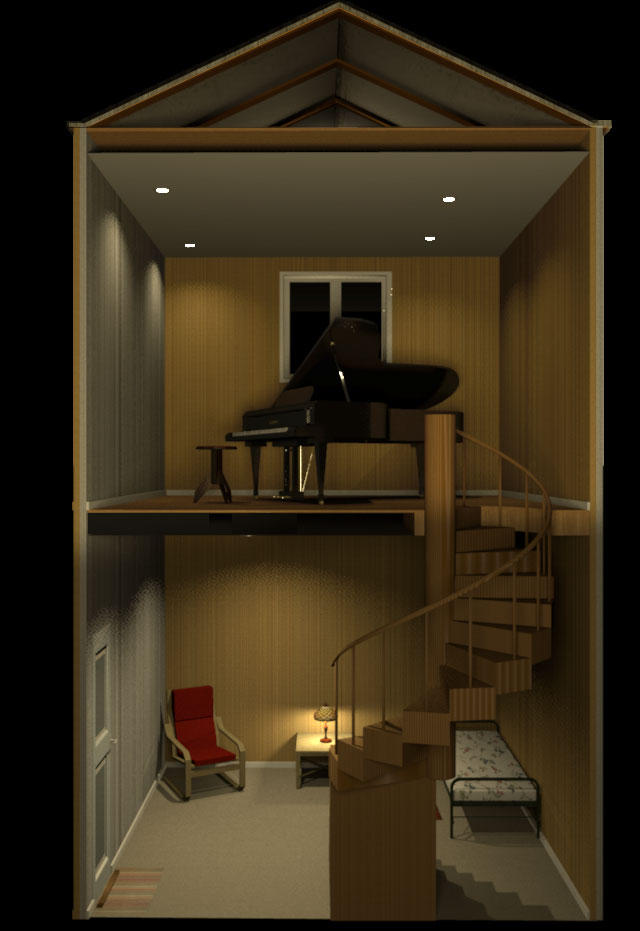
- I also seem to remember that the ceiling cutout only works if there is a level above (?).
- The path is not one circle, but two half arcs which for several reasons is the easiest way to create a full circle with the path command.
- The SVG matrix used for SH3D is always 0,0 to 1,1.
- The format for the Elliptical Arc in a path:
- a rx,ry x-axis-rotation largearc-flag,sweep-flag,x,y
- Where
- - rx and ry are the x and y radii
- - x-axis-rotation and largearc-flag make no difference in this case
- - sweep-flag 0 indicates direction of the arc
- - x and y are the end co-ordinates of the arc (relative to the starting point as a lower case a is used),
- - z returns the path to the starting point (and may not be necessary in this case)
- As lowercase letters (m,a,z) are used, the co-ordinates are relative, but SH3D can do absolute (capital letters) or a mix too. In fact, I think any thinkable valid SVG path will work. At least, I have not yet managed to come up with a path that SH3D did not handle (but only path - not other elements, like circle).
- When I write above that one needs to use the Furniture Library Editor to create a path, that is actually not entirely true. In later versions of SH3D, there is the Home.xml file where it is possible (if maybe not advisable) to edit/add the cutout directly in the model where a cutout is indicated like this:
<pieceOfFurniture ....... staircaseCutOutShape='m 0,0.5 a .5,.5 0,0,0 1,0 a .5,.5 0,0,0 -1,0 z' ............../>
ok
PS Congratulations/Gratulerer, Cec!
|


 .
. 

 .
.


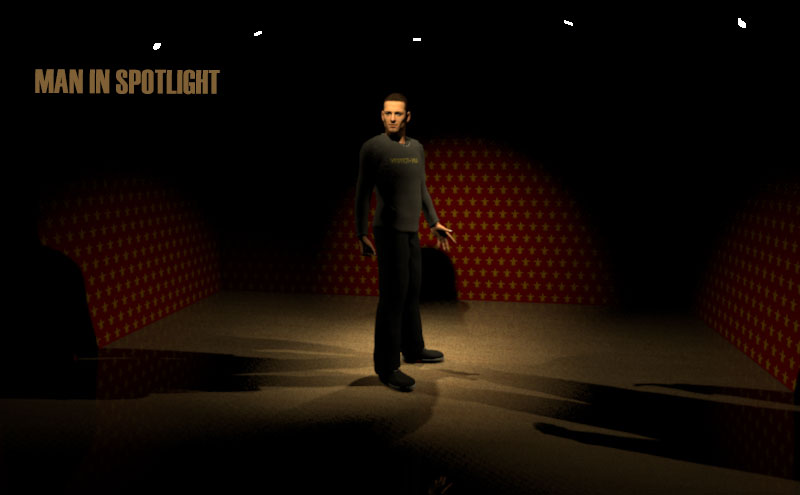
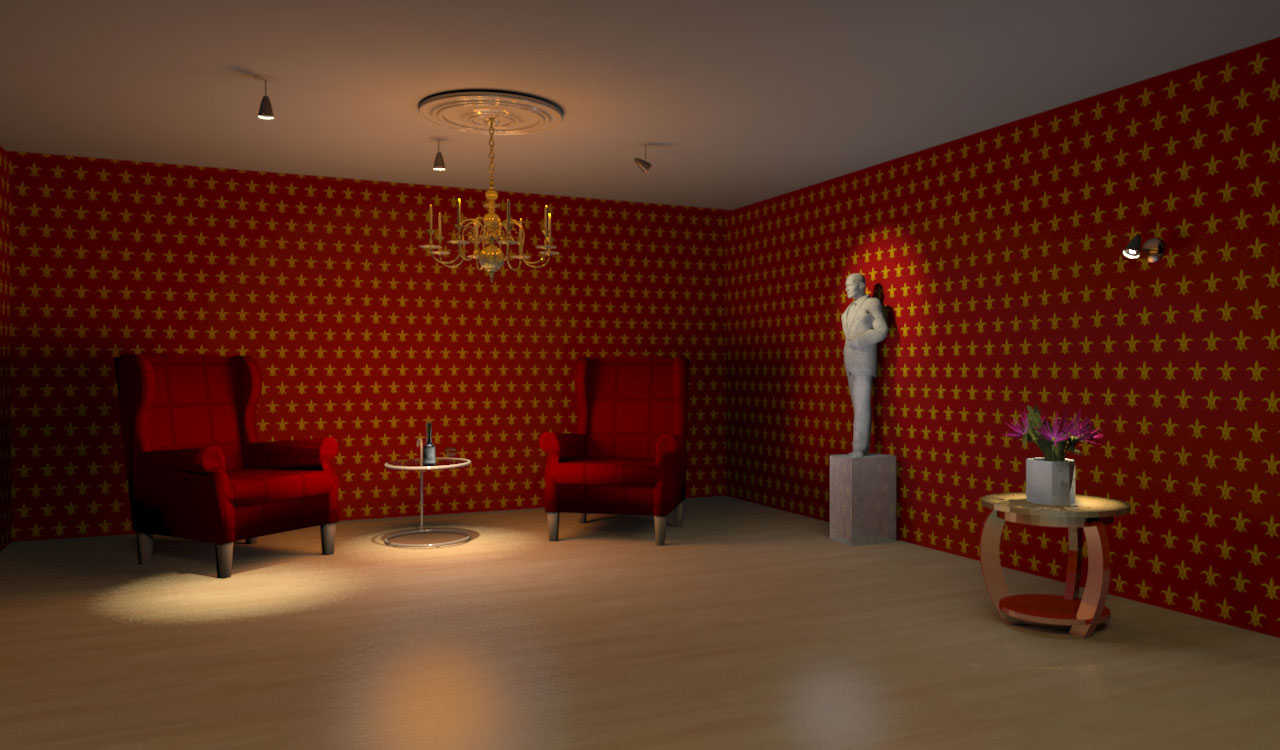


 New light sources give excellent opportunities! Thank you, okh!