Traduit avec www.DeepL.com/Translator (version gratuite)
English: First the texturing. When you create or modify a door make sure that you orientate and scale all textures using a random wood texture. When all textures are correct you can export the object and after import the way you set the textures is preserved even if you set another texture. One trick that often (but now always) works is to not set the texture for each part individually but to select for example the whole outside frame and use the texture radiobutton in the modify furniture window and set the texture for everything. If that is not as you want it you have to modify the material for each part.
Now the deformation (sliding) of doors. If you export the original door you can edit the obj file to see what it looks like. Look for lines starting with "g sweethome3d". In this thread https://www.sweethome3d.com/support/forum/viewthread_thread,8704_offset,8 the deformations are explained but I will add a 'simple' explanation here for the sliding doors: (This assumes that you create the whole door yourself.)
Create the frame in which the door(s) must fit. For ease of use export this frame and import it so you have a single object for all parts of the frame. Exclude the bottom of the frame (the sill) of the export because you need that separately.
For a sliding door you need a rail. This means that your object must have a part that acts as a rail, for example the sill. To make it easy export only the sill for the door you created and edit the obj file: Change all lines starting with g to "g sweethome3d_rail_1_[rest of the name]". If you have more than one sliding door use the same but with _2_ in a separately exported sill2 object. Import the edited sill(s).
For the door it's almost the same: Export only the door with all parts that should slide with the door, so not the sill and not the external frame around the door. Again edit the resulting obj file but now change all g lines to "g sweethome3d_opening_on_rail_1_[rest of the name]". of course replace _1_ with _2_ for the door parts on rail 2 if you have that. Import the edited door(s).
I think it's obvious that all furniture parts with "sweethome3d_opening_on_rail_1_" are sliding along the length of the object with "sweethome3d_rail_1_".
So now you have the frame of your door, one or two sills that act as a rail and one or two doors that should slide. Match them at the correct position and select all parts and export them. After import you have a sliding door with one or two doors that slide open independently.
---------------------------------------- Dodecagon.nl 950+ 3D models, manuals, and projects
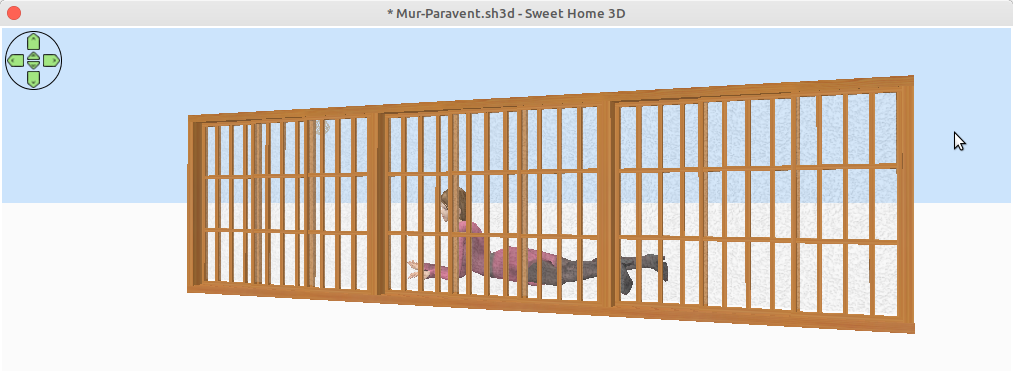
Thanks Keet, I'll try to find my way around your explanations. The textures should be fine, although in my example I've got lattice doors. I think it might be possible to group all the vertical elements, then all the horizontal ones, and texture these groups separately.
For the mobility of the door, it's going to be a bit more complicated because the starting model has three sliding panels, 3 different tracks. But I need three nested doors, which means 9 tracks and 9 sliding panels. And I think I'm obliged to process them together to avoid having jambs that interpenetrate because that could lead to texture bugs flush on the same plane.
To sum up, I'd have to machine an upright, export it and put it in my library, a battens ditto, a sill (1/3 of a sill in thickness) ditto, a panel (made up of my crosspieces and the translucent glazing) ditto, having textured everything individually. Then I'd have to assemble everything into 4 uprights, 1 battens (in reality, a carpenter would only make one long one, but mine has to be 562.6cm long, which is a bit long for a single piece of wood with a medium cross-section), 9 thresholds and 9 panels (frames, crosspieces, glazing), export and import into my library, to finally have the door model that suits me, the panes having been aesthetically rebuilt to my measurements. Finally, I could export and import it into my library and into my house. Just like a real craftsman would do in real life.
I've still got some way to go, but I'm making progress in my understanding, thanks again.
Traduit avec www.DeepL.com/Translator (version gratuite)
English: Nobody said it was easy although with experience you will see that setting textures and adding deformations is the easiest part of creating doors and windows. Creating a good looking overall design is much more difficult.
For your 9-panel sliding doors: you will need sills rail_1_ to rail_9_ to get nine individually sliding doors. That also means you will need nine doors with opening_on_rail_1 through opening_on_rail_9_. It is possible to assemble the whole 9-panel object before you set the rail strings but it's a small nightmare to determine the separate parts in the obj file to set those needed deformation strings.
A trick to make it easy: create the first sill and export to sill_1.obj. Add the prefix "sweethome3d_rail_1_" to all the g names and save the file. Now copy sill_1.obj to sill_2.obj. Edit the sill_2.obj file and all you have to do is a replace-all of "sweethome3d_rail_1_" in "sweethome3d_2_" and save the file. Rinse and repeat for the sills 3 to 9. Now you can import all the obj files in one go by selecting all the obj files in the file browser and dragging them into your Sweet Home 3D 2D window. You will get the import wizard for each object one after the other.
The same for the doors: create the first one and set the deformation strings. Copy and replace all of the deformation strings. Much faster then having to copy and export, set the prefixes and import.
IMPORTANT: Notice that each obj file has a line after the comments (#) that starts with "mtllib ". This is a reference to the mtl material file. Since all your sills and doors are identical they can all use the sill_1.mtl and door_1.mtl file but if you do this with other furniture it's best to copy the mtl file too and set the correct mtllib reference in the obj file. Because you combine them there's no need for the separate mtl files since they are all identical for the same part.
With all the parts you can now easily assemble the complete 9-door object and export it.
Another tip to get meaningfull material names: Exporting parts to reuse for the combination makes it very easy to also set nice names for the materials so your end result has nice properties like "Sill", "Frame", "Glass"(Paper?), etc. You do this by editing the "usemtl" lines in the obj file and the "newmtl" lines in the mtl file.
Example for a box that you want to be a door jamb: An exported box has six g lines followed by lines like "usemtl bottom", "usemtl top", etc. You see corresponding lines in the mlt file with "newmtl bottom", "newmtl top", etc. If you "Modify furniture" in Sweet Home 3D you will see the material properties "bottom", "top", etc. You can change that to a single material "Jamb" by replacing all the "usemtl" lines in the obj file with "usemtl Jamb". In the mtl file you replace the first "newmtl" line with "newmtl Jamb". This block of lines (until the next 'newmtl') is the only block of lines you need because your obj file only references the one material name "Jamb". So remove all the other blocks. If you now import the box and "Modify furniture" you will see the 'box' only has one property "Jamb". The texture orientation and scaling is preserved so you now have a meaningfull name AND you only have to set the one recognizable property to set the material for you door jamb. It's probably clear that instead of just using separate sill and door objects you can start with even smaller objects to make it easy to have those meaningfull material names. For example first exporting the glass to set the "Glass" name and exporting the door itself to set a "Door" name. Then combine them to a full door with the nice property names "Glass" and "Door" instead of multiple weird "bottom" and "top" names that say nothing. This may sound complicated but once you have done a few parts you will see that it is actually very easy. With more experience you will even manage to set multiple names in a multi-part object so you don't need every single little part separately.
I create 99% of all the furniture myself and using the parts-of-parts method makes it easy to re-use some of them for other furniture. I use the same Glass object everywhere I need glass without having to create it again. I only have to add deformation strings if needed.
---------------------------------------- Dodecagon.nl 950+ 3D models, manuals, and projects
After that, I'll have to learn how to make carved furniture with bevelled mirrors (I've got some very nice ones to integrate, in oak and walnut). I know I could simplify them, but if I could make them in .obj , they could go in the community library, if possible with their openings (the furniture would be frames and their doors would be doors). And we could put linen inside.
But that's another adventure and a future subject.
Belgique
Joined: Aug 17, 2023
Post Count: 83
Status:
Offline
Re: Modifier un modèle de porte ?
😄 That's a bit fast for me. I already thought it may be simple. Now it needs a back in oak and as I remember me the furniture, it is bevelled too but inside the door. Fortunately I believe the mirrors aren't curved at top. But I need to check it.
Mmm, I can't render the glass so that you can see through it. I's OK in preview not in rendered view. My glass is a glass pane to which I've applied the bubble-glass texture.
Si cela ne change rien, il s'agit probablement d'un problème avec le moteur de rendu, que je ne connais malheureusement pas très bien.
Is the glass totally opaque in the rendering?
Check the mtl file for the glass. Does it have a d line? If not add "d 0.4" at the end of the glass block. 0.4 is the transparency factor. You can experiment with values between 0.0 and 1.0 where 0.0 is invisible.
If that doesn't make a difference it's probably something with the renderer, which I unfortunately don't know much about.
---------------------------------------- Dodecagon.nl 950+ 3D models, manuals, and projects
Je vais exporter et je verrai bien ce qui se passe avec le mtl. ‑‑‑‑‑‑
As I haven't created an obj, I haven't exported the glass texture, so at this stage I don't have an mtl file. But it's strange that the transparency shows up in the preview if there isn't any. In fact, I was surprised that it worked to apply a texture to glass.