Netherlands
Joined: Apr 8, 2022
Post Count: 1248
Status:
Offline
Re: Countertop Cutouts
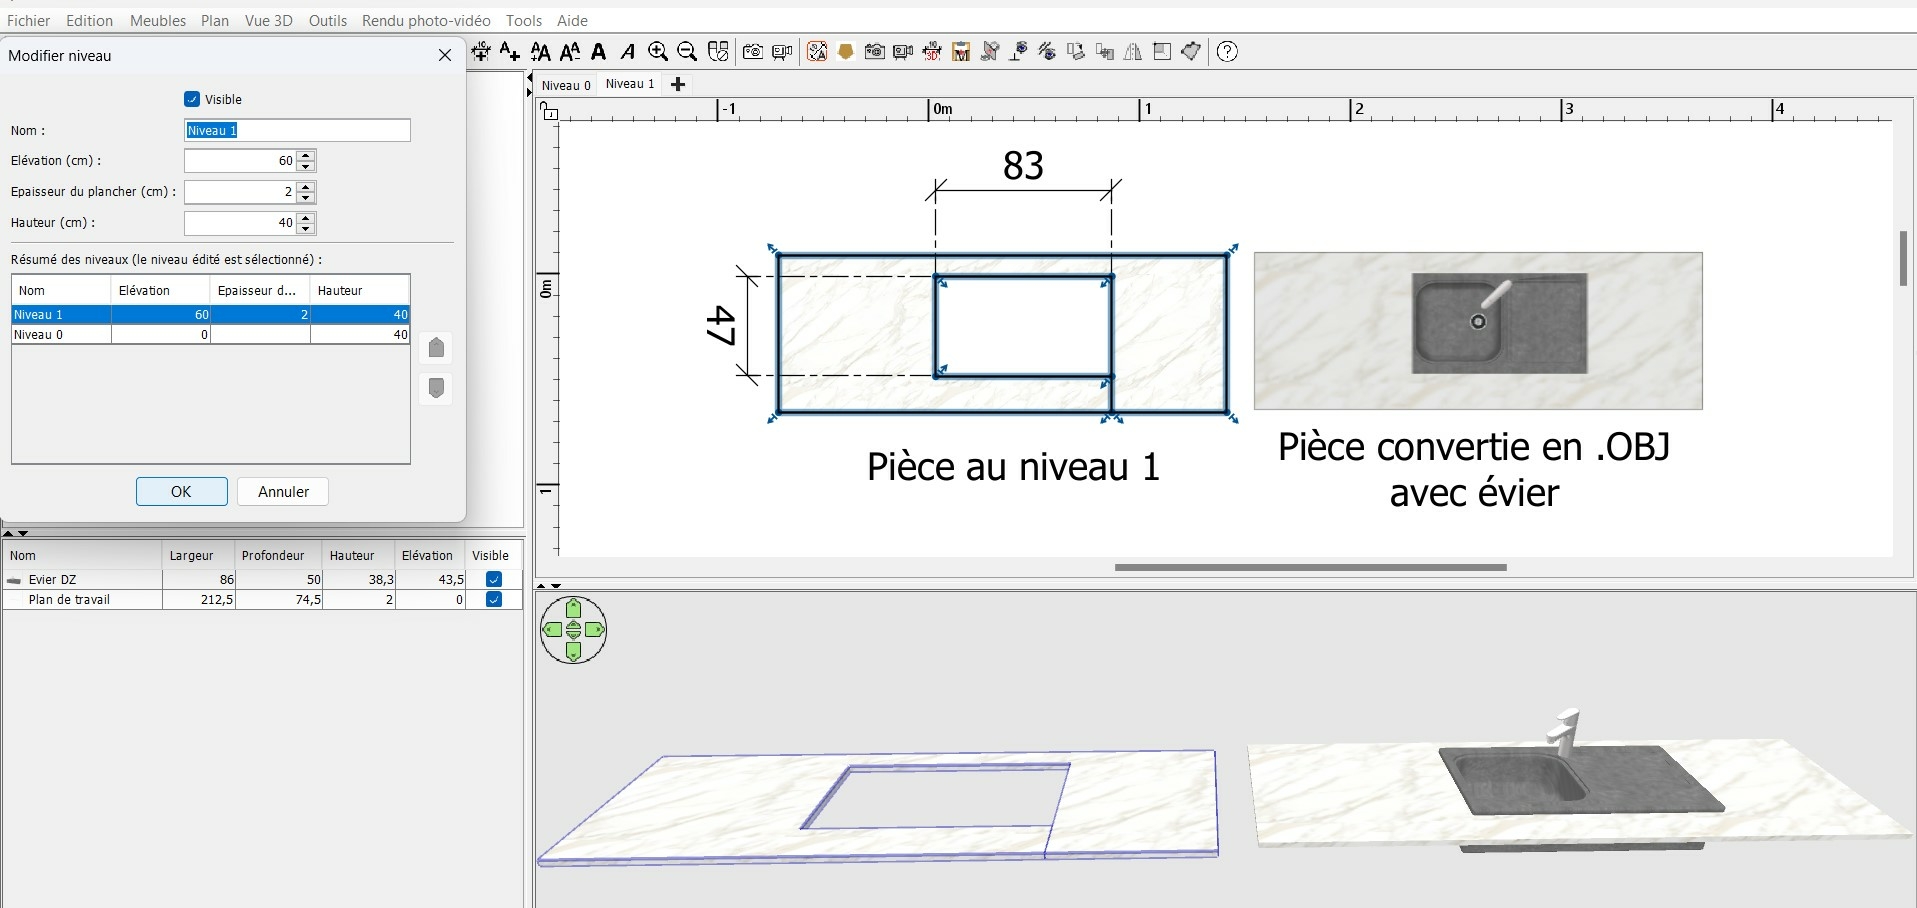
The easiest way is to use a wall for your countertop.
First tilt your sink so the top points forward. Export the sink. Import the sink and check "Door or window" in the import dialog.
Create a wall as if you have your counter top standing on its front side. Insert your import "window-sink" in the wall and adjust its position and elevation. It will create a hole in the wall the size of your sink.
Only select the wall and export it as countertop.obj. Import it and tilt it back so it is horizontal again. Export/import and you have your countertop with a hole for your sink.
A little tip: If your sink has a small border you should make the sink a little smaller before export and import as a window. This will make the hole a little smaller so it stays under the border of your original sink.
Check the manuals page on dodecagon.nl for a manual on how to change material names. A material "Top" looks better than "wall_1_1" if you want to set the color or texture of your countertop.
---------------------------------------- Dodecagon.nl 950+ 3D models, manuals, and projects
Netherlands
Joined: Apr 8, 2022
Post Count: 1248
Status:
Offline
Re: Countertop Cutouts
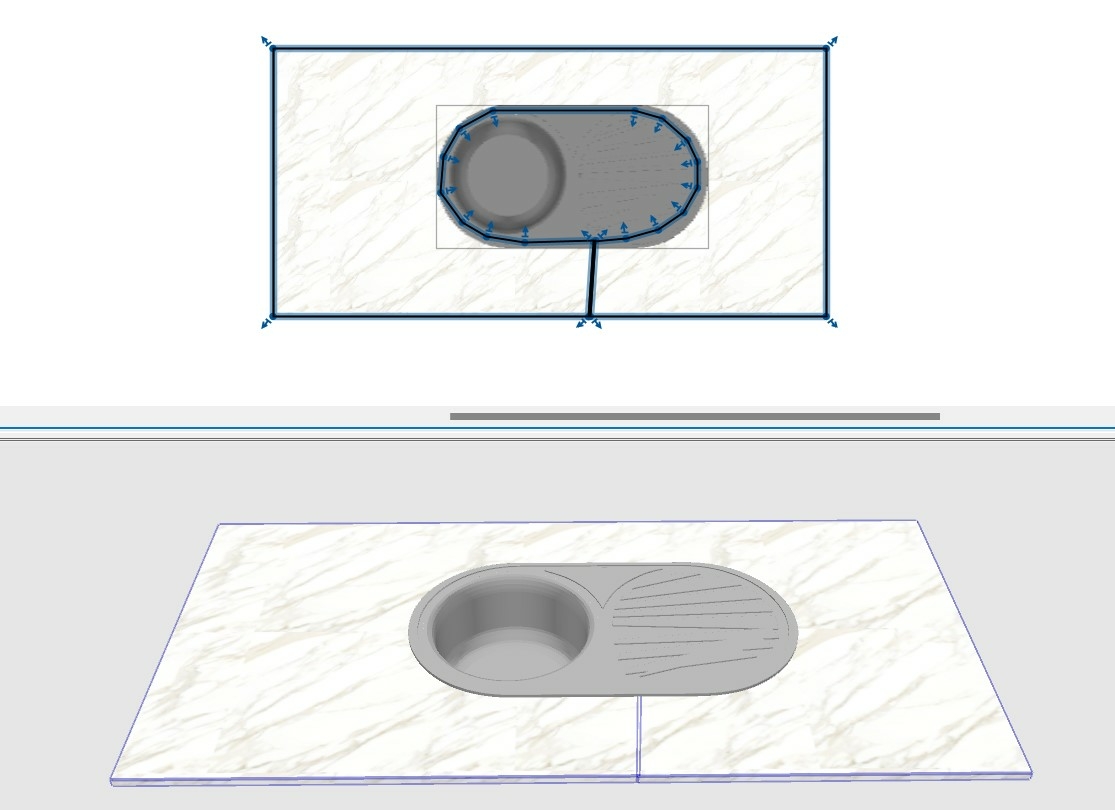
Yes, also an easy method... if you have a sink that fits into a rectangular hole. In that case yet another method would be to use boxes to create the top around the sink. With a round sink or any other form that won't fit into a rectangular hole you will have to use the wall method.
With boxes align them around the sink and export them together. After import use the Texture option, not the material Modify button. This gives an even texture over the whole countertop as if the hole is really cut out.
captaincook propose toujours de bonnes alternatives. (ce jeu de mots ne fonctionne qu'en anglais)
---------------------------------------- Dodecagon.nl 950+ 3D models, manuals, and projects
A very important thing to remember when using a room for furniture parts is that you MUST apply a texture on the original room BEFORE exporting because texturing after import of the object will distort the sides with a diagonal texture. You can use a random texture because it is just used to set the texture alignments for export. After import a change of texture will retain the correct alignment. I apply textures to all furniture parts I create, even if I know they will be just a color after assembly. Setting the texture shows me where I have to rotate or shift a texture on a side to make it look nice. That way I can distribute a model with only colors (smaller size) but when a user of the model wants to set a texture it will still look perfect.