Russia
Joined: Aug 13, 2022
Post Count: 481
Status:
Offline
a technique for inserting any piece of furniture into an interior without a model.
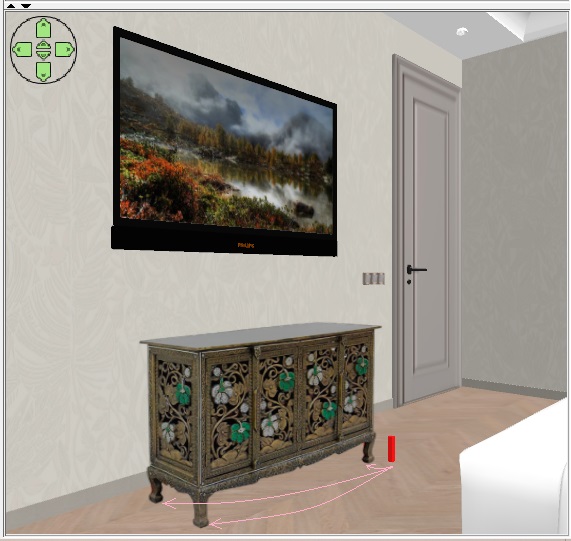
very often it is impossible to find a 3D model of the desired object. But there are high-quality photos from different angles. What to do? First you need to prepare. I found an interesting oriental-style chest of drawers. I cut off unnecessary fields as much as possible, cleared the background around the photo of the chest of drawers in the free photo editor. Now you need to find all the information about this chest of drawers. By searching the picture, I found a seller who indicated that the chest of drawers has these dimensions (width, depth, height). Very important information.
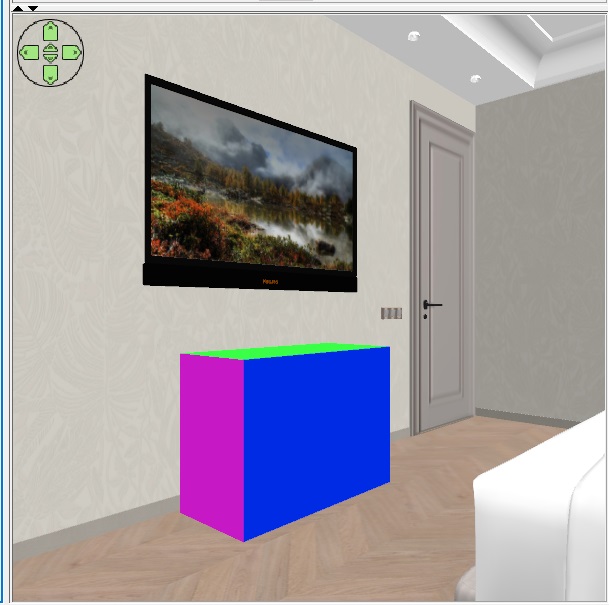
you need to make a box with multicolored sides according to these dimensions. Put it on the floor in the right place, where there will be a real chest of drawers. Sellers often give incorrect product sizes (especially if such a product does not have a well-known brand), but it is better to try to believe them this time. 103x45xh73
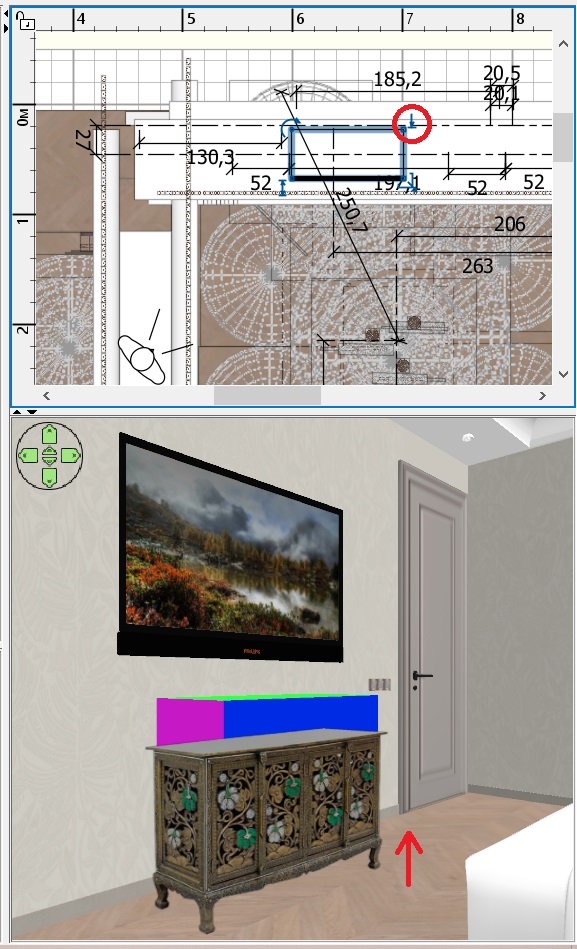
Now comes the most difficult job. You need to make a box with the size of the dresser image on a transparent background. These dimensions in my case are 96x81 cm (PNG image size 961x809 pixels). Keeping the proportions, I reduced the box with the image in height to 75 cm, and made the other 5 sides invisible. Now you need to try very hard to put the photo on the background of a colored template so that all the lines in the photo match the lines on the template. It's very difficult, but you have to try. The realism of the image depends on this. You can change the camera position, change the angle of view, and the height of the viewer. And of course rotate the photo box. This photo should be rotated as perpendicular to the camera's line of sight as possible, but you can rotate it slightly to achieve a match. It should work out like mine))). The main thing is the dimensions in width. The photo should slightly overlap the template in width. Please note that the box with the photo does not touch the floor. It hangs in the air in front of the template because it is smaller than the template and is located between the viewer (camera) and this template). This is very useful for rendering, because a box with invisible sides casts a strange shadow on the floor, and if it is hanging in the air and does not touch the floor, then there is no such shadow. Interestingly, the size of the photo can be very small, and then you need to move it very close to the camera. and the effect will be exactly the same.
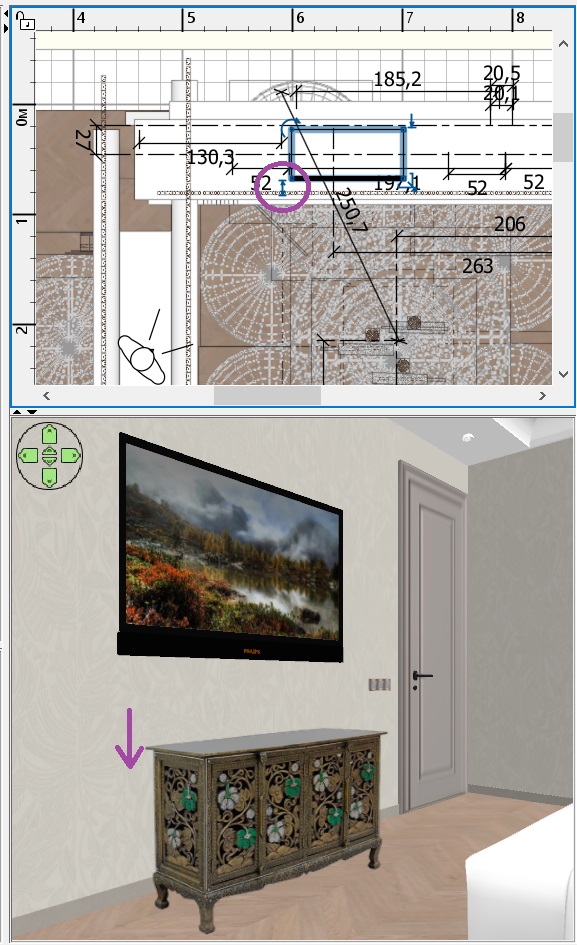
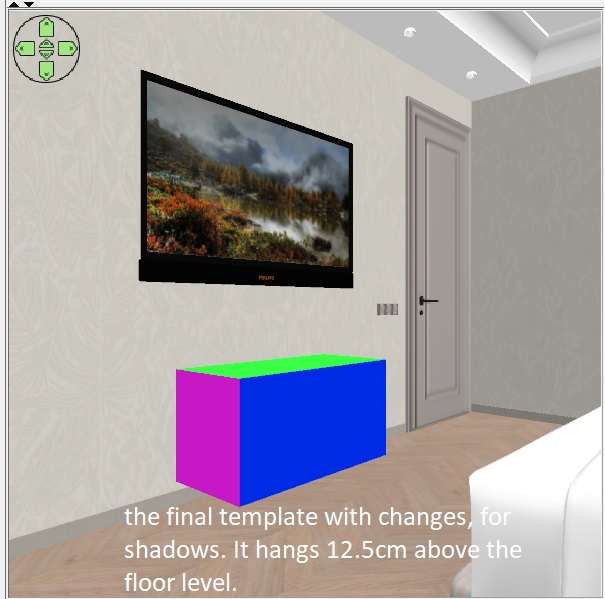
It is very important to turn off the magnet, it interferes with the subtle movements of the box. After all the attempts to combine the template and the photo, I realized that the seller had deceived me, the chest of drawers had a different width. But the main thing is that I managed to align all the lines of the photo and the template. You CAN'T MOVE THE CAMERA from now on. Use this button to lift the template above the floor level so that it disappears from the bottom of the photo.
Use this button to reduce the height of the color template so that it disappears along the top of the photo. It will turn out like this.
three legs will cast a shadow on the floor, you need to place thin boxes with a height of 12 cm (it was to this height that I raised the bottom of the colored template. These thin boxes should be placed exactly behind the legs in the photo. It is important that they do not stick out from behind the legs of the photo, it is better after that to paint them in the color of the legs of a real chest of drawers, they are still slightly visible on the curves of the shapes. These boxes are on the floor, far away from the box that is hanging in the air. But the render will have real shadows on the floor, as if from a real composite chest of drawers with real legs.
the final render will be like this. The chest of drawers is completely real, it is not visible that it is a collage. In this way, you can insert ANY objects with geometric shapes into the interior. The main thing is to define the basic form for the template. Yes, it's difficult, but sometimes it's the only way out if you don't have the right model. This way, you can insert only one object into the interior, two different objects in the photo will look wrong. Only if it is an object without geometric shapes. For example, a plant, a human, or a cat. There are no visible errors because there are no geometric lines.
Netherlands
Joined: Apr 8, 2022
Post Count: 1248
Status:
Offline
Re: a technique for inserting any piece of furniture into an interior without a model.
Oh man, I tried to do something like this before and it's realy difficult to get something that looks good. You did an amazing job with this very difficult cabinet! An excellent tutorial for users that can't find a specific model but can find an image.
I doubt it will work for this model but GIMP has tools to change the perspective of an image. For simpeler models this could be used to get separate images for front and side. Cut out the front and maybe stretch to the correct width. Then do the same for the side. For this model it will not work very well (see the feet). Generally it will work very well if the perspective only needs a little change. Select (part of) the image, Tools > Transform Tools > Perspective. Then drag the corners to change the perspective.
---------------------------------------- Dodecagon.nl 950+ 3D models, manuals, and projects
Russia
Joined: Aug 13, 2022
Post Count: 481
Status:
Offline
Re: a technique for inserting any piece of furniture into an interior without a model.
Hi! Very impressive examples! Of course, textures on boxes using photos are the right way to achieve a realistic rendering image. The model always looks right. Yes, correcting the curve of a photo using a special program is the right way. Make a rectangle out of a trapezoid and apply it as a texture to the box. Yes. Everything can be done for simple rectangular furniture in this way, I agree. But if you don't have the strength to model a cabinet, if you need to insert it quickly into the interior, then you don't have to make the model in the right way. And insert the photo so that no one notices)))). Yes, you have to agree here. that you become a hostage to the photographer's shooting height. Otherwise, there will be perspective distortions in the lines and shapes in the interior photo. I made a room with a grid of tiles that doesn't allow lying, and I couldn't insert a photo without making mistakes. Although it is probably possible to achieve excellent results even using uneven photos. My sideboard was taken by hand, without a tripod. And the program has all the buttons to align the box in space! No need to have other programs. There is a tilt, a rise, a decrease in height, a rotation of the texture within 1-2-3 degrees, everything can be adjusted and get an even picture of the furniture as a result. But sometimes it's not enough, I agree. And a ready-made buffet model would be better. Or make such a model yourself using SH3D tools. But it's interesting to try all the ways. Moreover, I am still sure that if you combine the photos on the boxes and real 3D objects, you can get a complex interior. And the program can handle it, it may not be able to handle all the models. You have to be careful here. I already know the limits that I can't go beyond, and I'm looking for ways to simplify the scene without compromising the design. Photos on the boxes as a replacement for the model is one of the ways.
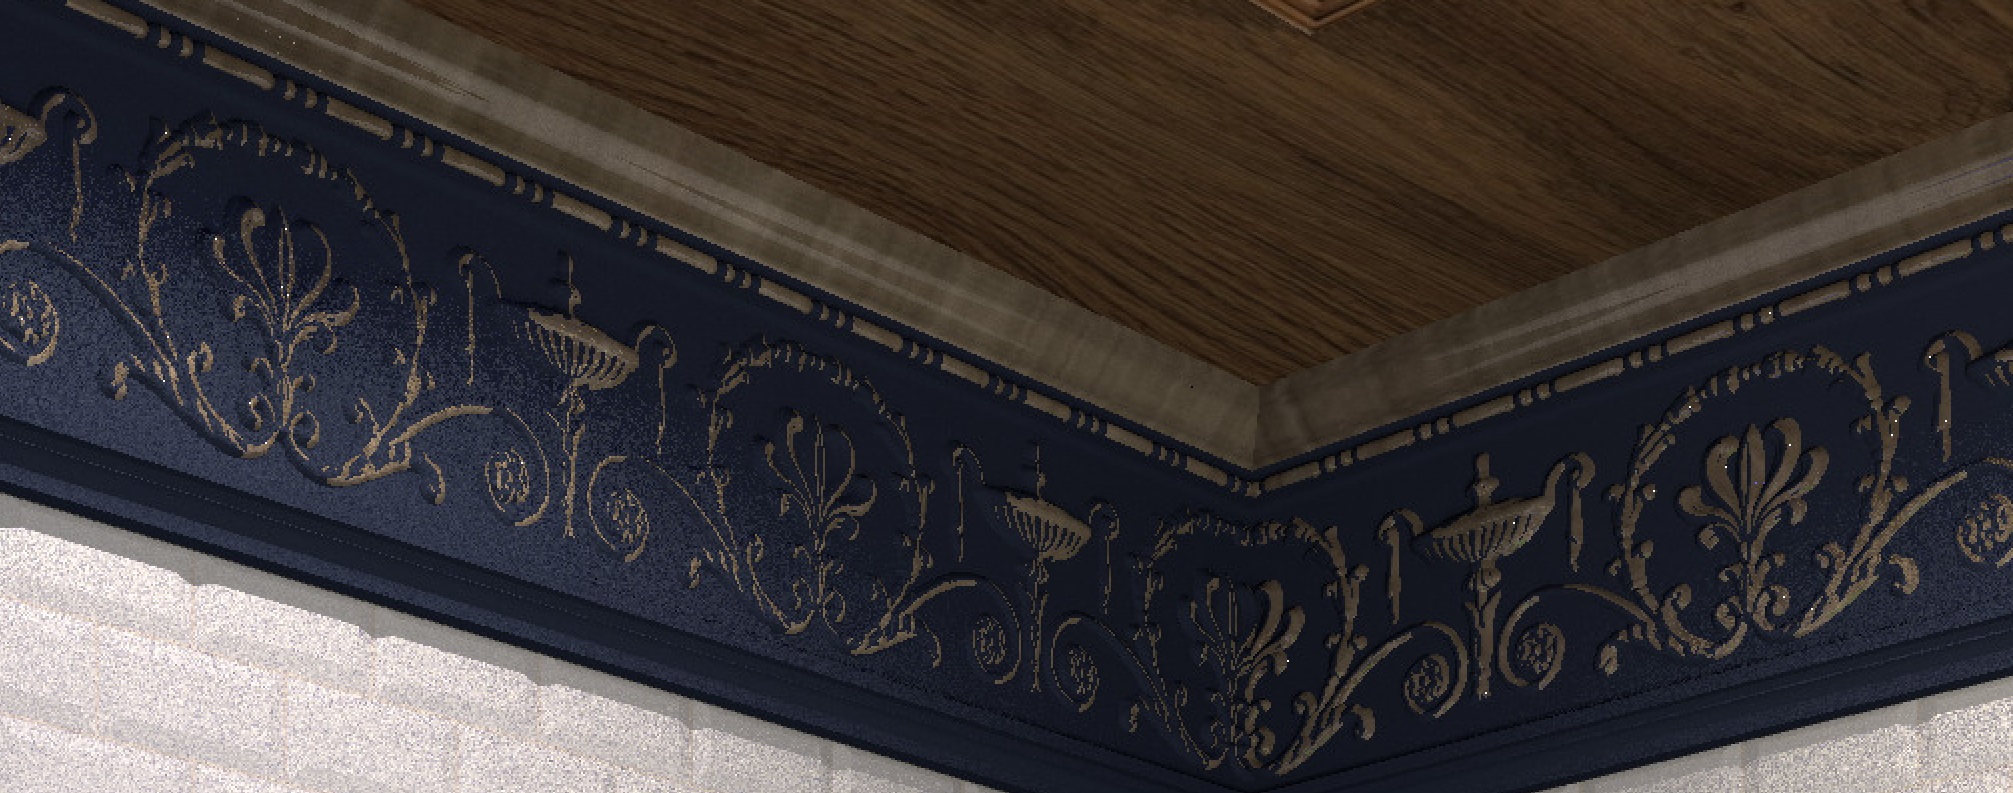
I also used an interesting way to make a gilded relief on the cornice. I made two models of the cornice (they are ready-made). One blue model is ordinary with a relief, and the second is gold with a slightly thicker thickness. If we now connect these two models and move the golden model a little deeper, then the viewer will see only the top of the relief in gold. And a golden relief pattern will appear with the upper sections wiped out. I first learned this method from Emanuel when he told me how to make snow on a car. A very interesting way to duplicate a model is to get the effect of painting in protruding places or snow on objects.