Light & textures - rendering examples of this and that.
This topic has been viewed 457458 times and has 128 replies
Re: Light & textures - rendering examples of this and that.
no idea, but your right, your name is not showing as logged in
Re: Light & textures - rendering examples of this and that.
This might give you an answer:
http://www.sweethome3d.com/support/foru ... 8750#39908
http://www.sweethome3d.com/support/foru ... 8750#39908

Re: Light & textures - rendering examples of this and that.
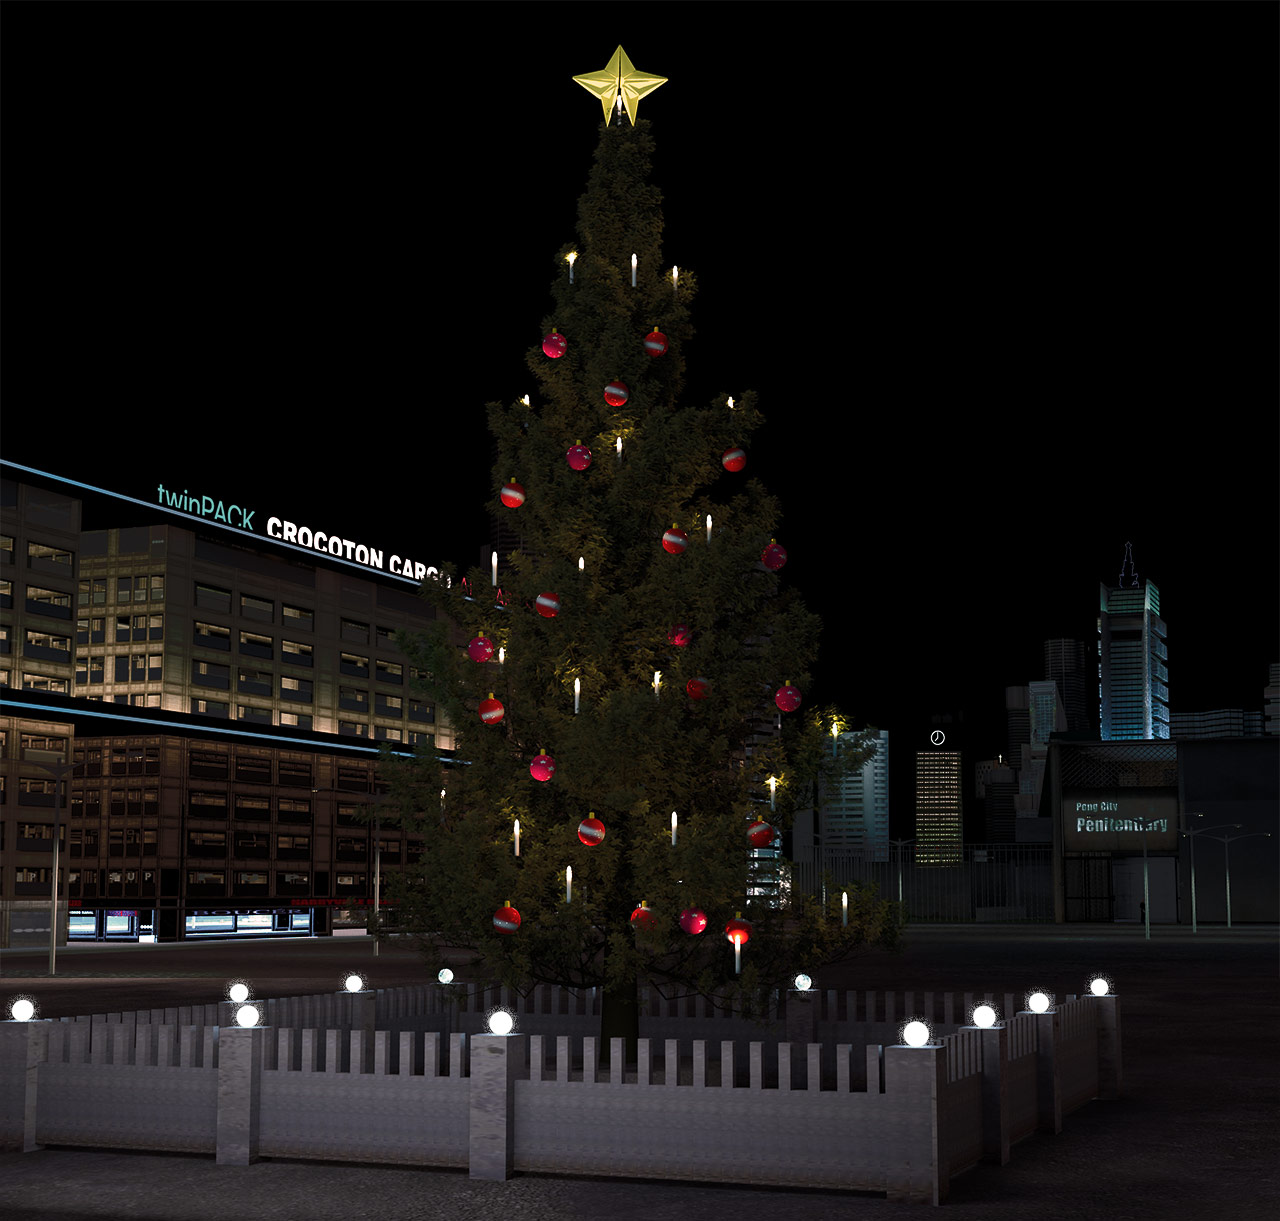
This imagae took me 72 hours to render.
I used 849 light sources for this image: 670 panel lights #3, 63 panel lights #1 and 104 incandescent light sorces + 12 opaque sphere lights.
To get the lights right, I used about 30 test renders in Q3, using the [font=courier new]fast[/font] samplerAlgorithm, and even with the [font=courier new]fast[/font] option, the rendering time was about 25 minutes, so it took some time to do this.
The project file is 4.62 Gb
Merry Christmas everyone!
Cec
Re: Light & textures - rendering examples of this and that.
Amazingly beautiful!!!
Thank you very much.
Happy Yuletide
Thank you very much.
Happy Yuletide


Re: Light & textures - rendering examples of this and that.
Very nicely done Cecilia [:)]
Merry Christmas to you all !
Merry Christmas to you all !
Emmanuel Puybaret, Sweet Home 3D creator
Re: Light & textures - rendering examples of this and that.
Totally agree with Puybaret and Hans – very nicely done and a very beautiful rendering it is.
Happy X-mas Cecilia, and the same to everyone else visiting here!
Xiste
Happy X-mas Cecilia, and the same to everyone else visiting here!
Xiste
Re: Light & textures - rendering examples of this and that.
@ hansmex, Puybaret, Xiste
Thank you for your lovely comments!
I really apreciate it.
A big Christmas hug from Cecilia.
Thank you for your lovely comments!
I really apreciate it.
A big Christmas hug from Cecilia.
Re: Light & textures - rendering examples of this and that.
Views on using backdrops
How to use backdrops as part of creating a nice scenery is explained in THIS THREAD
Using backdrops can be tricky.
Quite often I see backdrops that stand out as… well; backdrops.
Since Enkonyito introduced panel lights, I have used backdrops on a lot of my published images.
During this period, I have been trying to figure out how to make the backdrops blend in and become part of the scenery.
In this post I will share some of my findings.
II have used the Alps Hotel (Sweethome Demo Example 13) for this project. The Alps Hotel can be found HERE.
In my opinion, the Alps Hotel is visually very nice, very detailed, and very well suited for creating a surrounding scenery.
Note:
For my use, the default light source settings at 50% intensity is way too bright.
So for my interior shots of the Alps Hotel, I have reduced the intensity of every light source I could find to 5%.
This has allowed me to create interior ambiences with panel lights.
My project file can be downloaded HERE.
I have included my project file in case anyone should be interested in taking a look at how I work with backdrops and lighting.
This download does not include any modifications I have made to the interior.

Textured sky vs. backdrop
The most obvious disadvantage with using a textured sky, is that it will always be rendered as it is, affected by neither our light sources, nor the time of day.
This means that the scene itself will have to be colour-matched to blend in with the sky.
Example of sky texture:
@ FoW = 63.

Another disadvantage with using textured skies is that when zooming in to a lower Field of View, the quality of a sky texture is reduced.
Here is a shot @ FoW = 25.
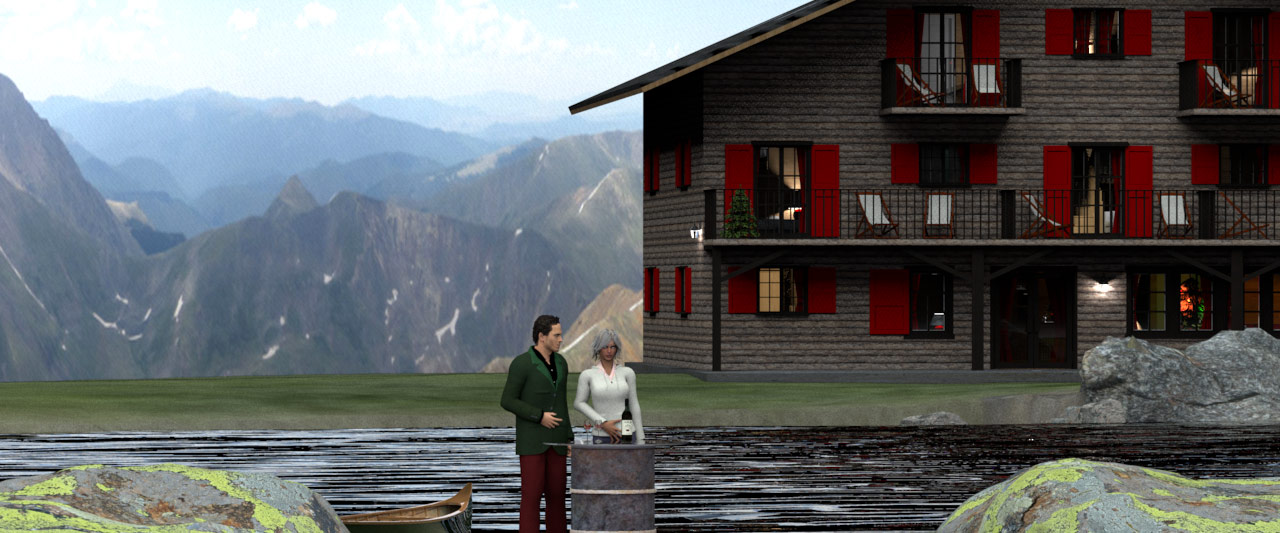
Good backdrops can be difficult to find.
Images will always have shadows that indicates the direction and angle of the sun, which can be a problem.
Backdrops will normally cover only a small sector of the sky. This can create some trouble with reflective surfaces ( like windows and water).
Since all reflective surfaces need something to reflect, we need to provide it.
A light source is not enough. Another backdrop can work, but a textured sky will always work.
No sky texture:
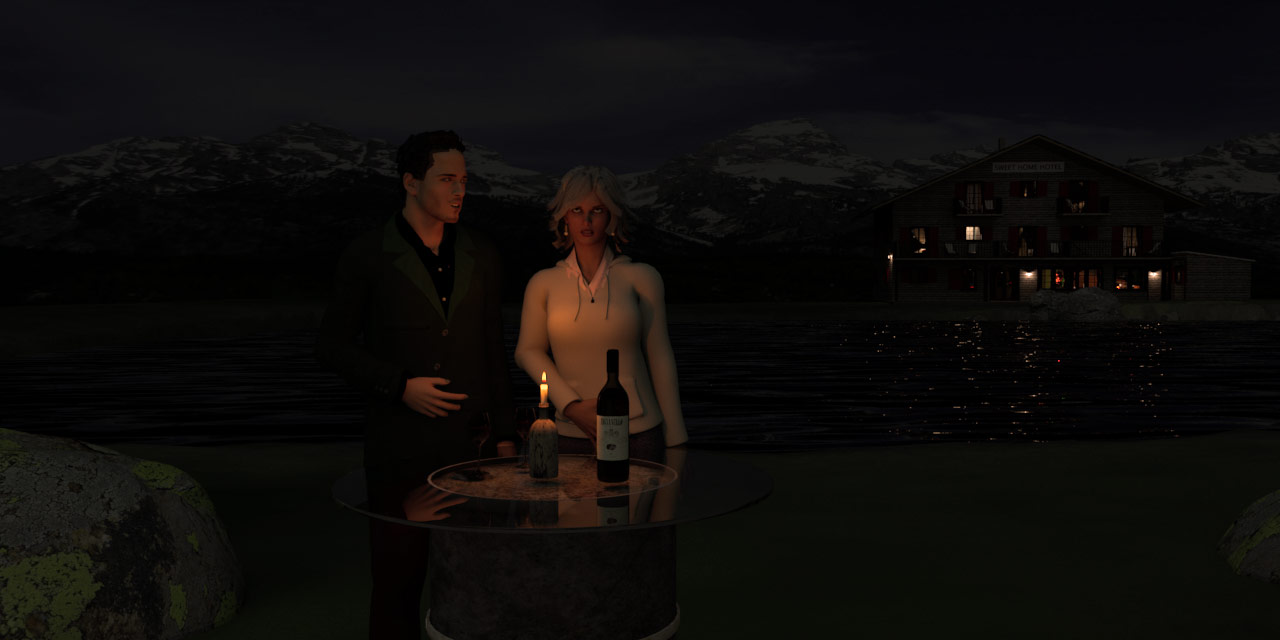
Blue sky with clouds:
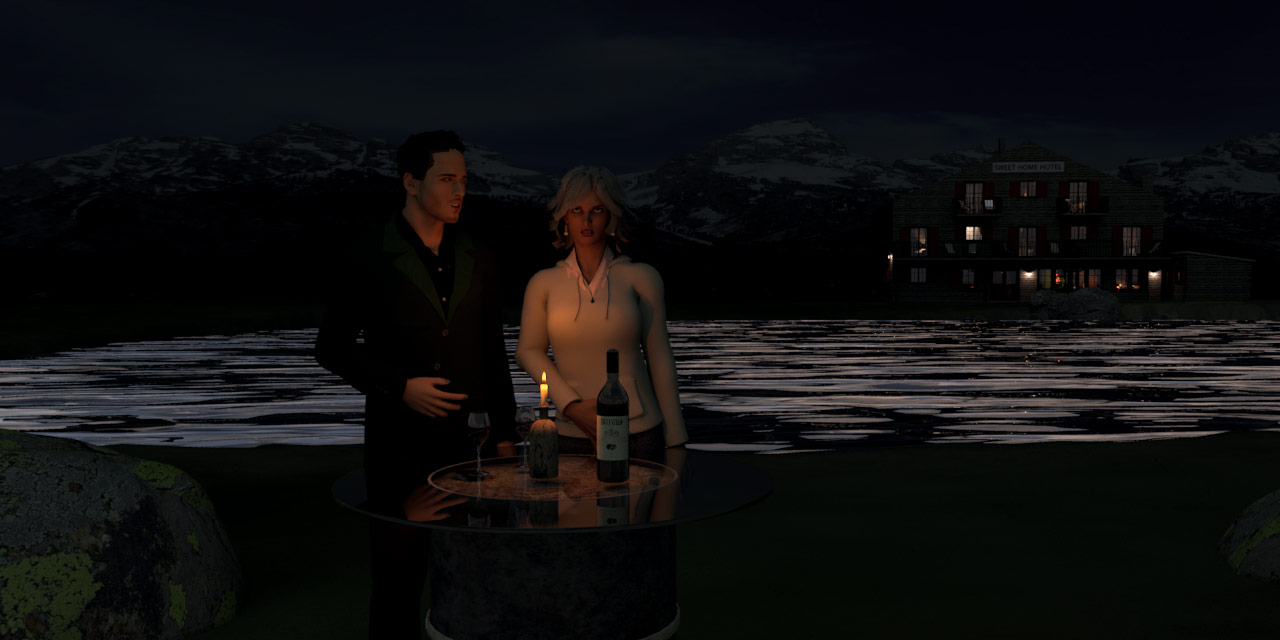
Using backdrops can give us several advantages on condition that we are willing to put some work into it.
One advantage is that a backdrop will be affected by the way we light it.
The project file shows one example of how to blend a backdrop with the rest of the scene.
This is the image you get when rendering the project file as it comes:
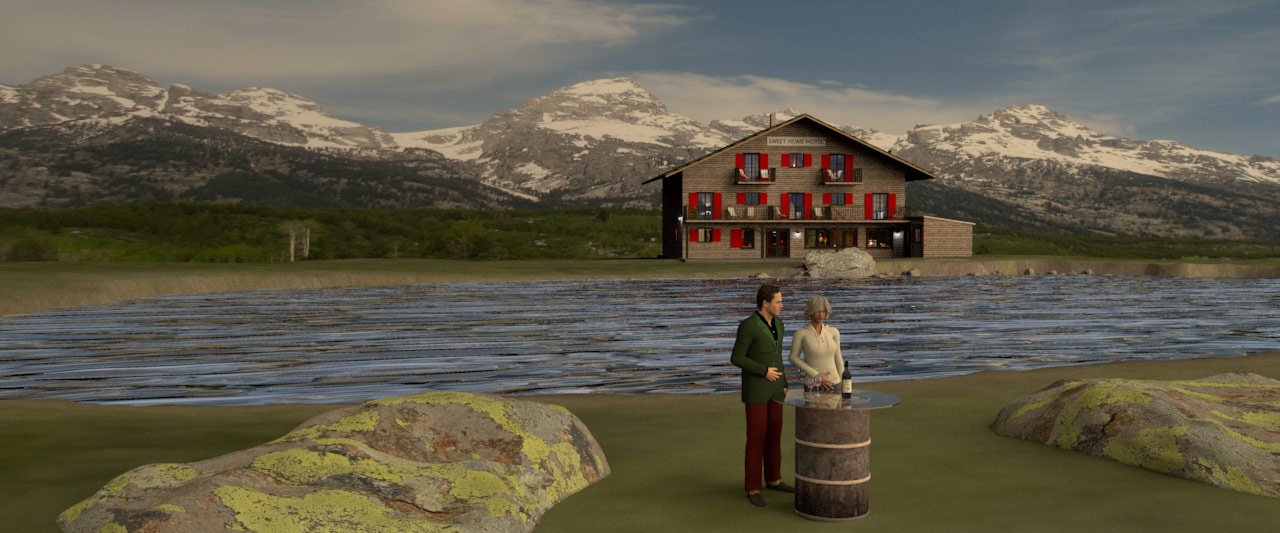
Changing the colours of the panel lights can create different ambiences.
Using white lights:

Using low intensity lights:

Of course a general tint can be applied in post production. There are hundreds of free luts that can be downloaded, and many of them can create amazing results.
Myself I find using Enkonyito’s panel lights to be a much more controllable and better solution.
Another advantage worth mentioning is that a backdrop is resizable so we can avoid loss of quality with lower FoW-settings.
Example: Resized backdrop for a closer view ( FoW=25 ):
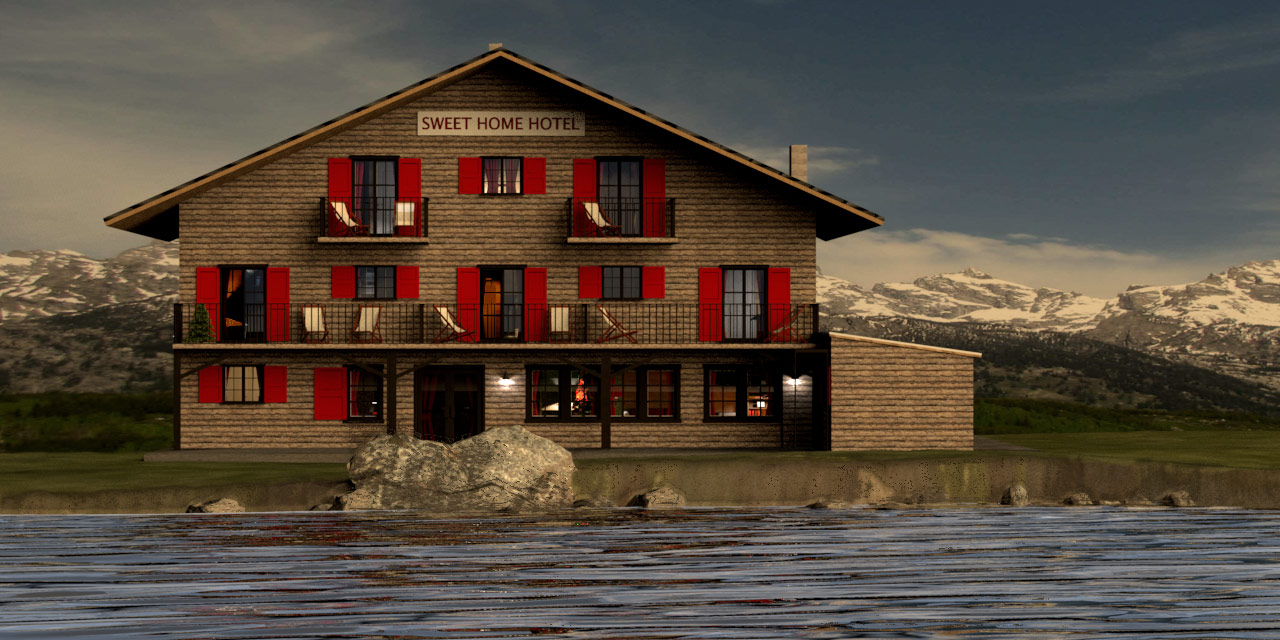
Interiors
These interior shots will show the purpose of making a backdrop group.
The Breakfast room.

The backdrop is moved and resized to be visible from both windows. (The best presentation of a room is a diagonal view.)
I’m using a combination of panel lights and sunlight ( 15:00 )
I have added some panel lights outside the windows. Intensity 50%. Default colour.
I have reduced the intensity of the pendant lamps to 5%.
Added a panel light at 270 degrees. Elevation 130 cm. Intensity 8%. Default colour.
Added a panel light at 90 degrees. Elevation 160 cm. Intensity 2%. Default colour.
Both panel lights are covering about 70 % of the floor surface and placed in the middle of the room.
I probably should have reduced the shininess of the pendant lamps to 0 in order to avoid the outline that draws attention to the low resolution.
Small lounge outside room 4, 1st floor.
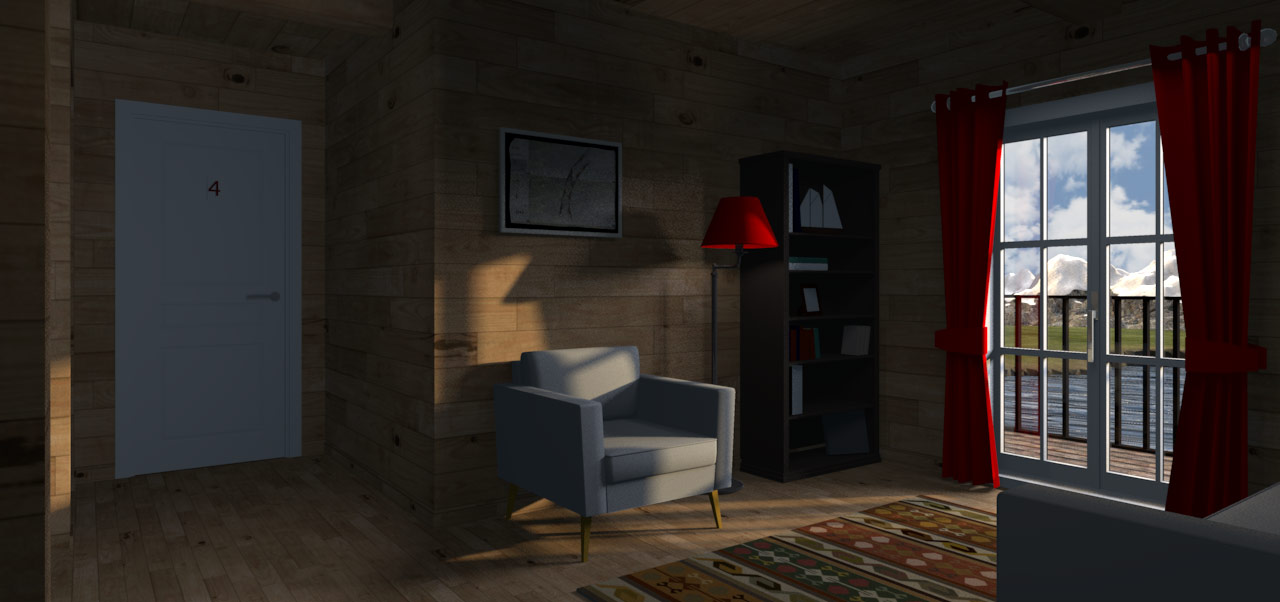
Removed the shininess from the filled bookshelf, and coloured it with a slightly darker colour to create a contrast to the walls.
Added a panel light at 270 degrees. Elevation 230 cm. Intensity 8%. Default colour.
Added a panel light outside the balcony door. 50% intensity. Default colour.
Sunlight 15:00.
(Forgot to remove shininess from the curtain rod.)
The attic room
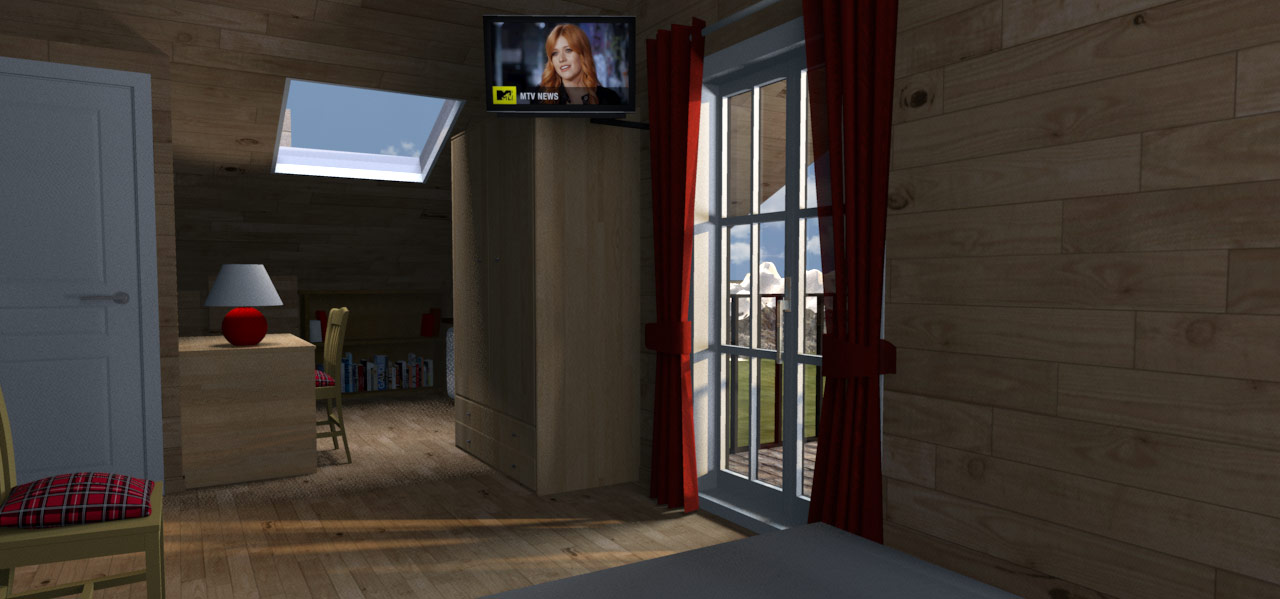
Added an image to the TV.
Added a slightly transparent (opacity 90%) red fabric texture to the curtains.
Placed an overhead light panel at 90 degrees 50 meters above the window. 50% intensity. Default colour.
Placed a panel light outside the balcony door. 50% intensity. Default colour.
Sunlight 15:00.
Owners flat
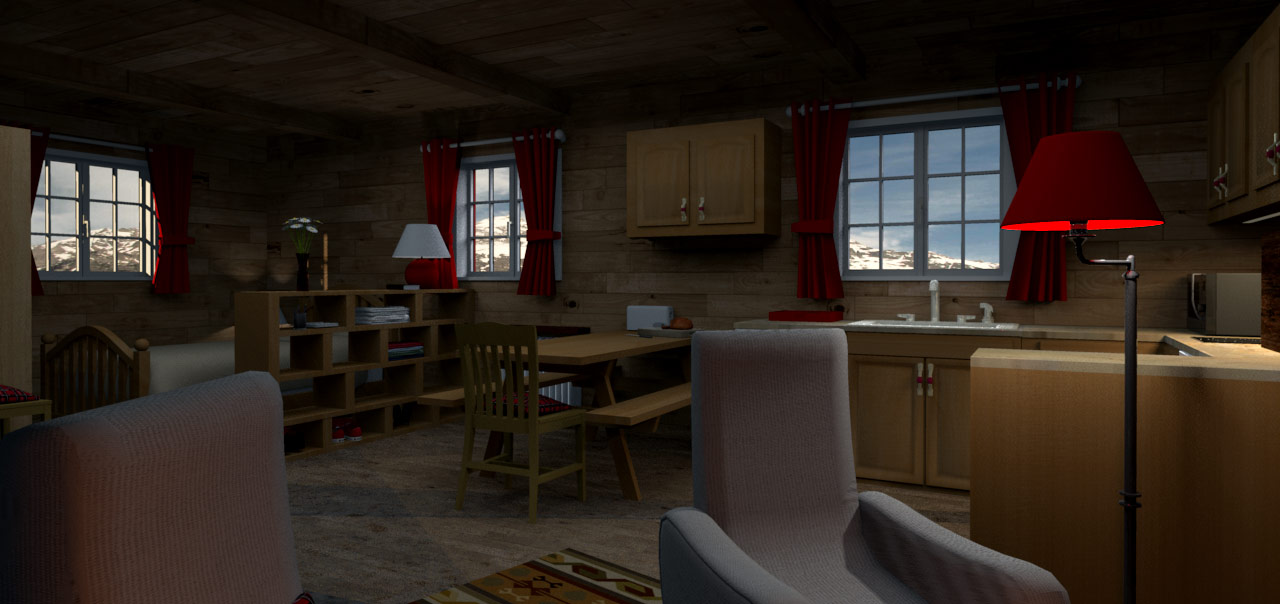
Added a panel light under the upper cabinets.
Added a panel light at 270 degrees. Elevation 130 cm. Intensity 8%. Default colour.
Added a panel light at 90 degrees. Elevation 160 cm. Intensity 2%. Default colour.
Added some panel lights outside the windows. Intensity 50%. Default colour.
Owners flat – different angle.
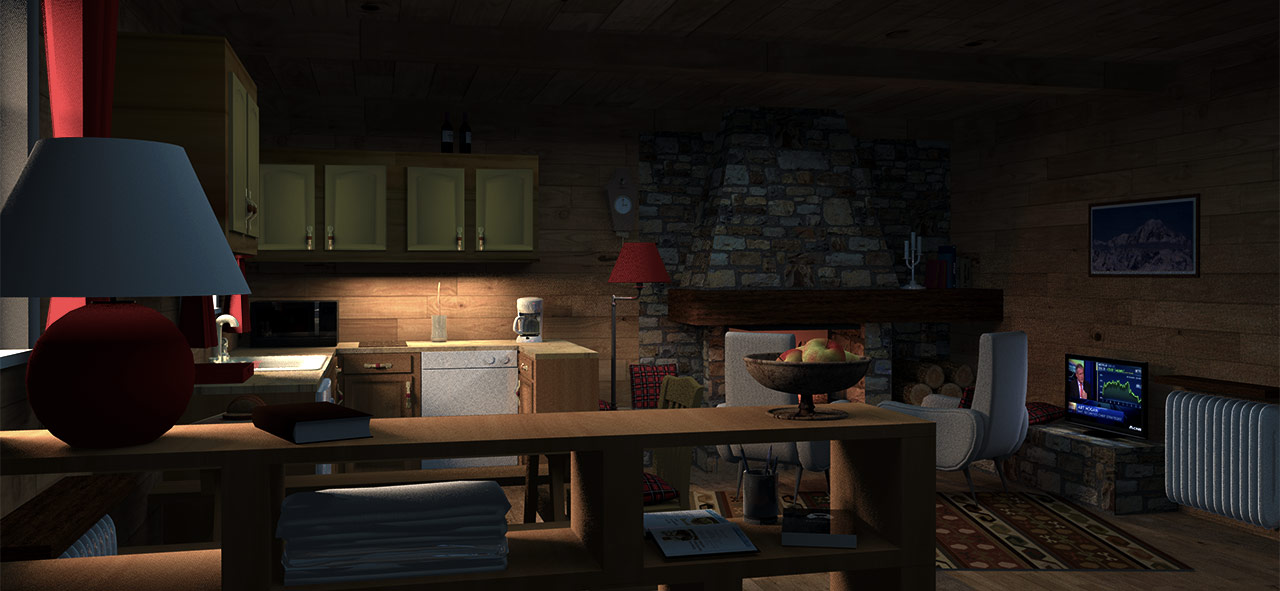
In the addition to the above, I added an image to the TV.
Added some apples and things…
Reception.
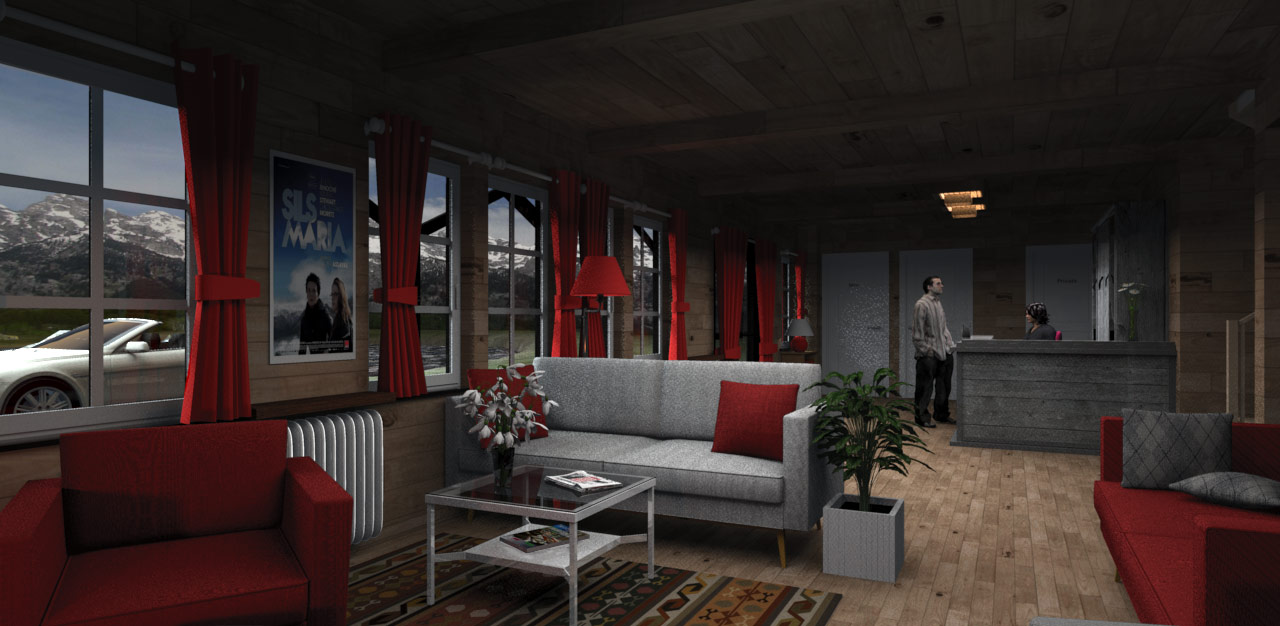
Added texture to the sofas and the armchair.
Added a table, some flowers, a magazine and a newspaper.
Added a poster.
Added some light over the counter, and placed some people there.
Added a panel light at 270 degrees. Elevation 130 cm. Intensity 8%. Default colour.
Added a panel light at 90 degrees. Elevation 160 cm. Intensity 2%. Default colour.
Added panel lights outside the window.
Placed a BMW cabriolet outside.
Forgot to fix the shininess on the doors.
Cec
________
Unfortunately I made a group of the Alps Hotel in order to tidy up my objects list.
Too late I became aware that making a group places all furniture on the ground level.
So in this project file all furniture belonging to the 1st floor, the 2nd floor and the Attic, are elevated from the Ground Floor level rather than placed on their original levels.
This makes the Alps Hotel rather tricky to edit.
Subsequently the original levels that came with the Alps Hotel demo file are no longer used by the Alps Hotel, but they are used by me to make modifications and lighting for my interior shots.
I have elevated all original levels by 160 cm in order to place the Alps hotel on top of my backdrop-demo-terrain.
_
How to use backdrops as part of creating a nice scenery is explained in THIS THREAD
Using backdrops can be tricky.
Quite often I see backdrops that stand out as… well; backdrops.
Since Enkonyito introduced panel lights, I have used backdrops on a lot of my published images.
During this period, I have been trying to figure out how to make the backdrops blend in and become part of the scenery.
In this post I will share some of my findings.
II have used the Alps Hotel (Sweethome Demo Example 13) for this project. The Alps Hotel can be found HERE.
In my opinion, the Alps Hotel is visually very nice, very detailed, and very well suited for creating a surrounding scenery.
Note:
For my use, the default light source settings at 50% intensity is way too bright.
So for my interior shots of the Alps Hotel, I have reduced the intensity of every light source I could find to 5%.
This has allowed me to create interior ambiences with panel lights.
My project file can be downloaded HERE.
I have included my project file in case anyone should be interested in taking a look at how I work with backdrops and lighting.
This download does not include any modifications I have made to the interior.
Textured sky vs. backdrop
The most obvious disadvantage with using a textured sky, is that it will always be rendered as it is, affected by neither our light sources, nor the time of day.
This means that the scene itself will have to be colour-matched to blend in with the sky.
Example of sky texture:
@ FoW = 63.
Another disadvantage with using textured skies is that when zooming in to a lower Field of View, the quality of a sky texture is reduced.
Here is a shot @ FoW = 25.
Good backdrops can be difficult to find.
Images will always have shadows that indicates the direction and angle of the sun, which can be a problem.
Backdrops will normally cover only a small sector of the sky. This can create some trouble with reflective surfaces ( like windows and water).
Since all reflective surfaces need something to reflect, we need to provide it.
A light source is not enough. Another backdrop can work, but a textured sky will always work.
No sky texture:
Blue sky with clouds:
Using backdrops can give us several advantages on condition that we are willing to put some work into it.
One advantage is that a backdrop will be affected by the way we light it.
The project file shows one example of how to blend a backdrop with the rest of the scene.
This is the image you get when rendering the project file as it comes:
Changing the colours of the panel lights can create different ambiences.
Using white lights:
Using low intensity lights:
Of course a general tint can be applied in post production. There are hundreds of free luts that can be downloaded, and many of them can create amazing results.
Myself I find using Enkonyito’s panel lights to be a much more controllable and better solution.
Another advantage worth mentioning is that a backdrop is resizable so we can avoid loss of quality with lower FoW-settings.
Example: Resized backdrop for a closer view ( FoW=25 ):
Interiors
These interior shots will show the purpose of making a backdrop group.
The Breakfast room.
The backdrop is moved and resized to be visible from both windows. (The best presentation of a room is a diagonal view.)
I’m using a combination of panel lights and sunlight ( 15:00 )
I have added some panel lights outside the windows. Intensity 50%. Default colour.
I have reduced the intensity of the pendant lamps to 5%.
Added a panel light at 270 degrees. Elevation 130 cm. Intensity 8%. Default colour.
Added a panel light at 90 degrees. Elevation 160 cm. Intensity 2%. Default colour.
Both panel lights are covering about 70 % of the floor surface and placed in the middle of the room.
I probably should have reduced the shininess of the pendant lamps to 0 in order to avoid the outline that draws attention to the low resolution.
Small lounge outside room 4, 1st floor.
Removed the shininess from the filled bookshelf, and coloured it with a slightly darker colour to create a contrast to the walls.
Added a panel light at 270 degrees. Elevation 230 cm. Intensity 8%. Default colour.
Added a panel light outside the balcony door. 50% intensity. Default colour.
Sunlight 15:00.
(Forgot to remove shininess from the curtain rod.)
The attic room
Added an image to the TV.
Added a slightly transparent (opacity 90%) red fabric texture to the curtains.
Placed an overhead light panel at 90 degrees 50 meters above the window. 50% intensity. Default colour.
Placed a panel light outside the balcony door. 50% intensity. Default colour.
Sunlight 15:00.
Owners flat
Added a panel light under the upper cabinets.
Added a panel light at 270 degrees. Elevation 130 cm. Intensity 8%. Default colour.
Added a panel light at 90 degrees. Elevation 160 cm. Intensity 2%. Default colour.
Added some panel lights outside the windows. Intensity 50%. Default colour.
Owners flat – different angle.
In the addition to the above, I added an image to the TV.
Added some apples and things…
Reception.
Added texture to the sofas and the armchair.
Added a table, some flowers, a magazine and a newspaper.
Added a poster.
Added some light over the counter, and placed some people there.
Added a panel light at 270 degrees. Elevation 130 cm. Intensity 8%. Default colour.
Added a panel light at 90 degrees. Elevation 160 cm. Intensity 2%. Default colour.
Added panel lights outside the window.
Placed a BMW cabriolet outside.
Forgot to fix the shininess on the doors.
Cec
________
Unfortunately I made a group of the Alps Hotel in order to tidy up my objects list.
Too late I became aware that making a group places all furniture on the ground level.
So in this project file all furniture belonging to the 1st floor, the 2nd floor and the Attic, are elevated from the Ground Floor level rather than placed on their original levels.
This makes the Alps Hotel rather tricky to edit.
Subsequently the original levels that came with the Alps Hotel demo file are no longer used by the Alps Hotel, but they are used by me to make modifications and lighting for my interior shots.
I have elevated all original levels by 160 cm in order to place the Alps hotel on top of my backdrop-demo-terrain.
_
Re: Light & textures - rendering examples of this and that.
Guess what? I absolutely love these pictures, Cecilia!
Who is online
Users browsing this forum: No registered users and 1 guest