1. Is there a way to edit one's own posts?
2. I just realized that I can get one of the blue lines with the help of pythagoras. Still thunking about the rest.
Generate roof plugin
This topic has been viewed 2463537 times and has 338 replies

Re: Generate roof plugin
What I described in your "measure in aerial view" topic included the side wall you already have (with the horizontal top). If you follow what I described you get the wall that is missing including the partial wall that is already there.
Of course you could also calculate just the top part but it's easier with texturing when you have a single object for the full side wall.
Another tip for that: Start with a shape as close as possible to what you need. Place it under the roof and determine where the shape needs to change. Then adjust the points.
Of course you could also calculate just the top part but it's easier with texturing when you have a single object for the full side wall.
Another tip for that: Start with a shape as close as possible to what you need. Place it under the roof and determine where the shape needs to change. Then adjust the points.
Dodecagon.nl
1300+ 3D models, manuals, and projects
1300+ 3D models, manuals, and projects
Re: Generate roof plugin
Hi
I kind of got it to work, but I relied on an approximation first, as suggested by dorin. This is okay, but actually I wanted to solve it with math in order to always be able to reproduce it. But in the end I took the existing wall and tried different heights and depths in order to see where it intersects with the big roof. And then I had the points for the 3d shape generation. I feel a little bad for not being able to solve this with pure calculation though
I kind of got it to work, but I relied on an approximation first, as suggested by dorin. This is okay, but actually I wanted to solve it with math in order to always be able to reproduce it. But in the end I took the existing wall and tried different heights and depths in order to see where it intersects with the big roof. And then I had the points for the 3d shape generation. I feel a little bad for not being able to solve this with pure calculation though

Re: Generate roof plugin
@MartinH81
1.My last statement is referring to that: you make a hole for the window and then insert and set it,
in place to let the plugin to do this for you.
We (especially Daniels118) has worked hard few months to do this for users.
That's what I want to say on my last statement.
2. For more precise calculations you could read this post . I've pin it on my browser.
I've made this mini tutorial especially for Martin but also for the others in needs.
Intended to cover two problems:
1. How to make holes in roof for dormers.
2. To make holes in the dormers sides walls under the roof.
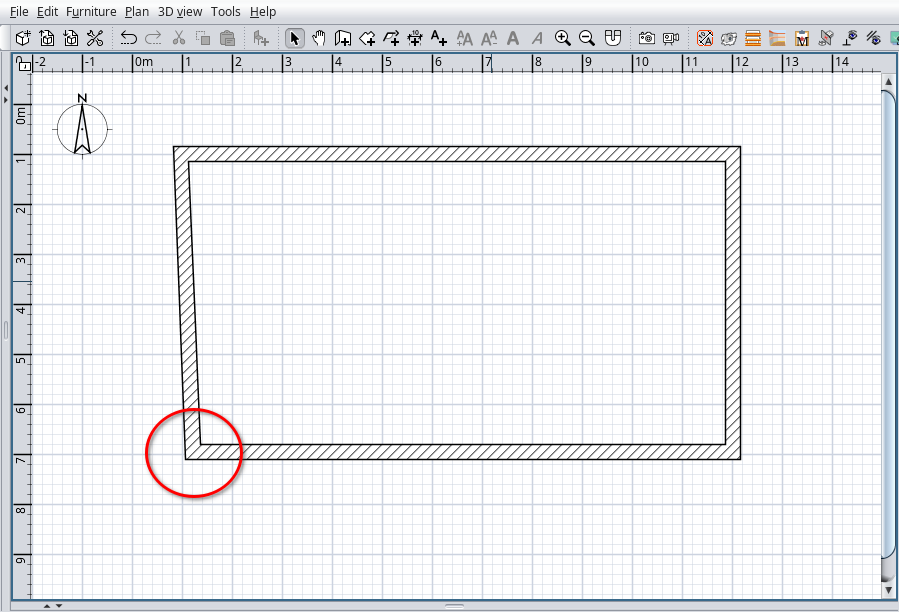
I've started to reproduce the Martin home including the non perpendicular walls.
[image 01]
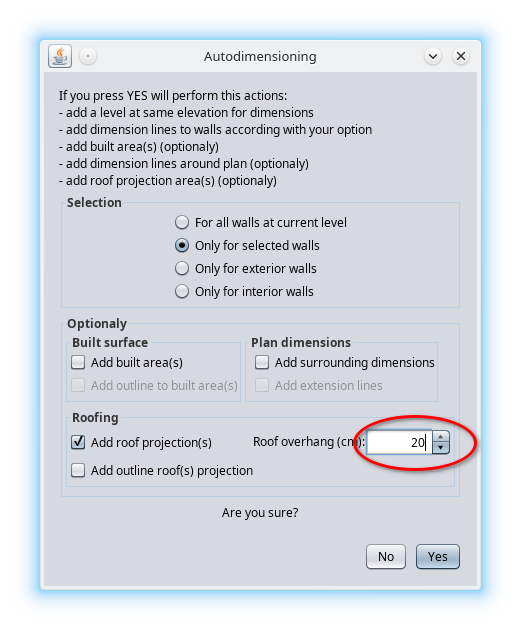
I've use AutoDimensioning to obtain a roof projection with 20cm overhang...
[image 02]
Resulting this
[image 03]
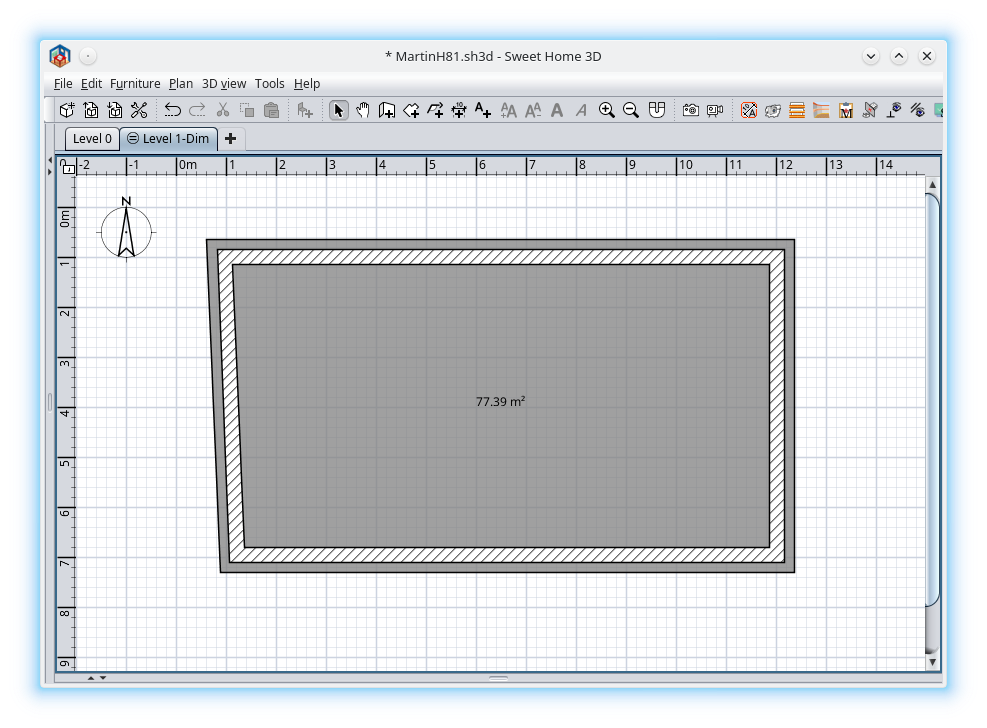
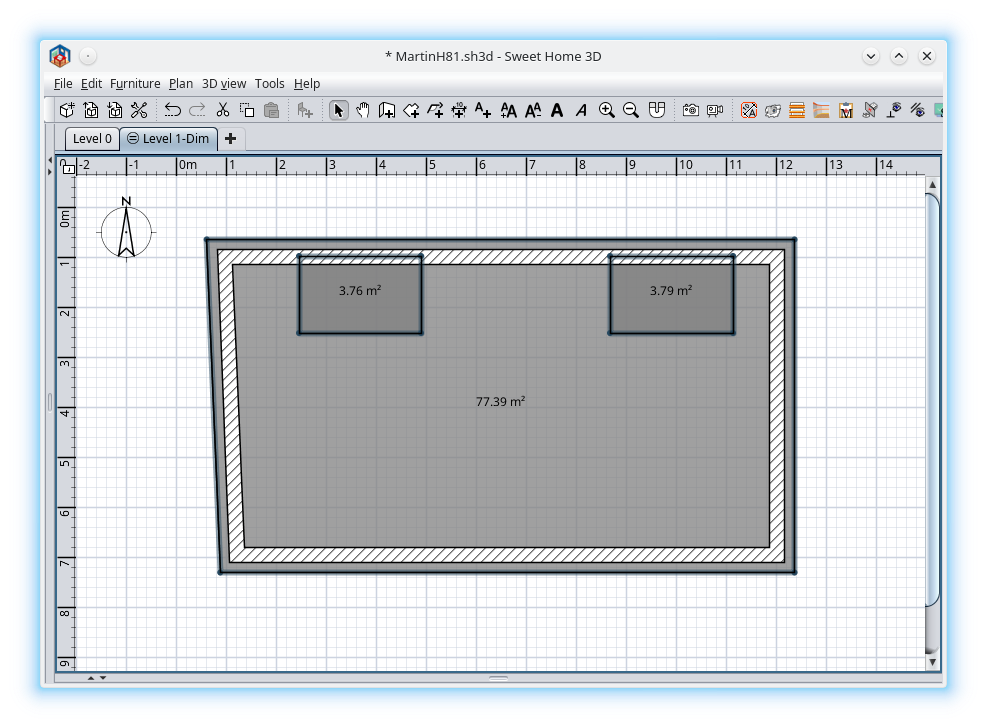
I've draw two rooms (perfect rectangle) representing the future holes for dormers.
Select all three and...
[image 04]
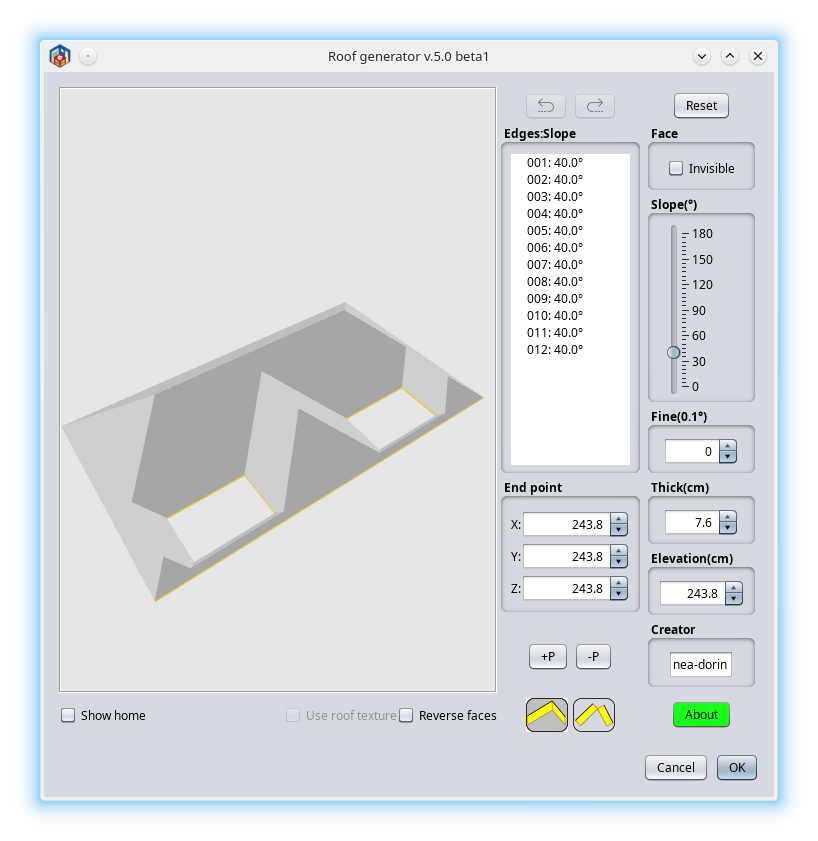
Generate roof... (something like this)
[image 05]
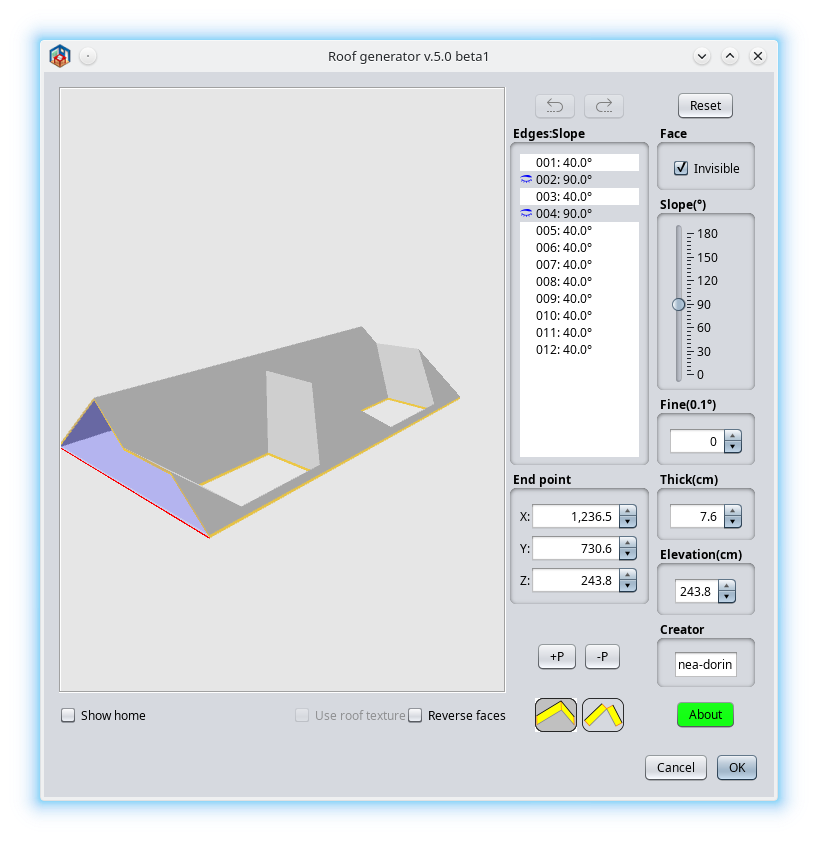
Made the two exterior faces at 90 deg and invisible...
[image 06]
Select ALL the faces around the holes...
[image 07]
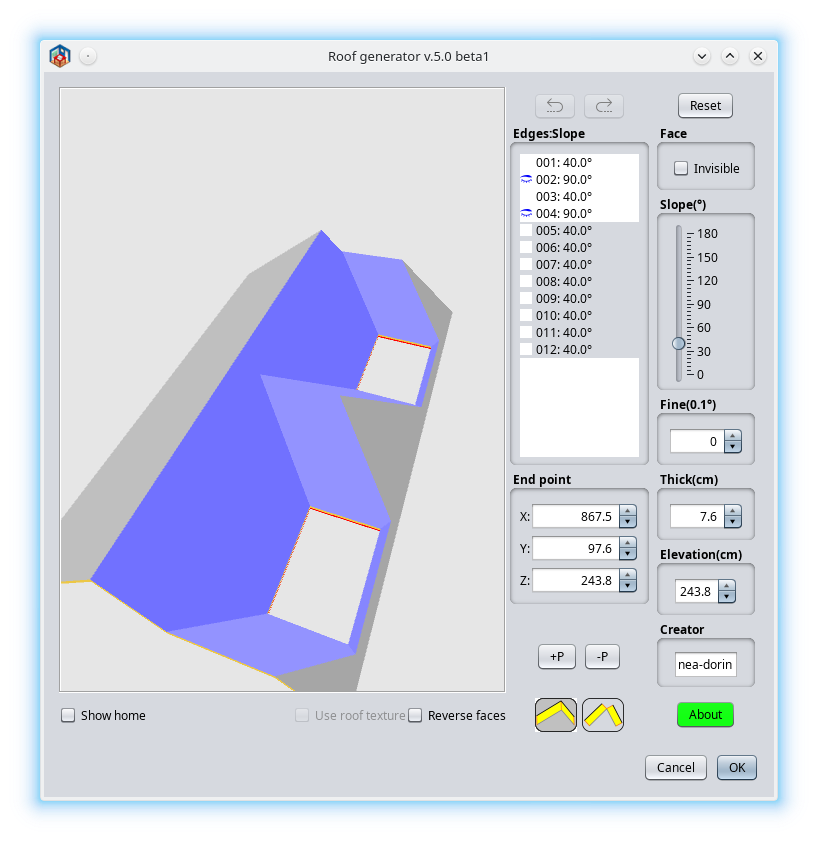
Set all at 90 deg...
And I've got this!?!?
[image 08]
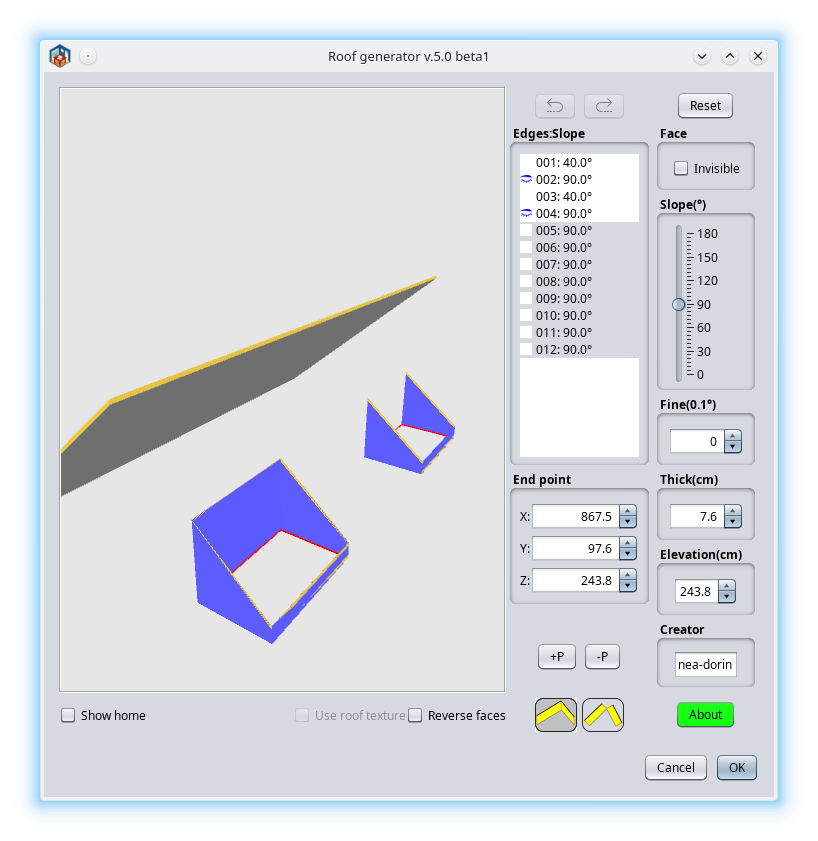
If your result is similar to this...
STOP continue! Click Cancel and...
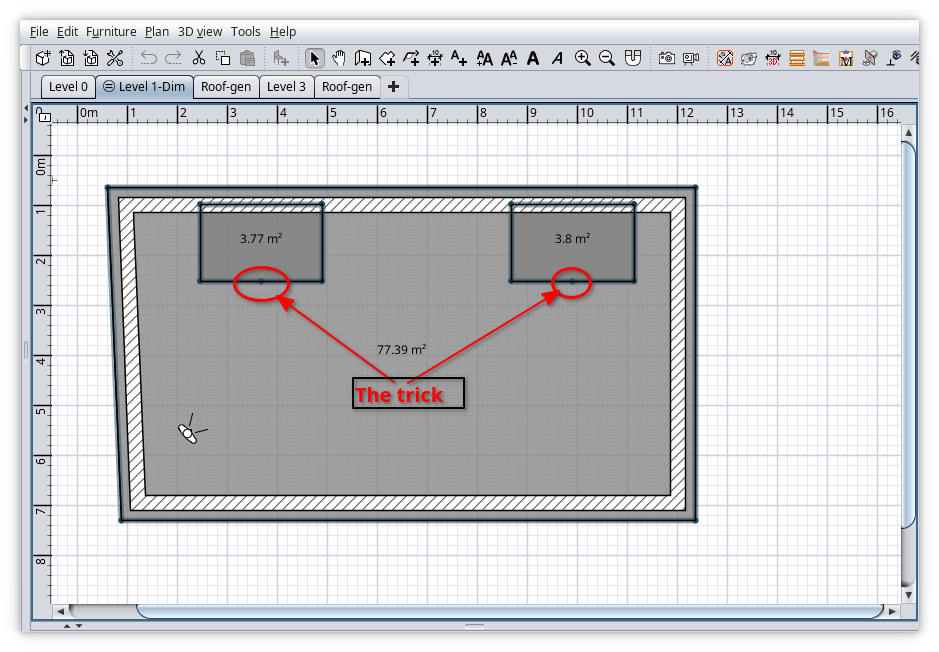
Go back to your holes rooms. You have to apply a small trick:
Select one of them and insert an extra point on the side pointed to the middle of the roof.
[image 09-0]
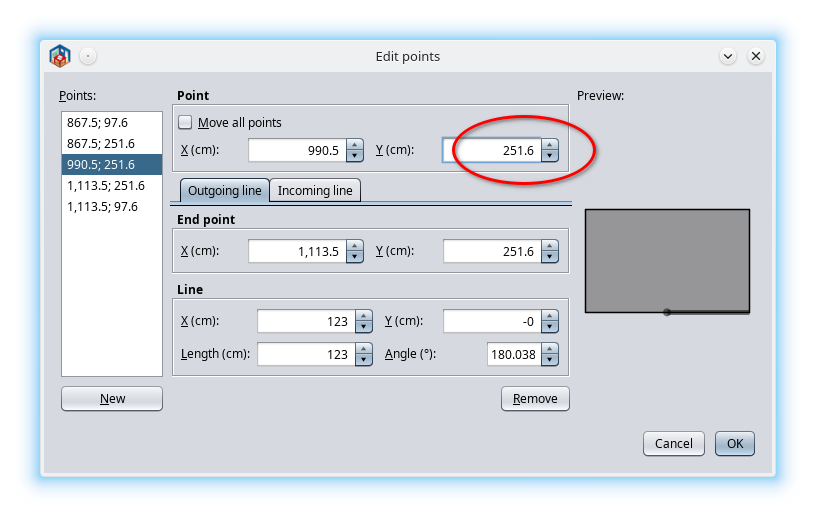
Modify a little this point (in my case with 1 cm) to not be aligned with the previews and the next point.
[image 09-1]
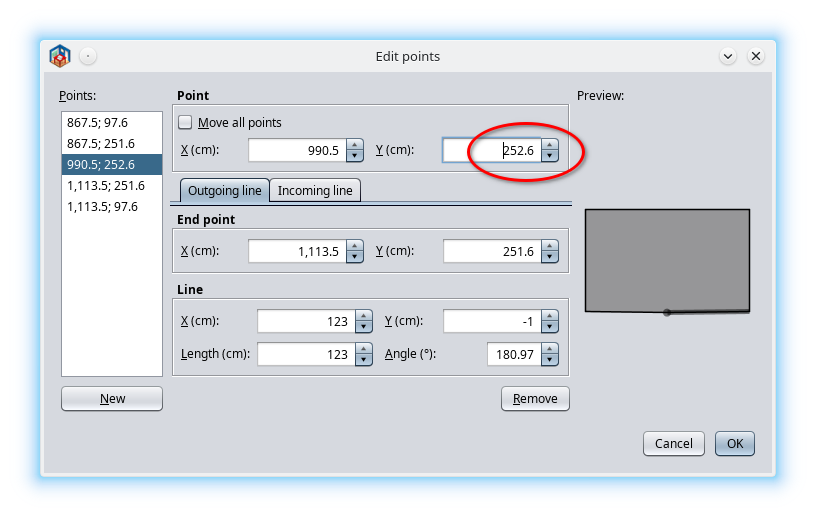
Do the same with other hole (room)
Select again all three rooms and...
[image 10]
Generate roof.
Verify from start to have 2 faces in place of only one at both holes at sides pointing to the roof middle.
If none or one has and the other doesn't you have to go back and increase the middle point(s) with another cm.
[image 11]
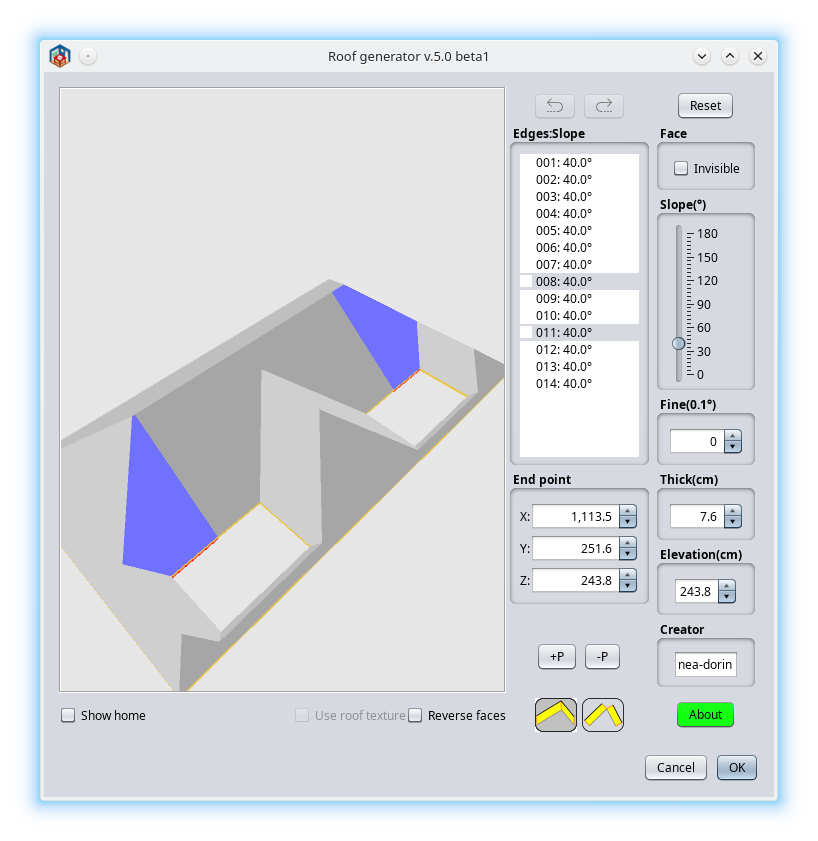
Now make the two exterior faces at 90 deg & invisible,
select all faces around the holes...
[image 12]
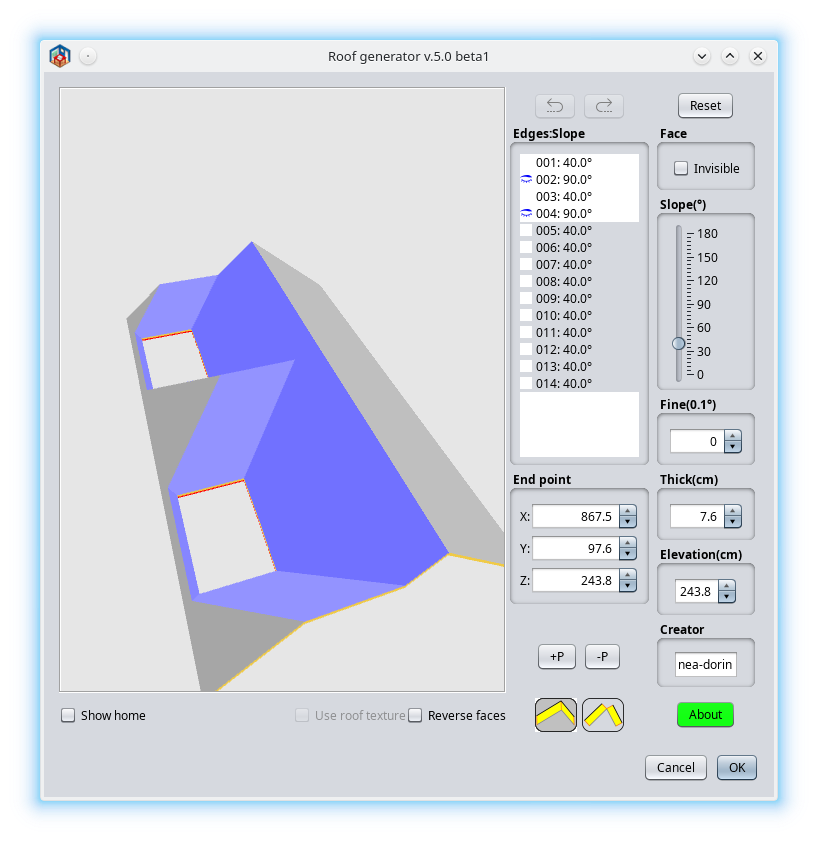
Make them also at 90 deg & invisible.
Looks different compared with the first attempt.
[image 13]
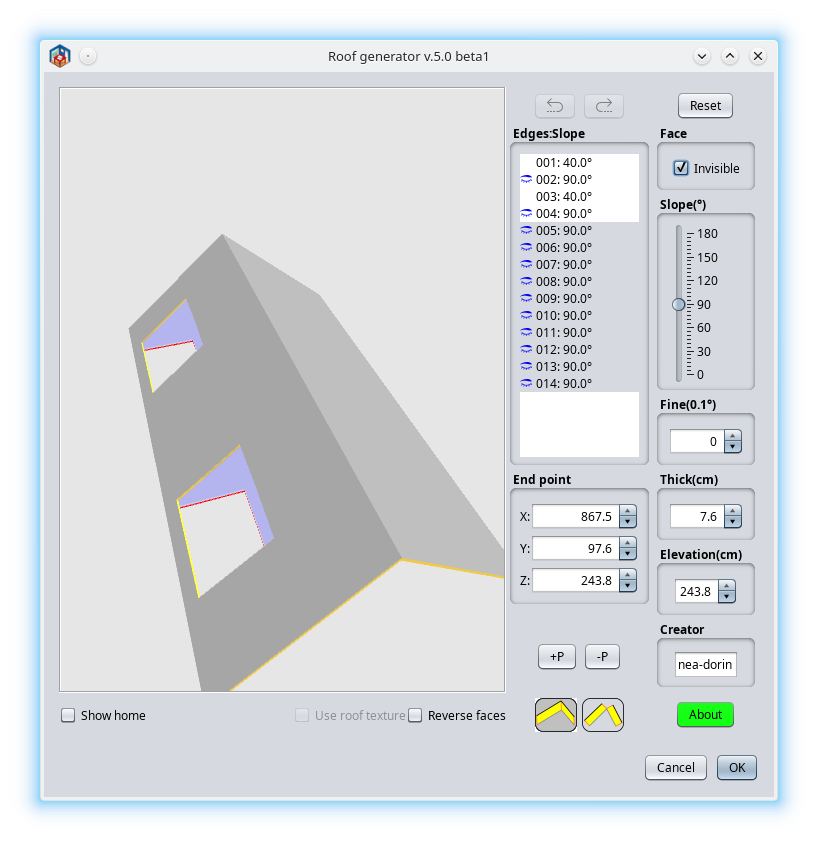
So, we could continue.
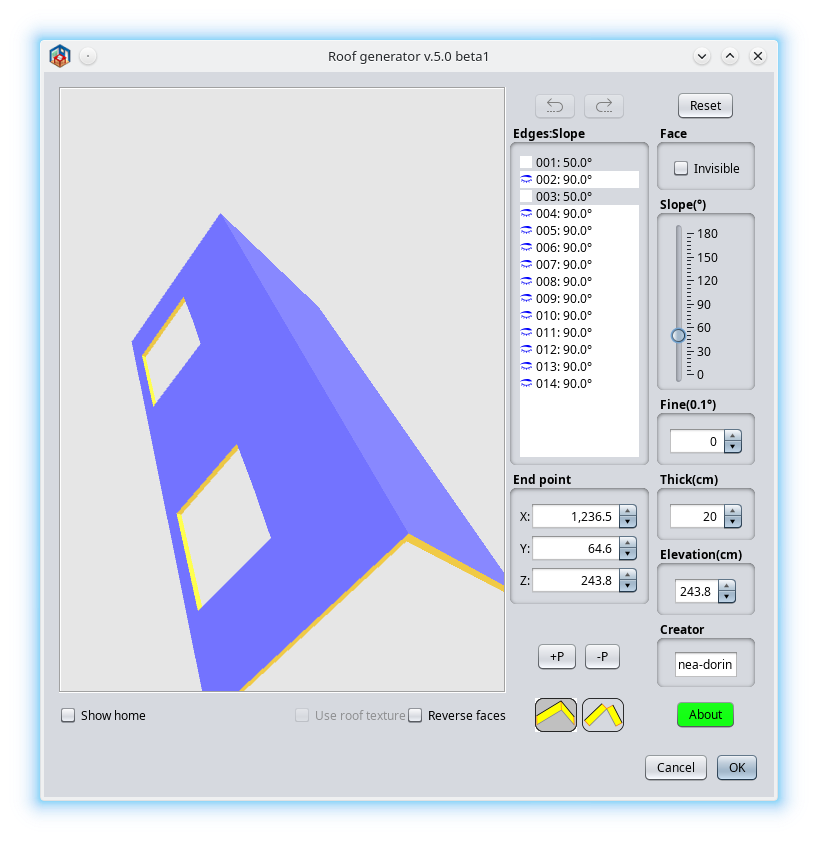
Select the two visible remaining faces and set it at 50 deg,
Set the thickness at 20cm...
[image 14]
Check Show home to see the walls and where is the roof.
It is a little bit too high.
[image 15]
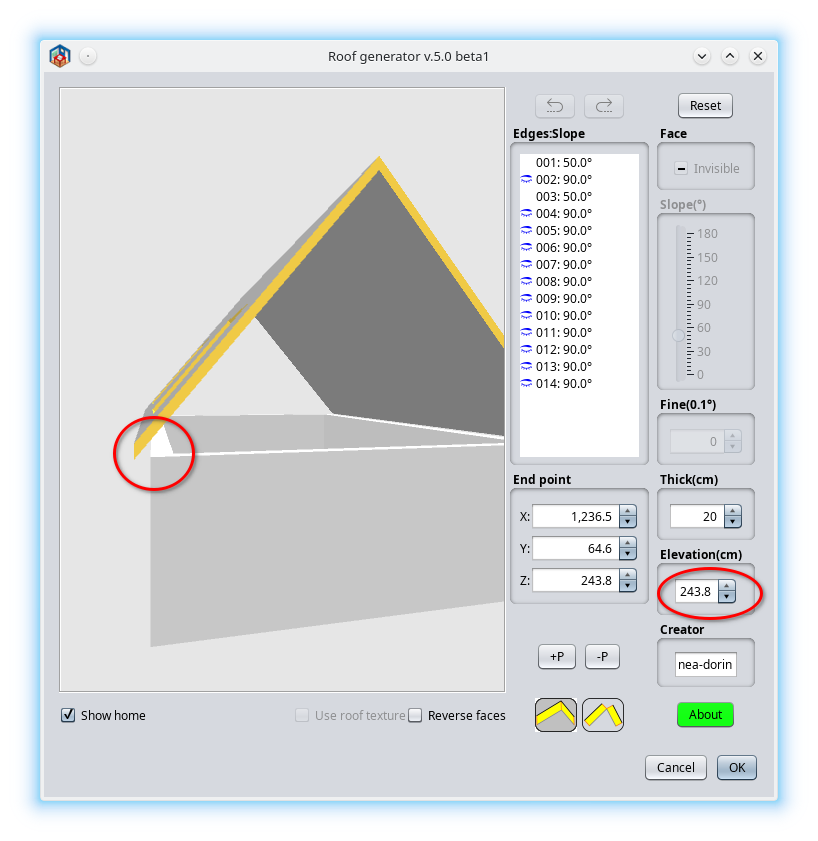
So, reduce the elevation.
[image 16]
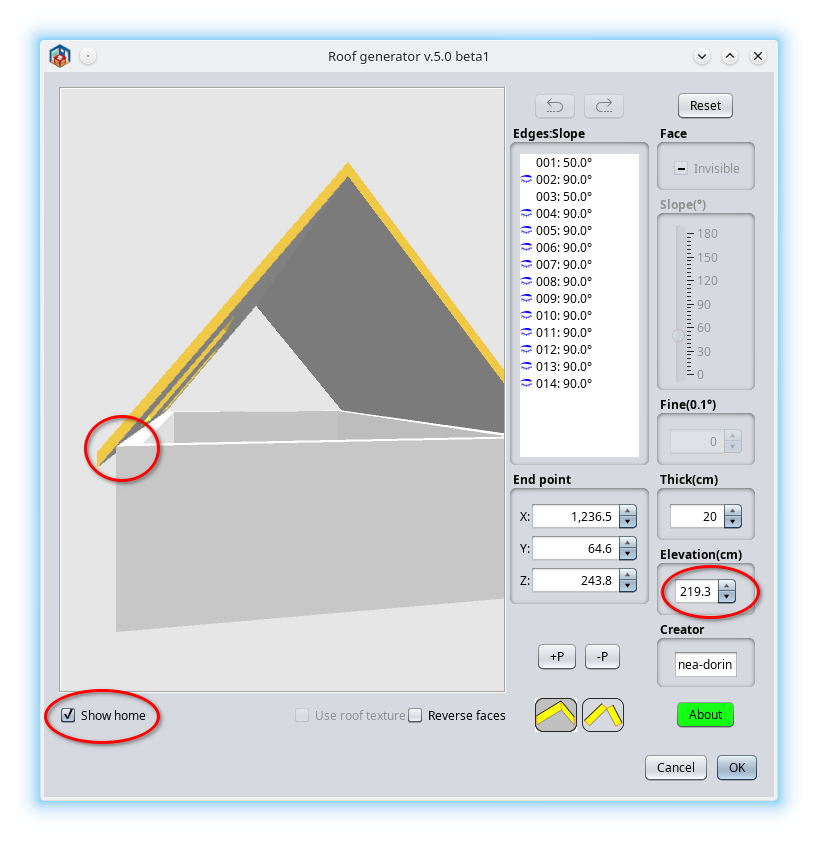
Click Ok and this is the roof.
[image 17]
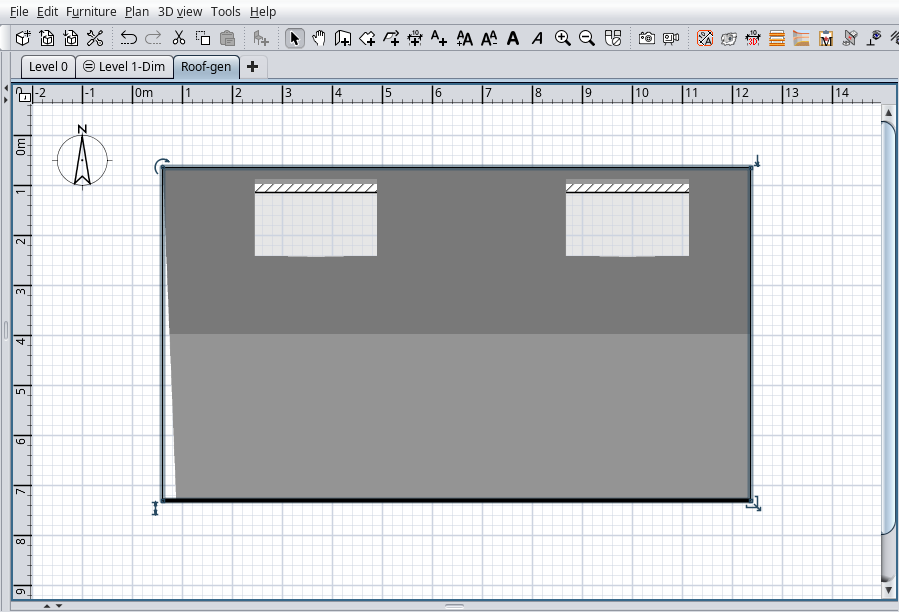
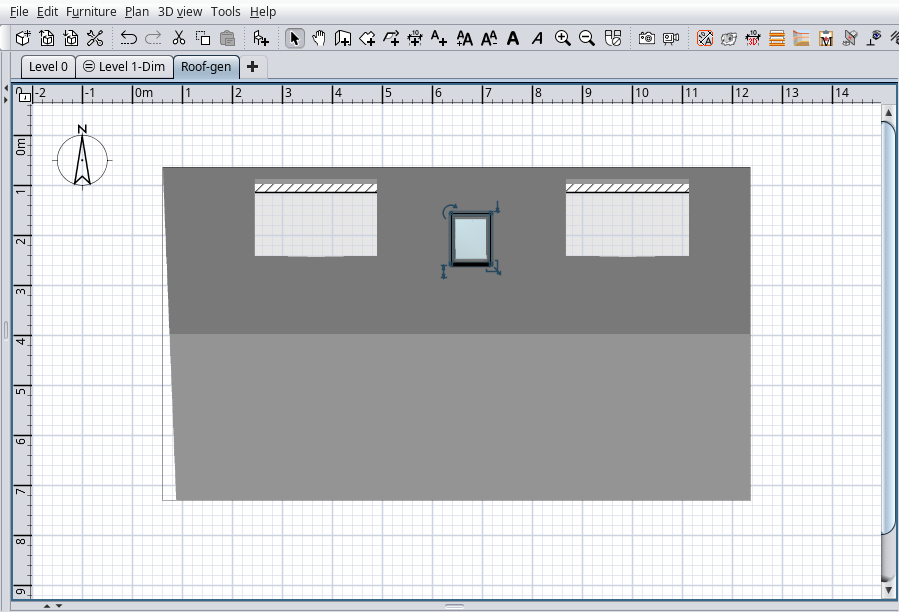
Drag&drop a roof window from the dedicated library.
In plan could look like this...
[image 18]
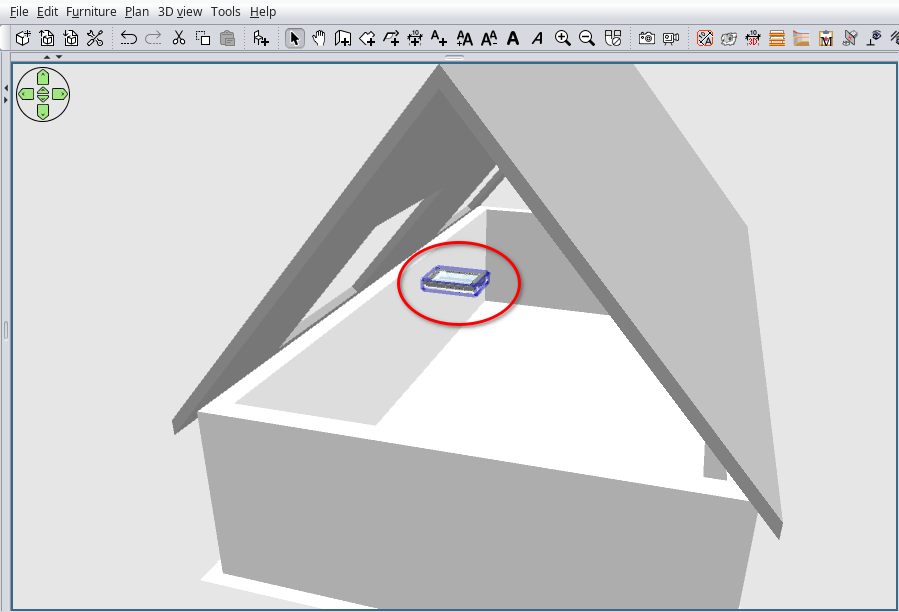
In 3D view like this. Don't worry, Let it as is.
[image 19]
Select the roof and Generate roof.
[image 20]
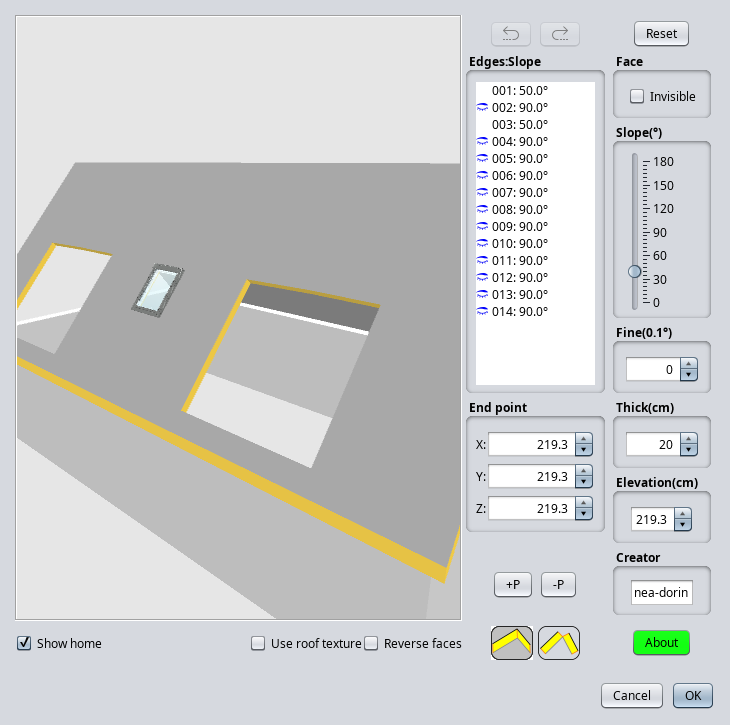
The plugin will make the necessary hole and will set the window(s) in the correct position.
Now, create a new Level 3 (NOT at same elevation)
go to Level 0, select and copy the walls and...
[image 21]
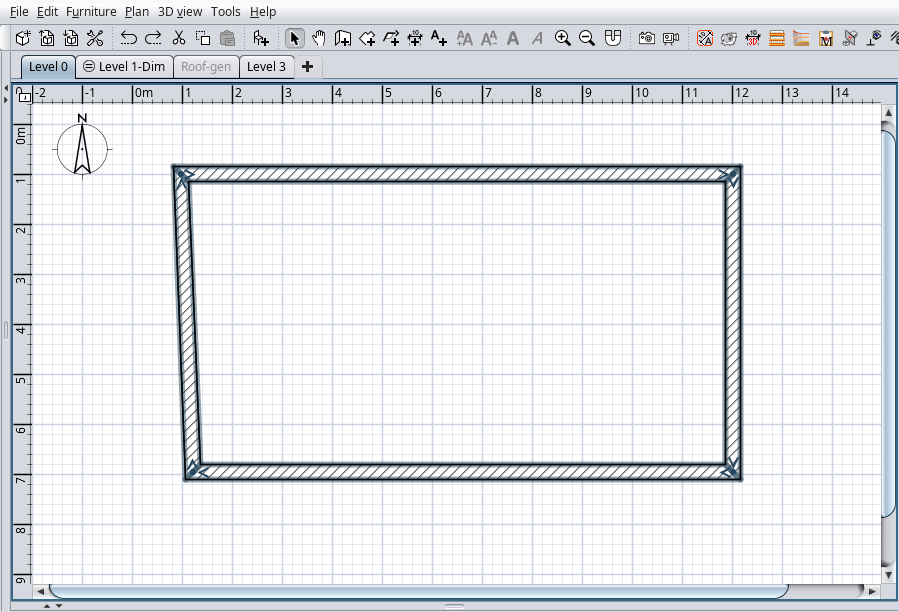
Paste the walls on Level 3,
generate a room inside than delete the upper and the lower walls as unnecessary.
[image 22]
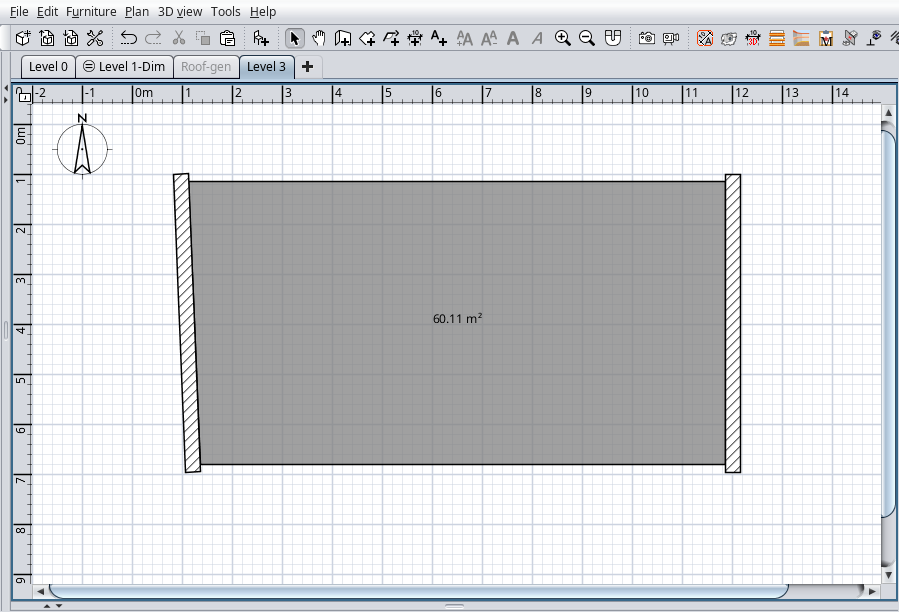
After coloring the room and uncheck the ceiling we have this. Too high.
[image 23]
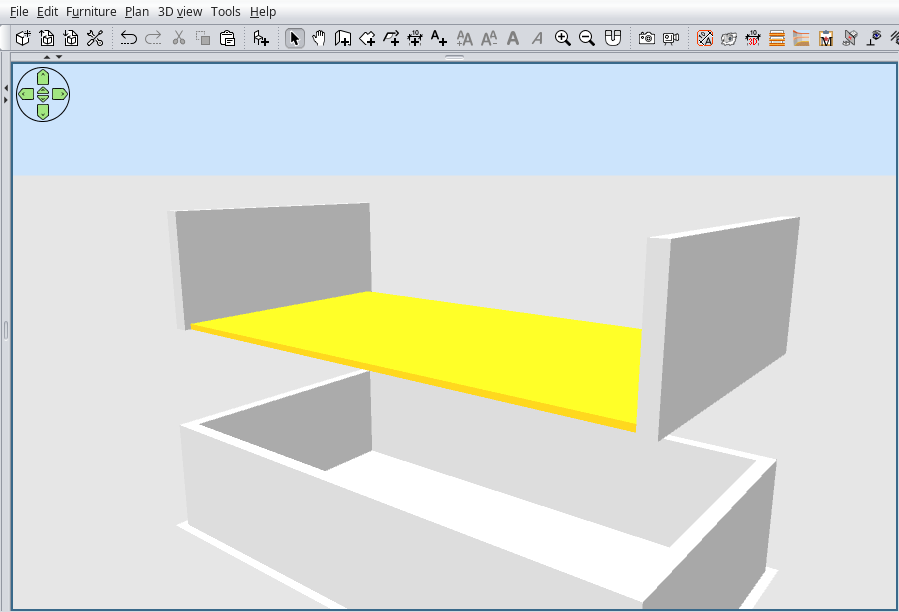
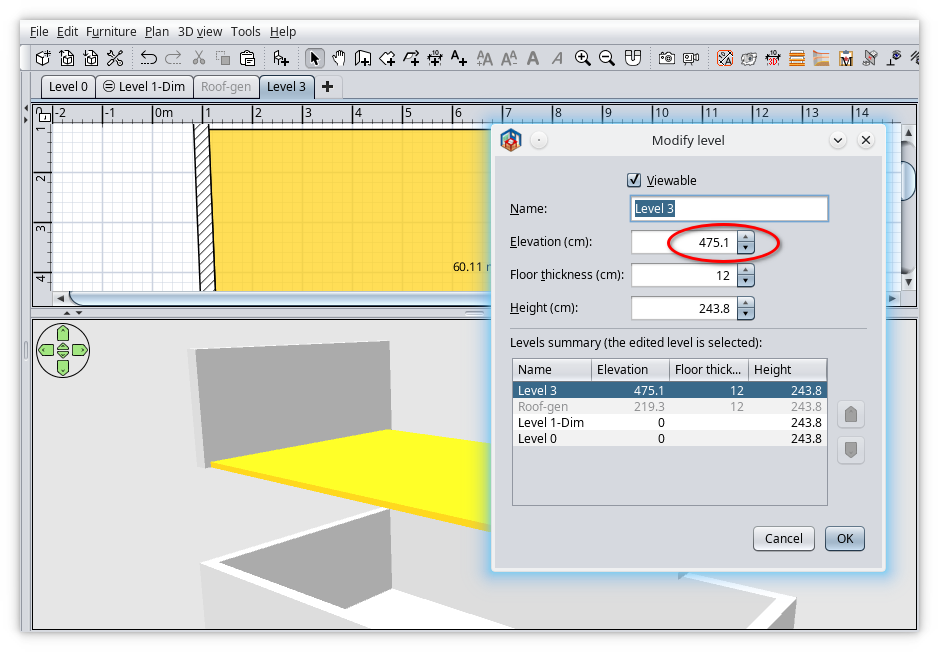
Select and modify Level 3. Look at their elevation.
[image 24]
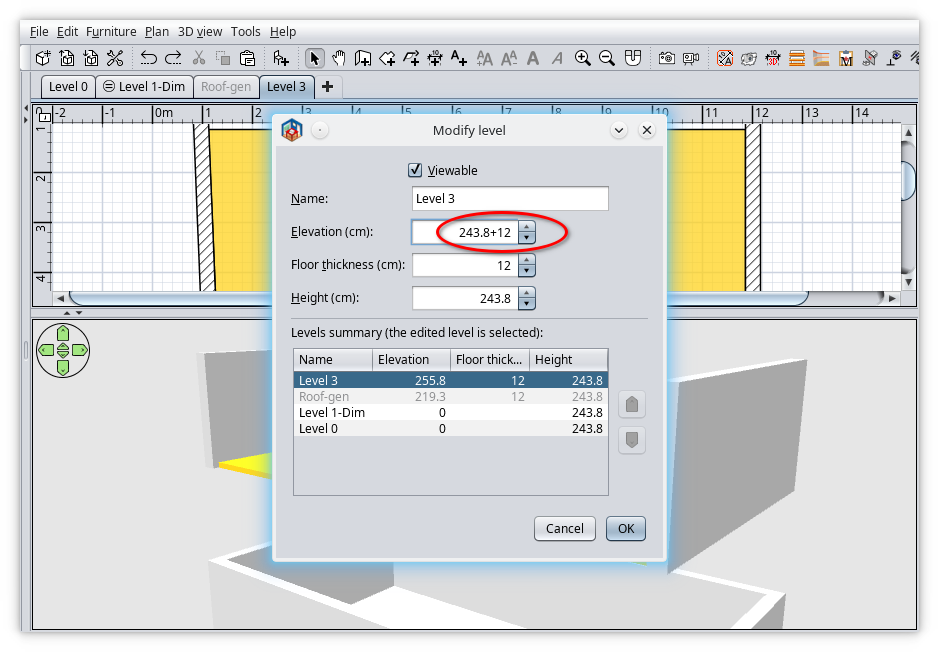
To adjust it let SH3D to perform the calculus (by the way, It's able to perform much complex calculations)
[image 25]
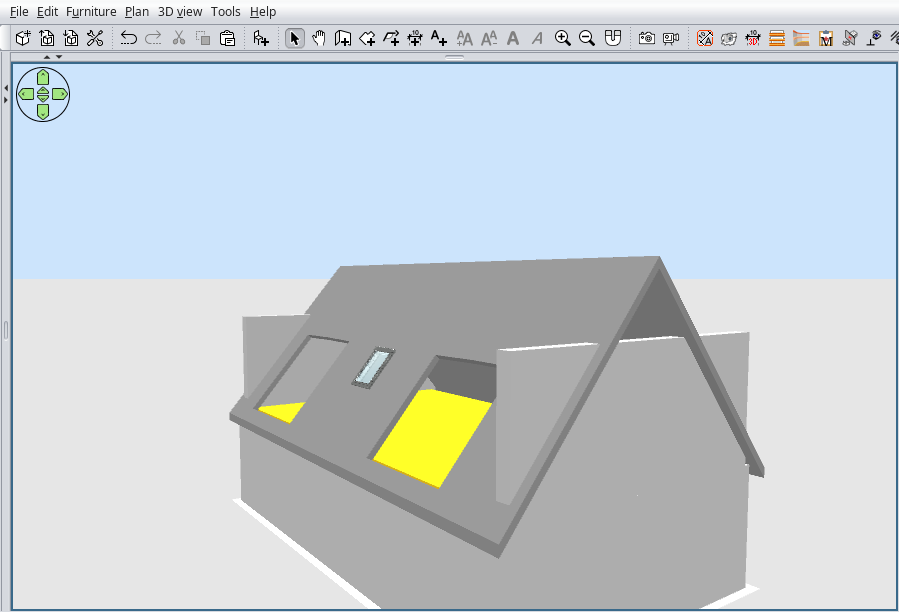
Now the Level 3 with walls it is at correct place.
We need to adjust the wall but we need some aids to not guess too much.
[image 26]
On Level 3 I've added two dimension lines set as elevation dimension and visible in 3D at an arbitrary length.
[image 27]
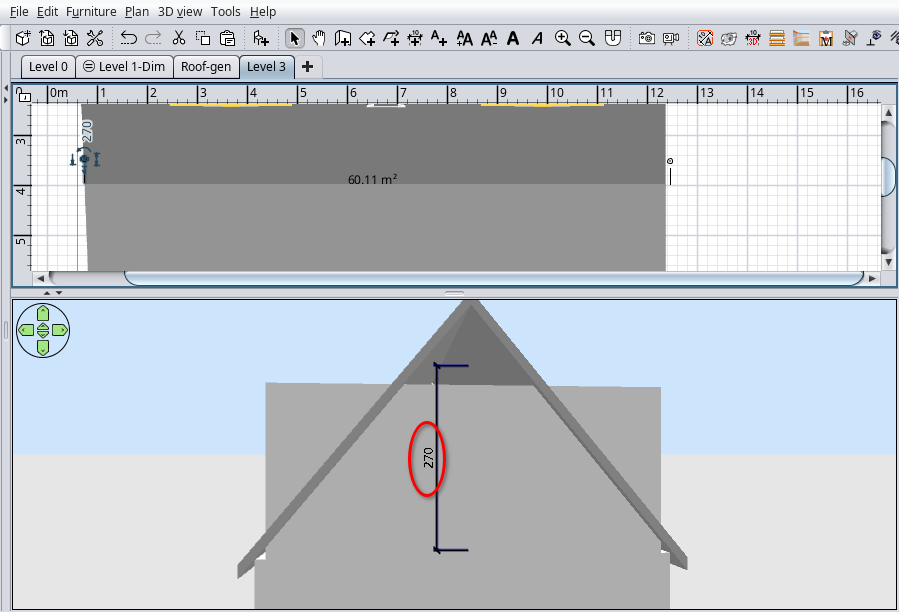
I've modify their length until under the top of the roof.
That give me the maximum high of the walls.
[image 28]
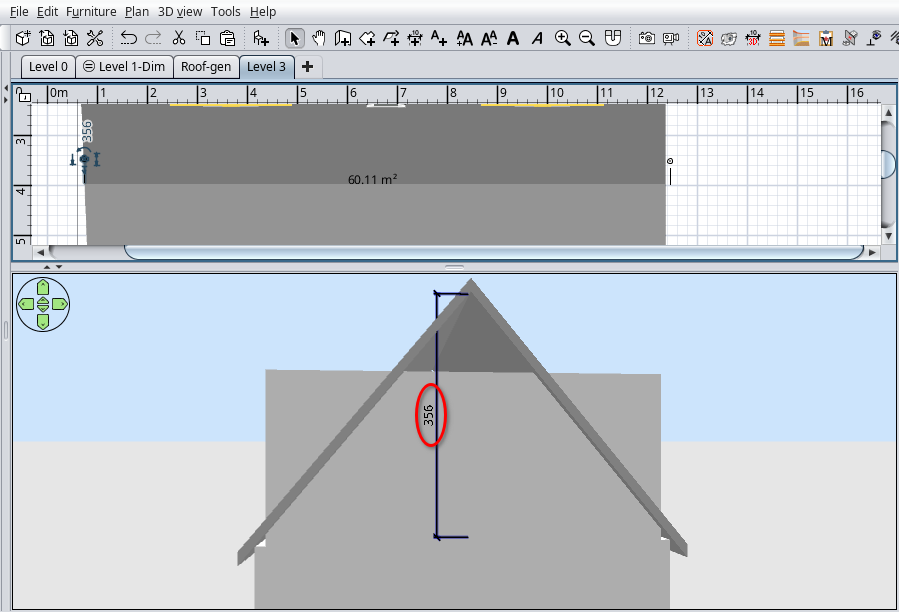
I've set the walls high accordingly.
[image 29]
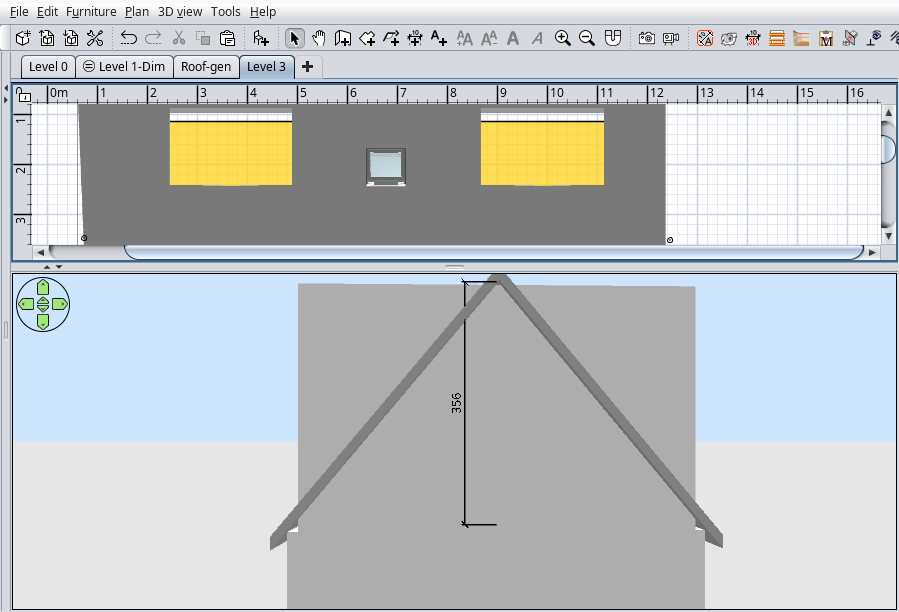
To avoid some unnecessarily calculus I've split the walls in two equal parts.
[image 30]
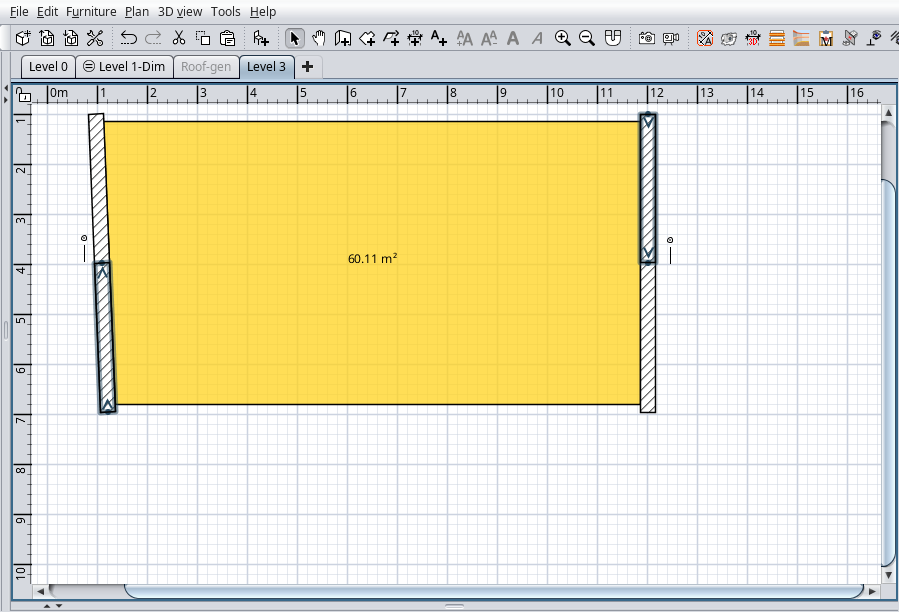
Then I've set for each (4 walls) the start and the end point.
In my case 0 and 356. This is the result.
[image 31]
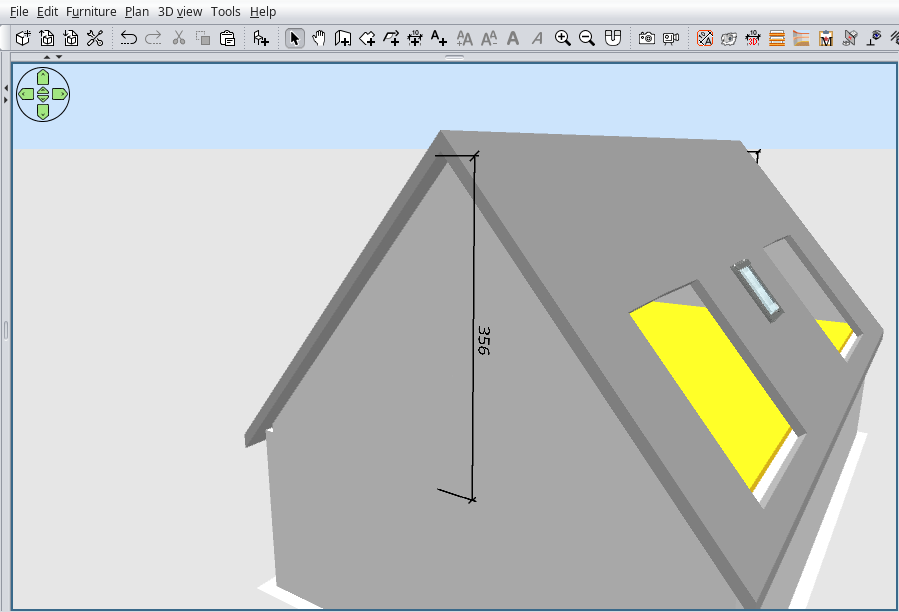
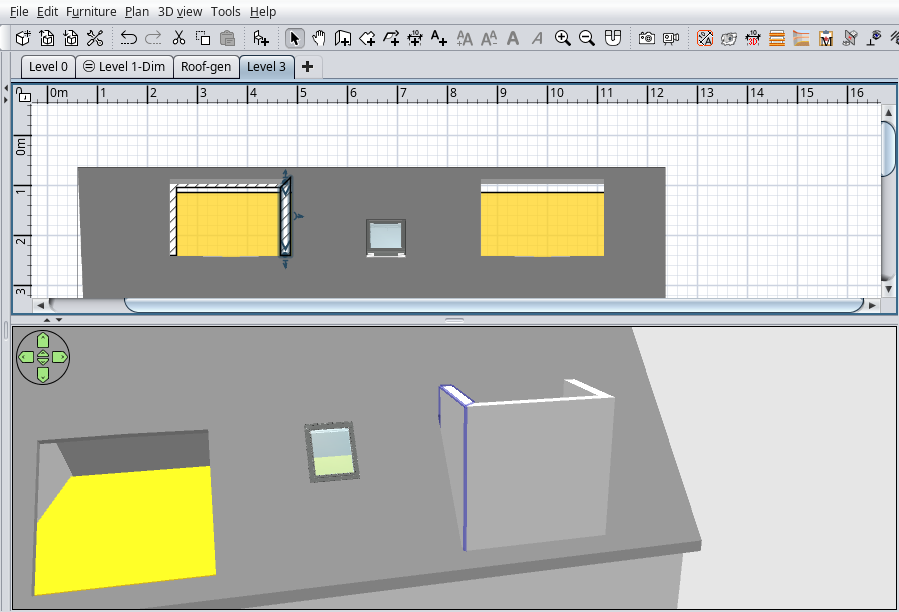
Now, using the roof holes as guidance, I've draw 3 wall for every dormer.
I've adjusted using the arrows and that's why I prefer the walls to be connected.
[image 32]
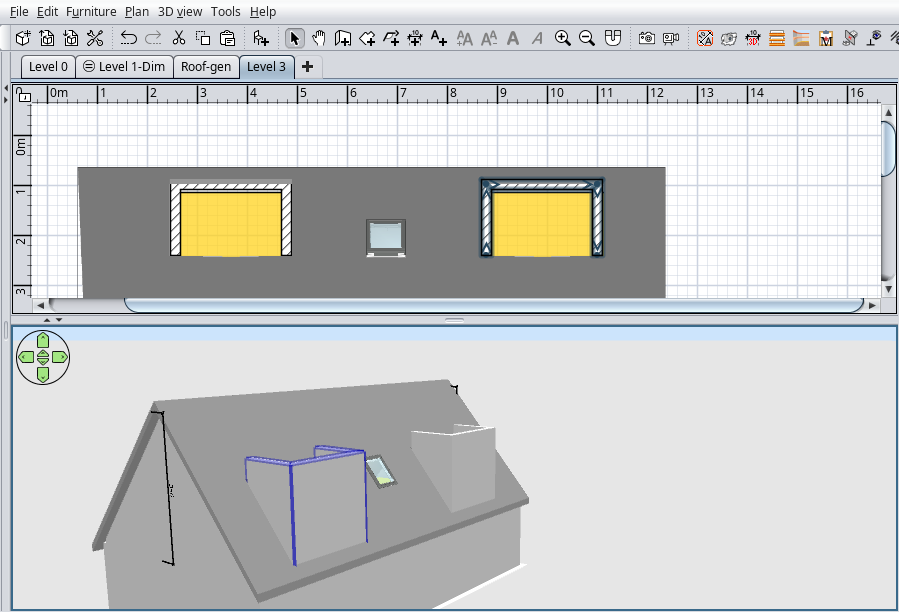
I've copy it and move to the other dormer. Adjust it again if is necessary (different dormer dimensions.
[image 33]
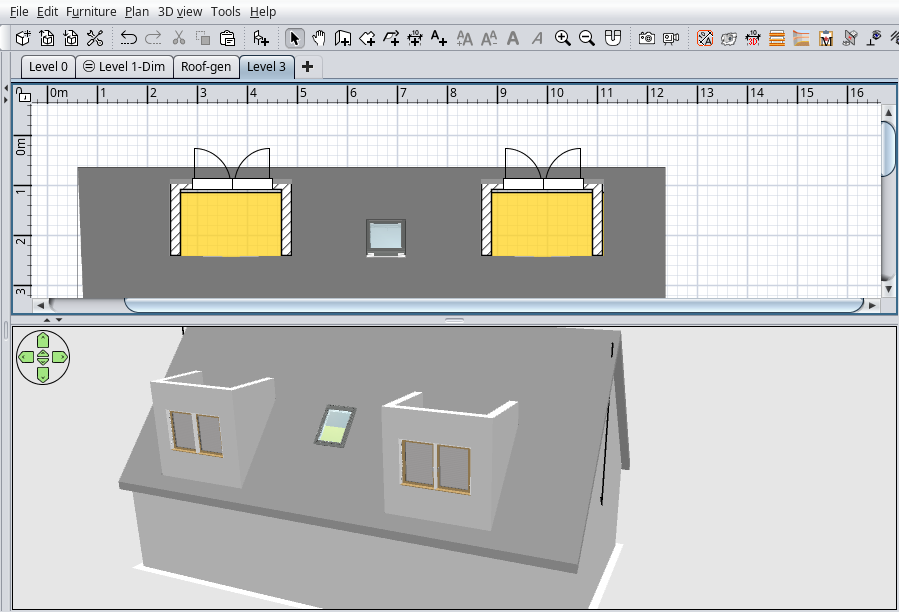
I've insert and adjust 4 windows from the SH3D library.
While is a vertical wall I don't need and I can't use the roof windows.
[image 34]
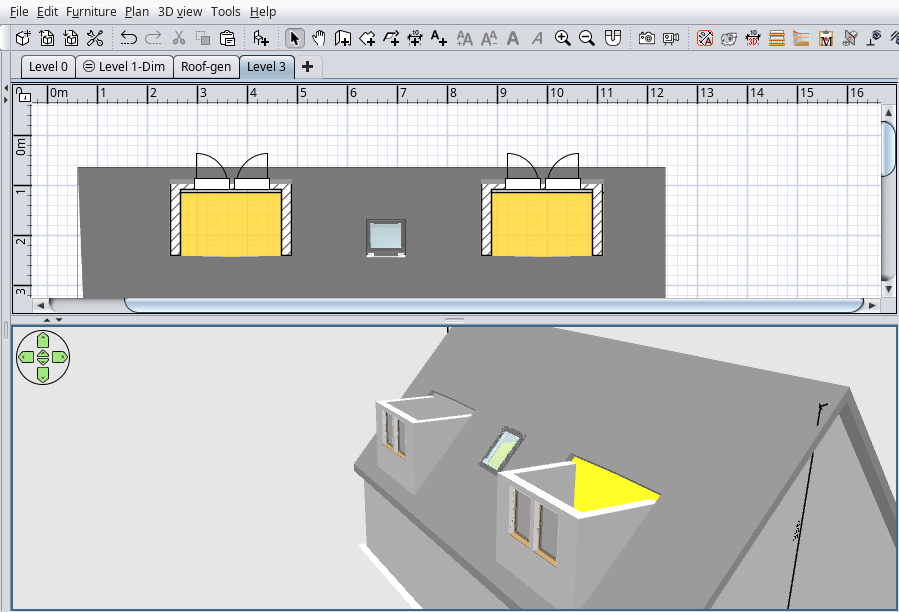
I've reduce the dormers walls high as much as possible.
[image 35]
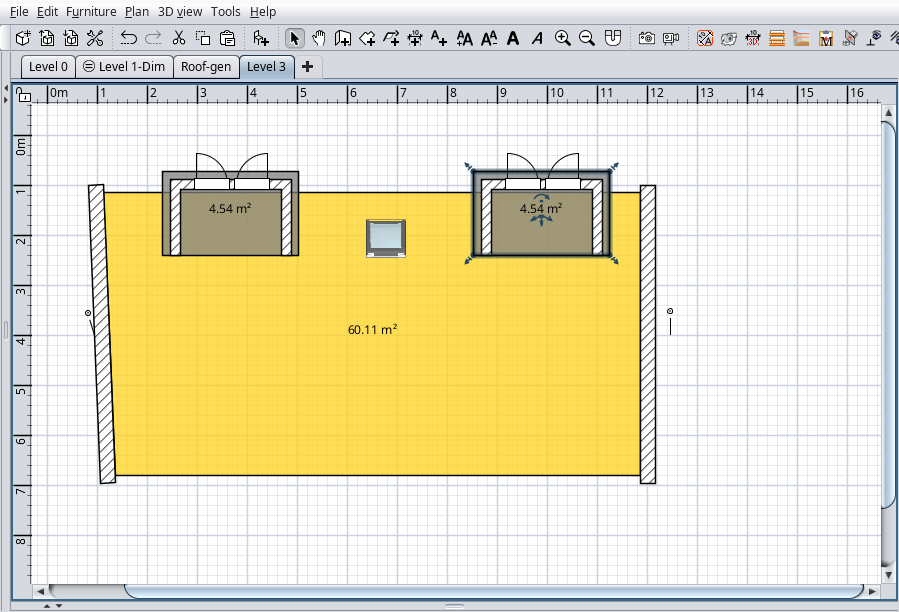
I've hide the roof level to have access at dormers walls and draw two rooms for dormers roofs.
I draw it manually at 15 cm overhang.
Select one of them, show the roof level and Generate roof...
[image 36]
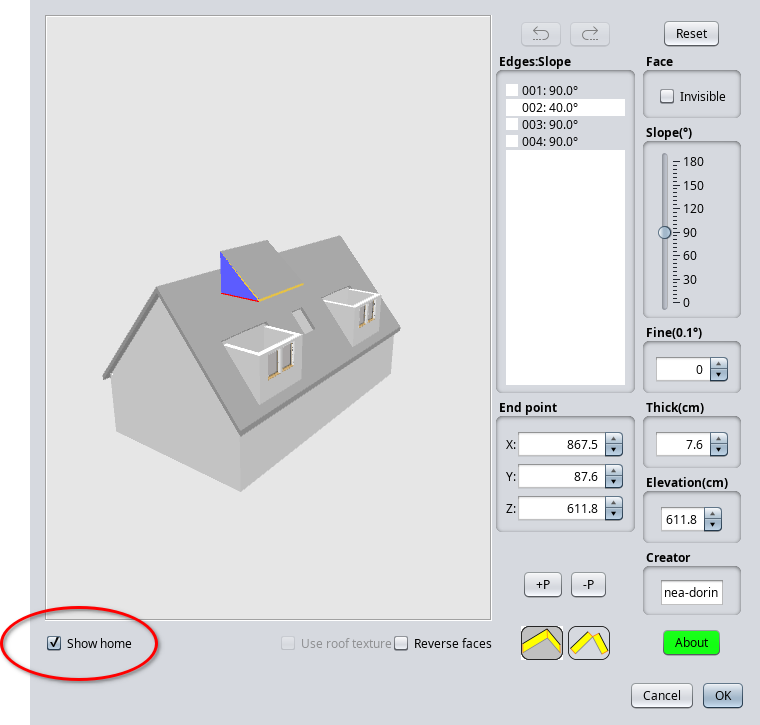
I recommend to use Show home to see where is placed the new roof.
[image 37]
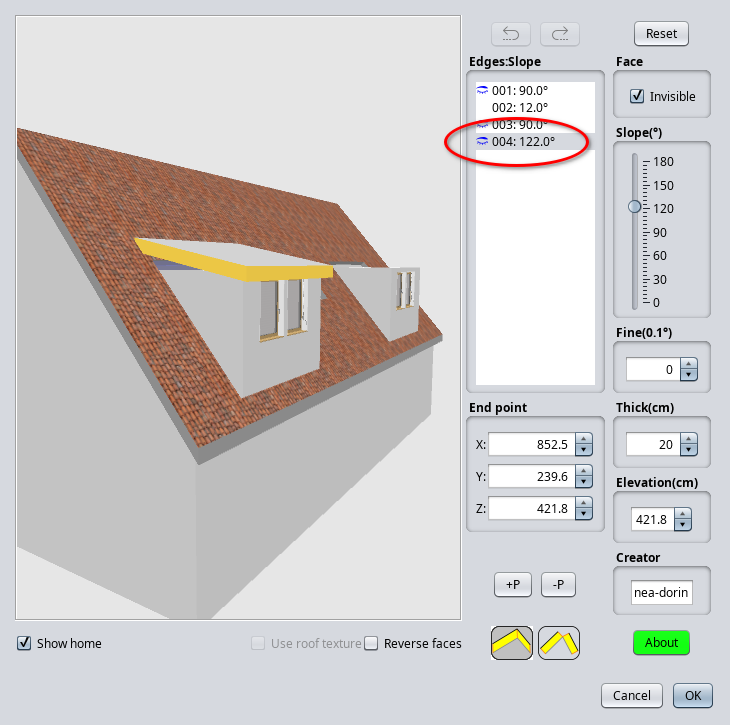
After set the faces angle and visibility, the thickness and elevation,
because I've don't let an overhang on that part, it appear a gap between roofs.
In that case I've increase the angle from 90 to 122 to fill the gap.
[image 38]
After generating I copy/paste the roof over to the other dormer.
On 3D you could see this:
[image 39]
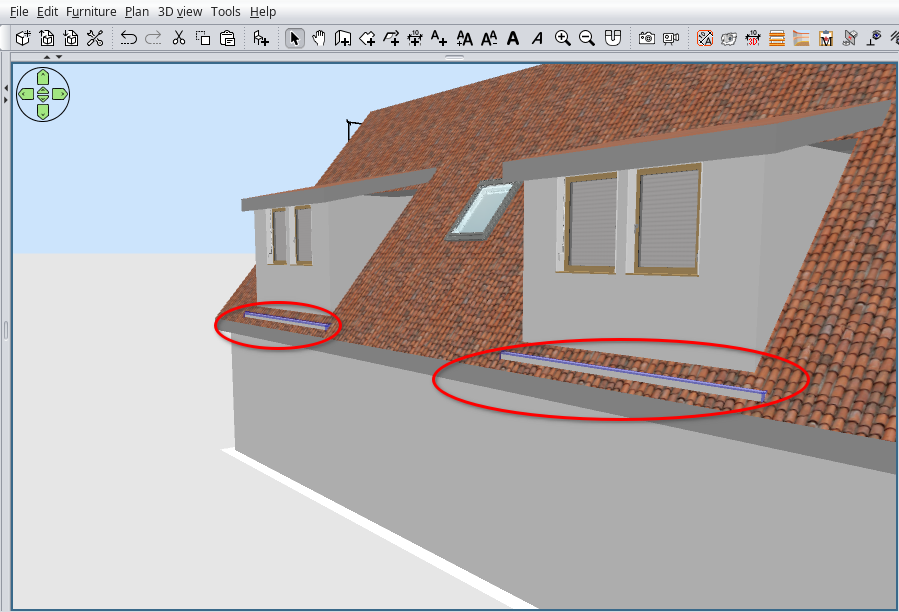
That's the rooms used to generate the dormers roofs and could be deleted.
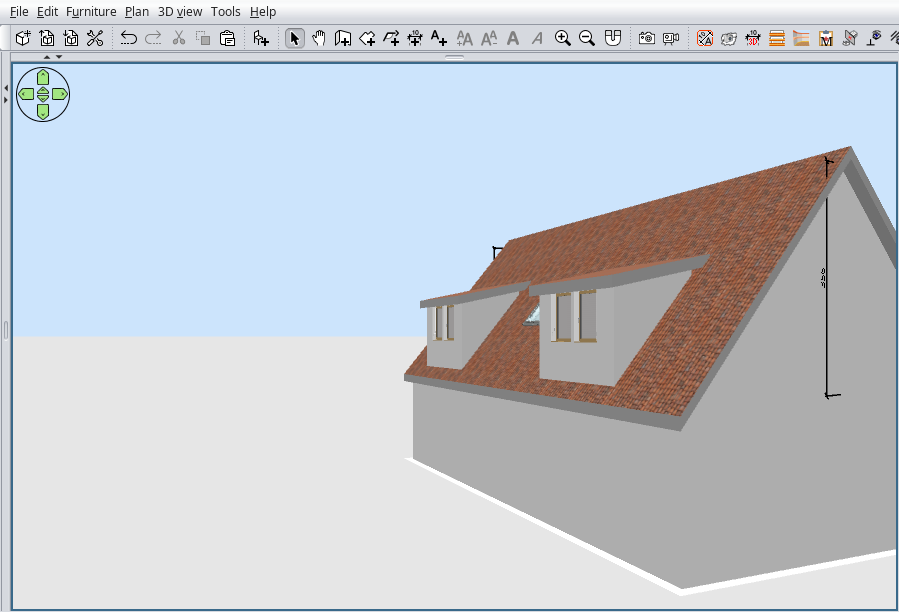
I've adjust the dormers walls sides at correct slope to fill the gaps.
You need to pay attention to the walls directions.
[image 40]
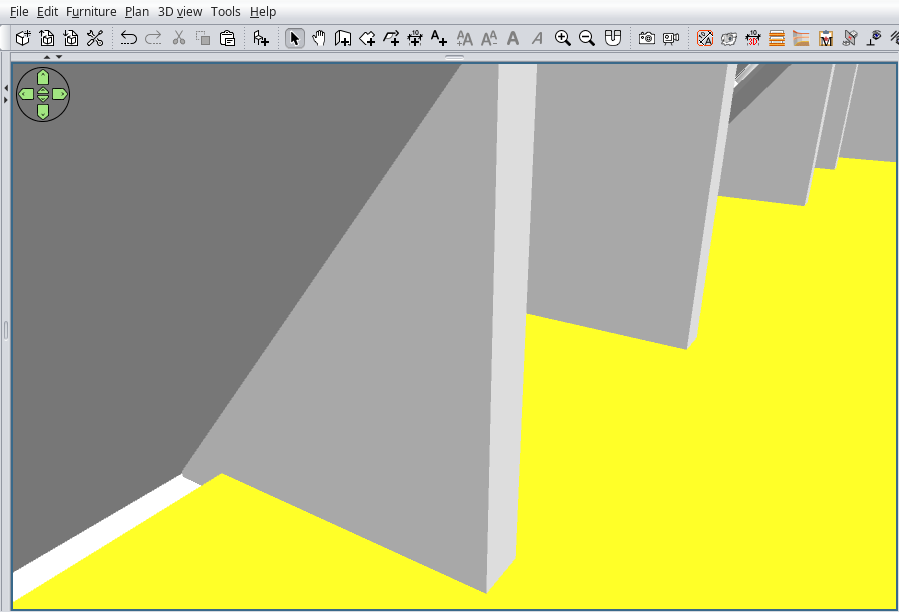
But under the roof is not really what I want. Will be!
[image 41]
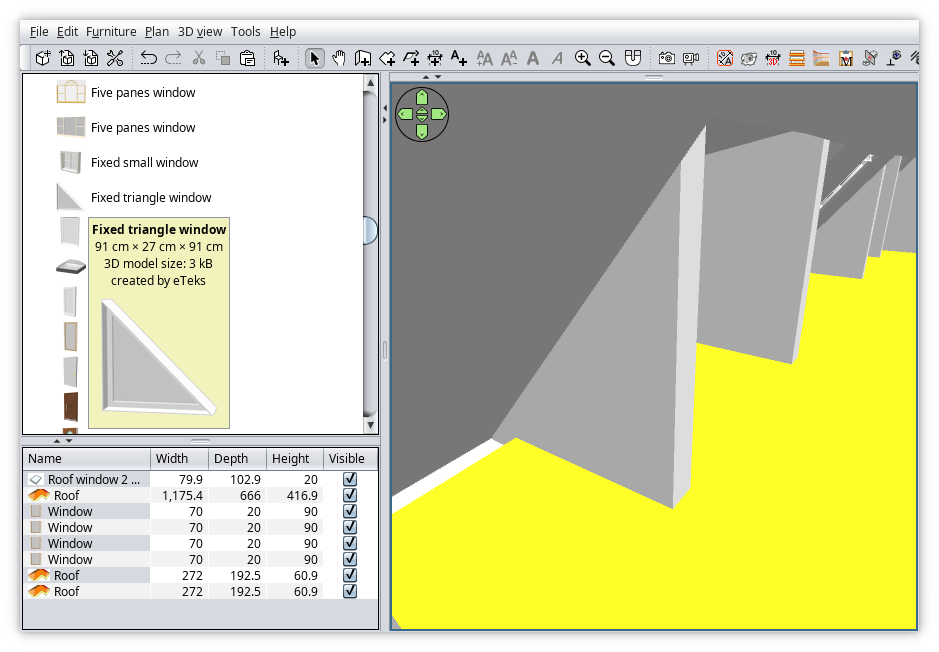
I need a proper triangle. Let's see if we don't have it already.
Found it!
[image 42]
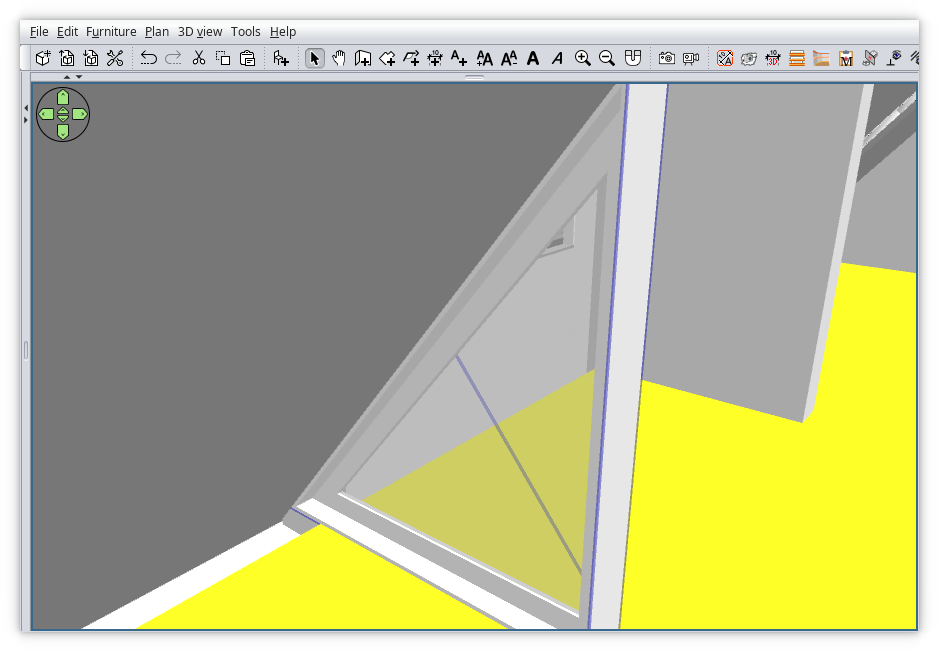
Adjusted and inserted in walls (only one for now)
[image 43]
Modify the window materials (not the object texture) as invisible.
[image 44]
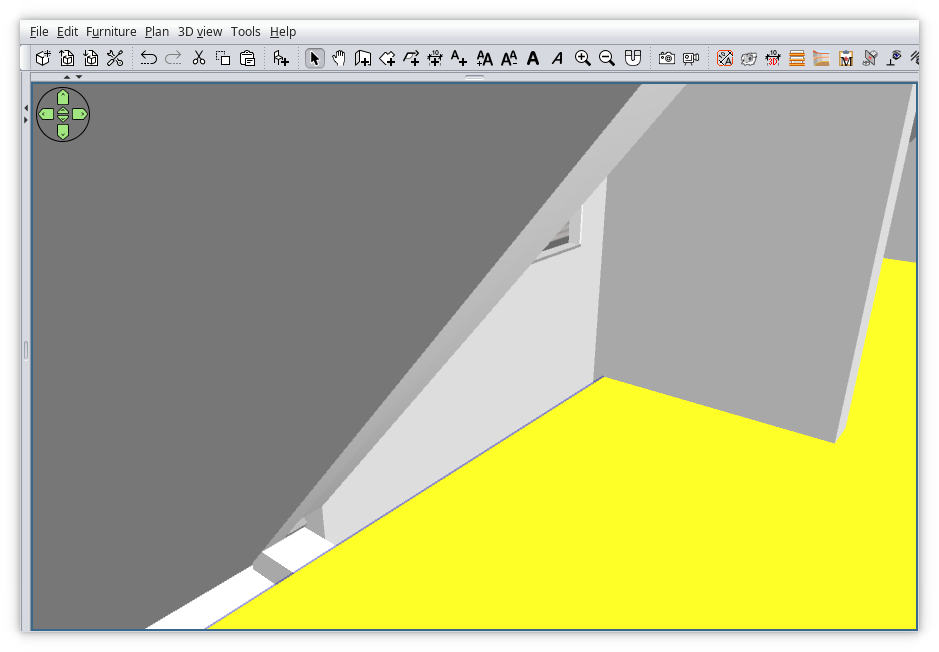
At the end I've copy paste it in the rest of the walls.
[image 45]
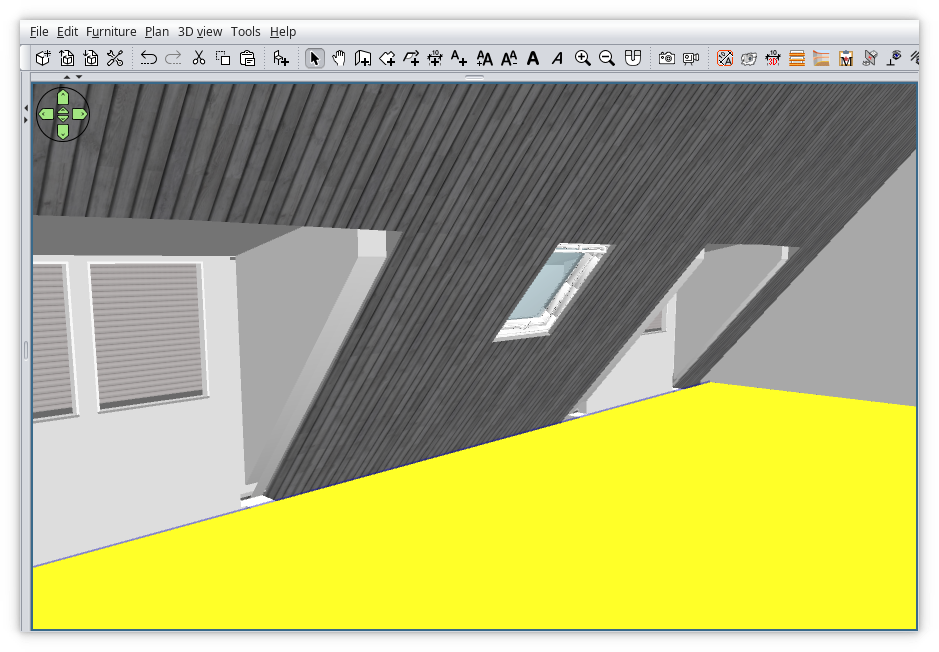
That's is!
Unfortunately it took me much more time (4h) to write than to do(15min).
1.My last statement is referring to that: you make a hole for the window and then insert and set it,
in place to let the plugin to do this for you.
We (especially Daniels118) has worked hard few months to do this for users.
That's what I want to say on my last statement.
2. For more precise calculations you could read this post . I've pin it on my browser.
I've made this mini tutorial especially for Martin but also for the others in needs.
Intended to cover two problems:
1. How to make holes in roof for dormers.
2. To make holes in the dormers sides walls under the roof.
I've started to reproduce the Martin home including the non perpendicular walls.
[image 01]
I've use AutoDimensioning to obtain a roof projection with 20cm overhang...
[image 02]
Resulting this
[image 03]
I've draw two rooms (perfect rectangle) representing the future holes for dormers.
Select all three and...
[image 04]
Generate roof... (something like this)
[image 05]
Made the two exterior faces at 90 deg and invisible...
[image 06]
Select ALL the faces around the holes...
[image 07]
Set all at 90 deg...
And I've got this!?!?
[image 08]
If your result is similar to this...
STOP continue! Click Cancel and...
Go back to your holes rooms. You have to apply a small trick:
Select one of them and insert an extra point on the side pointed to the middle of the roof.
[image 09-0]
Modify a little this point (in my case with 1 cm) to not be aligned with the previews and the next point.
[image 09-1]
Do the same with other hole (room)
Select again all three rooms and...
[image 10]
Generate roof.
Verify from start to have 2 faces in place of only one at both holes at sides pointing to the roof middle.
If none or one has and the other doesn't you have to go back and increase the middle point(s) with another cm.
[image 11]
Now make the two exterior faces at 90 deg & invisible,
select all faces around the holes...
[image 12]
Make them also at 90 deg & invisible.
Looks different compared with the first attempt.
[image 13]
So, we could continue.
Select the two visible remaining faces and set it at 50 deg,
Set the thickness at 20cm...
[image 14]
Check Show home to see the walls and where is the roof.
It is a little bit too high.
[image 15]
So, reduce the elevation.
[image 16]
Click Ok and this is the roof.
[image 17]
Drag&drop a roof window from the dedicated library.
In plan could look like this...
[image 18]
In 3D view like this. Don't worry, Let it as is.
[image 19]
Select the roof and Generate roof.
[image 20]
The plugin will make the necessary hole and will set the window(s) in the correct position.
Now, create a new Level 3 (NOT at same elevation)
go to Level 0, select and copy the walls and...
[image 21]
Paste the walls on Level 3,
generate a room inside than delete the upper and the lower walls as unnecessary.
[image 22]
After coloring the room and uncheck the ceiling we have this. Too high.
[image 23]
Select and modify Level 3. Look at their elevation.
[image 24]
To adjust it let SH3D to perform the calculus (by the way, It's able to perform much complex calculations)
[image 25]
Now the Level 3 with walls it is at correct place.
We need to adjust the wall but we need some aids to not guess too much.
[image 26]
On Level 3 I've added two dimension lines set as elevation dimension and visible in 3D at an arbitrary length.
[image 27]
I've modify their length until under the top of the roof.
That give me the maximum high of the walls.
[image 28]
I've set the walls high accordingly.
[image 29]
To avoid some unnecessarily calculus I've split the walls in two equal parts.
[image 30]
Then I've set for each (4 walls) the start and the end point.
In my case 0 and 356. This is the result.
[image 31]
Now, using the roof holes as guidance, I've draw 3 wall for every dormer.
I've adjusted using the arrows and that's why I prefer the walls to be connected.
[image 32]
I've copy it and move to the other dormer. Adjust it again if is necessary (different dormer dimensions.
[image 33]
I've insert and adjust 4 windows from the SH3D library.
While is a vertical wall I don't need and I can't use the roof windows.
[image 34]
I've reduce the dormers walls high as much as possible.
[image 35]
I've hide the roof level to have access at dormers walls and draw two rooms for dormers roofs.
I draw it manually at 15 cm overhang.
Select one of them, show the roof level and Generate roof...
[image 36]
I recommend to use Show home to see where is placed the new roof.
[image 37]
After set the faces angle and visibility, the thickness and elevation,
because I've don't let an overhang on that part, it appear a gap between roofs.
In that case I've increase the angle from 90 to 122 to fill the gap.
[image 38]
After generating I copy/paste the roof over to the other dormer.
On 3D you could see this:
[image 39]
That's the rooms used to generate the dormers roofs and could be deleted.
I've adjust the dormers walls sides at correct slope to fill the gaps.
You need to pay attention to the walls directions.
[image 40]
But under the roof is not really what I want. Will be!
[image 41]
I need a proper triangle. Let's see if we don't have it already.
Found it!
[image 42]
Adjusted and inserted in walls (only one for now)
[image 43]
Modify the window materials (not the object texture) as invisible.
[image 44]
At the end I've copy paste it in the rest of the walls.
[image 45]
That's is!
Unfortunately it took me much more time (4h) to write than to do(15min).
A computer program does what you tell it to do, not what you want it to do. Murphy's Law
When all else fails, read the instructions. Murphy's Law
If you don't like "AS IS", DIY. Dorin's law
When all else fails, read the instructions. Murphy's Law
If you don't like "AS IS", DIY. Dorin's law
Re: Generate roof plugin
Bravo, Dorin! [=D>] [@};-] Belissimo tutorial! [@};-] [=D>]
Re: Generate roof plugin
Oh wow! That is f***** great! Thank you very much.
Re: Generate roof plugin
Can we actually get the slope of an existing roof?
Re: Generate roof plugin
Never mind. I guess via selection and regeneration.
Re: Generate roof plugin
Hello Dorin,
Thank for the great plug-in.
I would like to generate a clipped gable roof. Is it possible?
A clipped gable roof looks like this:
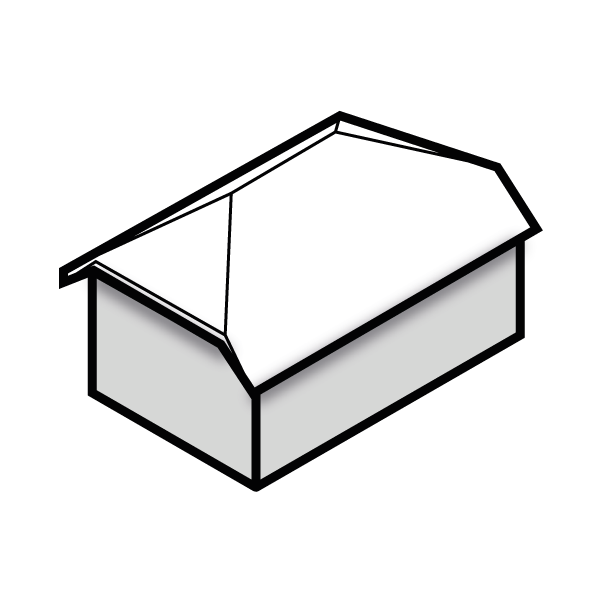 .
.
Thank for the great plug-in.
I would like to generate a clipped gable roof. Is it possible?
A clipped gable roof looks like this:
.Re: Generate roof plugin
Probably you want something like this:
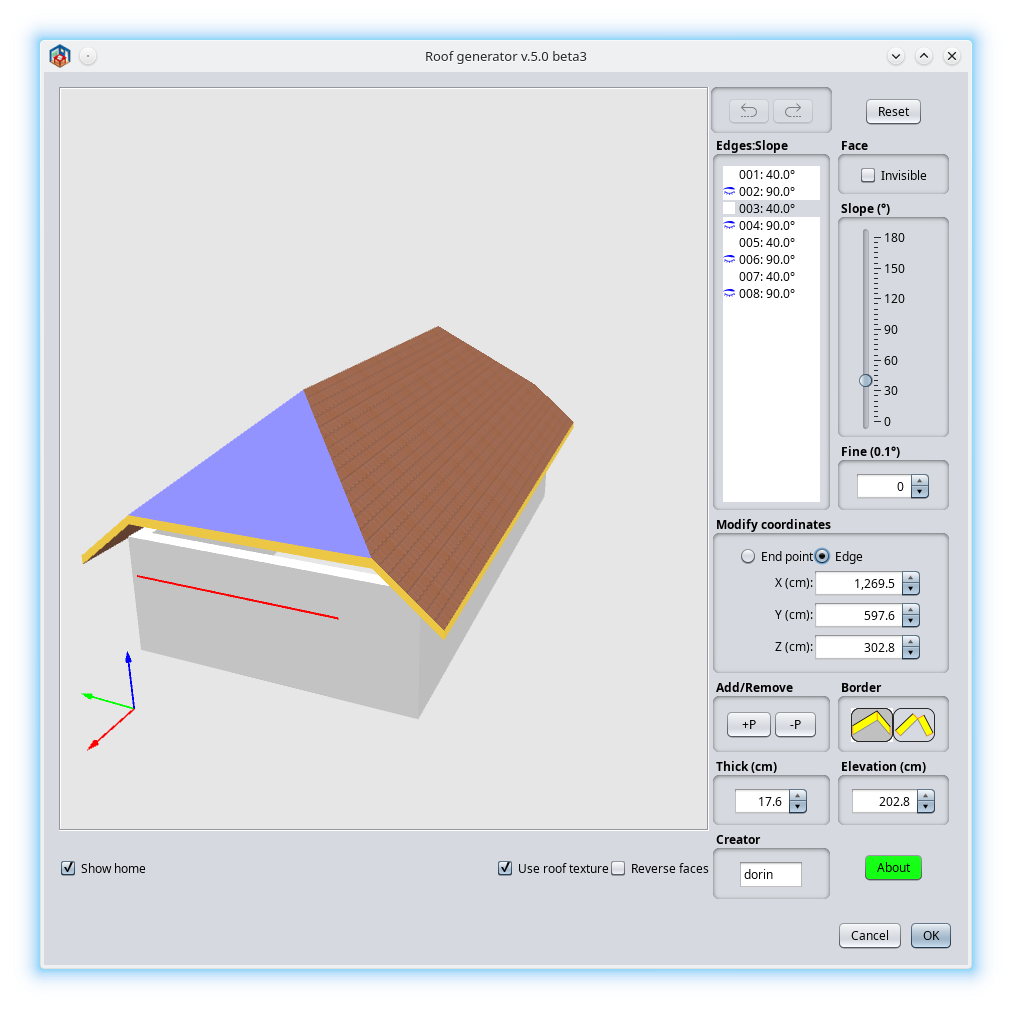
Unfortunately not now (not yet).
It's still a lot of work and I don't have much motivation.
If I'm still alive, probably next year.
Unfortunately not now (not yet).
It's still a lot of work and I don't have much motivation.
If I'm still alive, probably next year.
A computer program does what you tell it to do, not what you want it to do. Murphy's Law
When all else fails, read the instructions. Murphy's Law
If you don't like "AS IS", DIY. Dorin's law
When all else fails, read the instructions. Murphy's Law
If you don't like "AS IS", DIY. Dorin's law
Who is online
Users browsing this forum: No registered users and 2 guests