Photo rendering test
This topic has been viewed 1802814 times and has 68 replies
Re: Photo rendering test
I like the first rendering too! Well done, all of you!
Re: Photo rendering test
Thanks Hans!I prefer the second one:
- it's made with standard settings
- it's slightly lighter, looks a bit better.
Great work, Enko! Thanks!
I think Cecilia used interior light panels to simulate ambient lighting. The diffedBounces=0 parameter allows you to have more depth (from the lightest to the darkest).
So I did a quick test with this new beta version without using the interior panels or the external brightness.
Settings:
- anti-aliasing min/max: 1/2
- global illumination: default
- caustics photons: 0
- shininess shader: glossy
- filter: blackman-harris
- sampler algorithm: bucket
diffusedBounces: 0

diffusedBounces: 1

Enko
EnkoNyito

Re: Photo rendering test
Easter is finally over.
My sunburns ( from uncritical sunbathing in the Norwegian mountains) appears to be healing, and my crushed pride ( from ending up last in the ski-jump competition) is rapidly becoming a distant and soon forgotten memory... i think.
Back in sunny Copenhagen, where the crocus is ready to flourish, I have finally found the time to seriously explore the sweethome3d forum.
Yes, I could have used your ambient light option, had it been available at the time. It wasn't.
But quite frankly: I probably wouldn't have used it, even if it had been available.
Most of my projects are not really suited for automatic ambient lighting, and I have already formed a habit of creating my own ambiences, prior to the introduction of this automatic ambience-creator.
That being said, I think the ambient light option is a great enhancement to SH3D, and I really hope people prefer using your ambient light option to the default "Add Ceiling Light"-option ( which in my opinion has done more harm than good to any rendering I have seen using it).
Am I simulating ambient light.... ?
What do you think?
What came first; my simulation, or the "real" ambient light?
With the introduction of the new light panels, producing a variety of "simulations" of ambient light were automatically kickstarted. All the options were really there from the beginning, once the panel lights were installed. "Simulated ambient lighting" were there for anyone with an interest in lighting. I can only assume anyone with a hard-core interest in rendering, instantly fell in love with these new options, and I know for a fact that I was far from the first user to experiment with this and present it at the forum.
To me, these panel lights represented a turning point – or rather; it represents THE turning point – as the greatest thing that have so far happened in my short history with SH3D..
In my opinion, the automatic "ambient light" - option is a good spin-off, but it's just that. It has lots of limitations – limitations that are not there when you "simulate" it.
Why, you might ask, are most of my projects not suited for automatic ambient lighting?
Mainly because I prefer to work with dual ceilings, and the automatic light ambience is locked ( as far as I have experienced) to the physical room created by SH3D.
For anyone using custom ceilings, the automatic ambient lighting is really not a relevant option:
Ambient lighting:
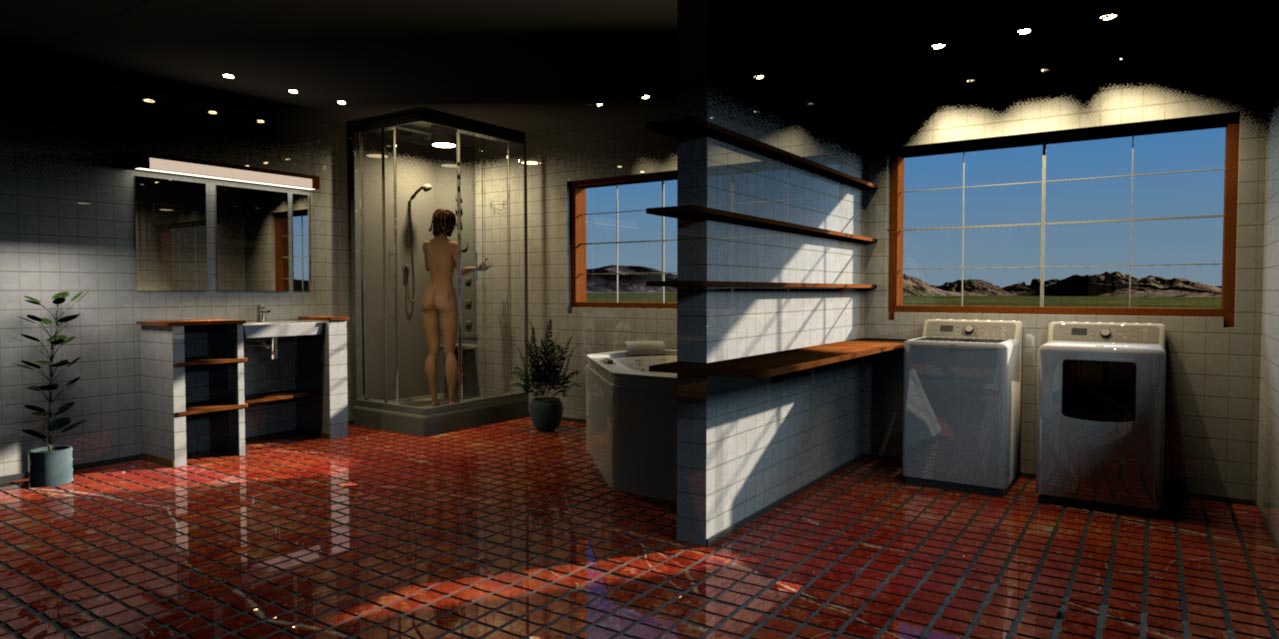
Simulated ambient lighting:

Well, anyway:
The most fundamental aspect of it is: Isn't the ambient light-option basically just an automatic simulation, whereas my manual "simulation" is a more controllable option?
I'm just asking...
Cecilia
My sunburns ( from uncritical sunbathing in the Norwegian mountains) appears to be healing, and my crushed pride ( from ending up last in the ski-jump competition) is rapidly becoming a distant and soon forgotten memory... i think.
Back in sunny Copenhagen, where the crocus is ready to flourish, I have finally found the time to seriously explore the sweethome3d forum.
Yes, I did ( and shame on me?)I think Cecilia used interior light panels to simulate ambient lighting
Yes, I could have used your ambient light option, had it been available at the time. It wasn't.
But quite frankly: I probably wouldn't have used it, even if it had been available.
Most of my projects are not really suited for automatic ambient lighting, and I have already formed a habit of creating my own ambiences, prior to the introduction of this automatic ambience-creator.
That being said, I think the ambient light option is a great enhancement to SH3D, and I really hope people prefer using your ambient light option to the default "Add Ceiling Light"-option ( which in my opinion has done more harm than good to any rendering I have seen using it).
Am I simulating ambient light.... ?
What do you think?
What came first; my simulation, or the "real" ambient light?
With the introduction of the new light panels, producing a variety of "simulations" of ambient light were automatically kickstarted. All the options were really there from the beginning, once the panel lights were installed. "Simulated ambient lighting" were there for anyone with an interest in lighting. I can only assume anyone with a hard-core interest in rendering, instantly fell in love with these new options, and I know for a fact that I was far from the first user to experiment with this and present it at the forum.
To me, these panel lights represented a turning point – or rather; it represents THE turning point – as the greatest thing that have so far happened in my short history with SH3D..
In my opinion, the automatic "ambient light" - option is a good spin-off, but it's just that. It has lots of limitations – limitations that are not there when you "simulate" it.
Why, you might ask, are most of my projects not suited for automatic ambient lighting?
Mainly because I prefer to work with dual ceilings, and the automatic light ambience is locked ( as far as I have experienced) to the physical room created by SH3D.
For anyone using custom ceilings, the automatic ambient lighting is really not a relevant option:
Ambient lighting:
Simulated ambient lighting:
Well, anyway:
The most fundamental aspect of it is: Isn't the ambient light-option basically just an automatic simulation, whereas my manual "simulation" is a more controllable option?
I'm just asking...
Cecilia
Re: Photo rendering test
No, quite the contrary. I quoted you to explain the difference in rendering and because you use the light panels in your interiors.Yes, I did ( and shame on me?)
I used them mainly to simulate the natural light coming from the outside.
The use of the term "ambient lighting" may not have been used by you or other users yet, but in practice this was already the case.
As soon as a 60 cm square light panel was used instead of the default room ceiling light, the beginnings of automatic ambient lighting were there. The major flaw was that the ceiling remained dark.
In the "new" automatic ambient lighting, there are 2 light panels and the ceiling is now visible. The constraint is that the size of the square panels remains limited even if now it is proportional to the area of the room.
This is not the case for non-novice users or more accustomed to manually placing the light panels.
In the recent projects of the blog, I show what can give the automatic ambient lighting (combined with other lighting) after having modified the ceilings of certain rooms.
Enko
EnkoNyito
Re: Photo rendering test
Cecilia,
I scrolled up and down at least 20 times to compare the two images, but I can't find the difference(s), if any...
Maybe smaller pictures that can both be seen at the same time would illustrate the difference(s) better??
Hans
I scrolled up and down at least 20 times to compare the two images, but I can't find the difference(s), if any...
Maybe smaller pictures that can both be seen at the same time would illustrate the difference(s) better??
Hans
Re: Photo rendering test
@hansmex
Good point!
Instead of making a smaller version, I have made a gif animation that toggles between the two images::
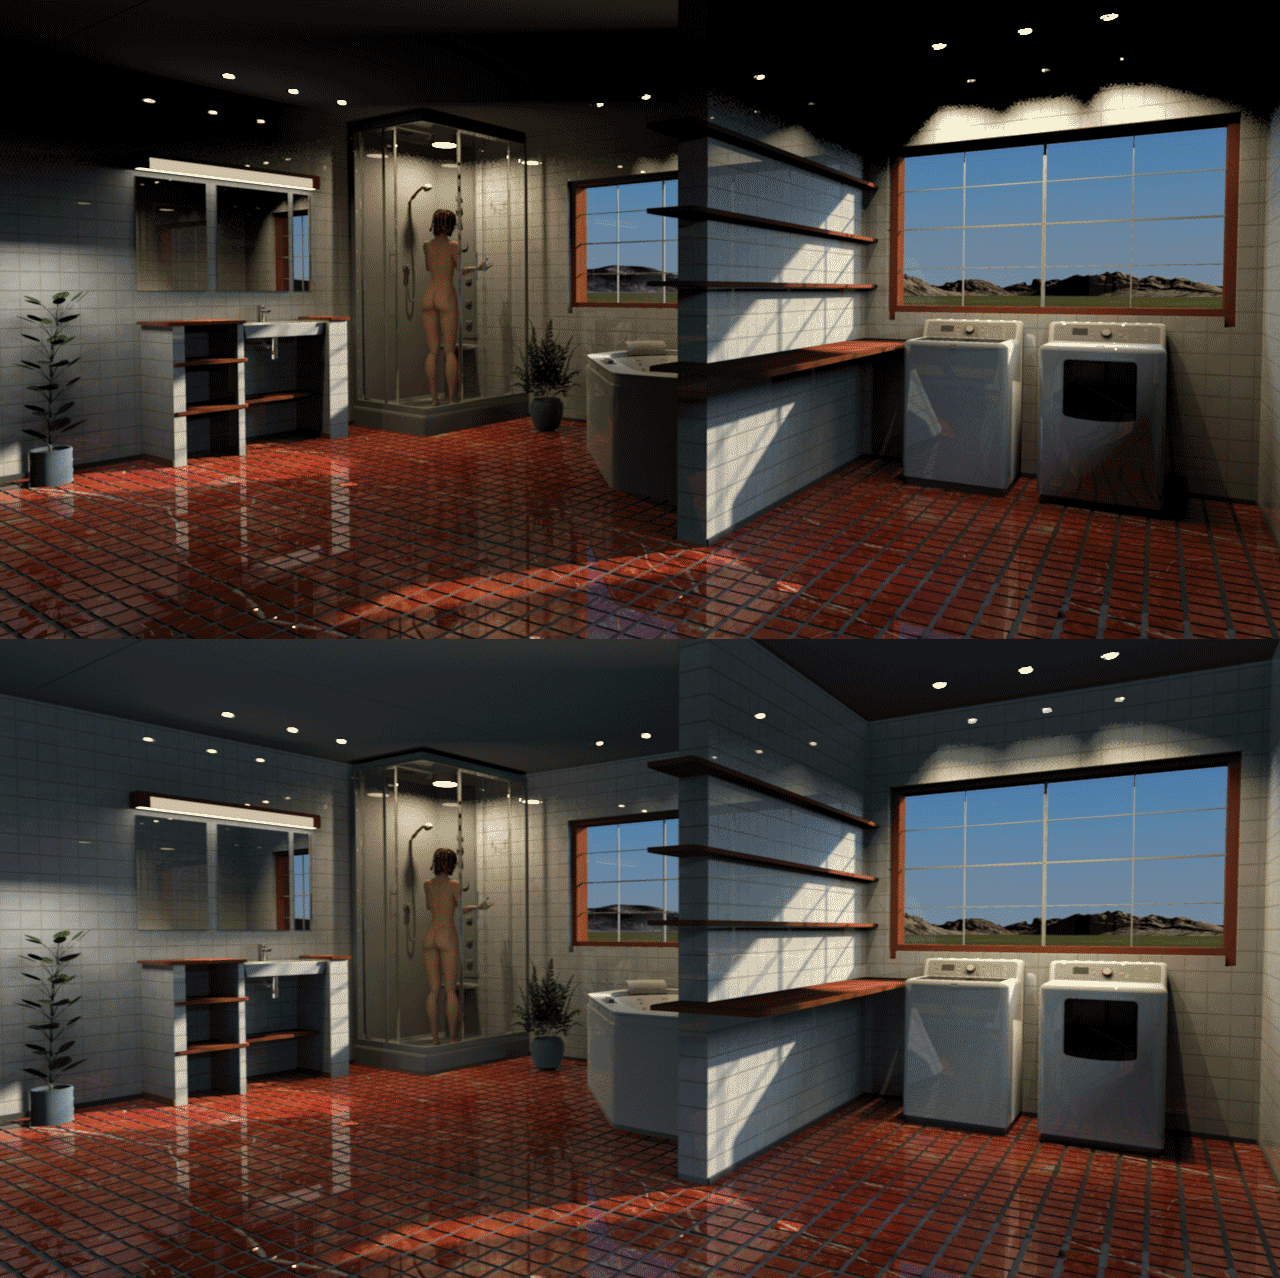
On my monitors the difference is quite noticeable.
The darker image is the one with "ambient lighting"set @ 100%.
If you still don't see any difference, I suggest you check your monitors contrast / brightness balance. There should be a built-in calibration procedure you can follow.
Cec
Maybe smaller pictures that can both be seen at the same time would illustrate the difference(s) better??
Good point!
Instead of making a smaller version, I have made a gif animation that toggles between the two images::
On my monitors the difference is quite noticeable.
The darker image is the one with "ambient lighting"set @ 100%.
If you still don't see any difference, I suggest you check your monitors contrast / brightness balance. There should be a built-in calibration procedure you can follow.
Cec
Re: Photo rendering test
No, quite the contrary. I quoted you to explain the difference in rendering and because you use the light panels in your interiors.
I was just trying to be funny

Yes, I have used the light panels a lot on the interiors. I often do that.
I know that some people are very fond of natural light, but I'm really more into using light sources as a creative tool. I literally grew up on a film set, where getting the light right was the top one priority. I often find myself thinking it's a photo-shoot when I'm lighting my scenes.
Natural light is all around us every day, whereas artificial lights can create some really special moods and play tricks on our perception of reality.
I remember my first attempt to use the new panel lights:
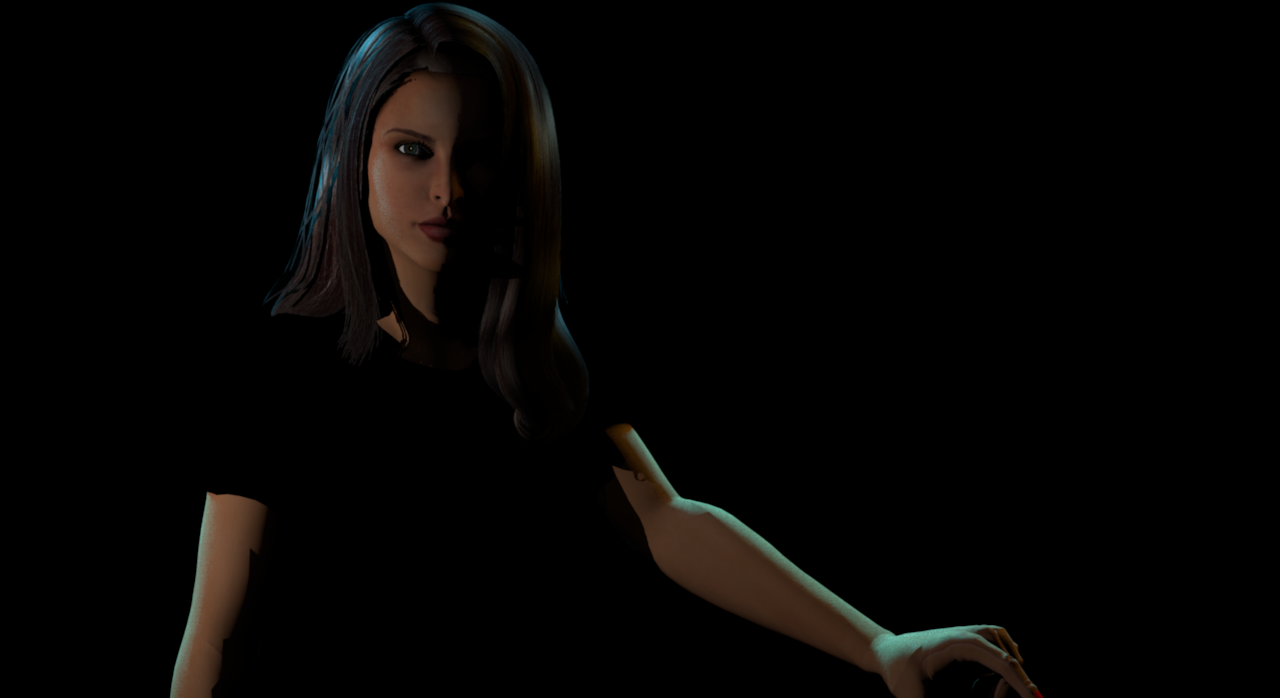
For me, being able to set lights like this, was magic.
With the panel lights I can recreate some magic moments and use everything I learned about lighting from "growing up" at film sets and photo shoots.
Cec
Re: Photo rendering test
This test concerns Sunflow shininess shaders:
- Uber (silk)
- Phong
- Ward
- Shiny (glossy)
Here is a comparison of these shaders by varying the shininess under 2 types of lighting.
The Diffuse shader is used when the object is matt.


Enko
- Uber (silk)
- Phong
- Ward
- Shiny (glossy)
Here is a comparison of these shaders by varying the shininess under 2 types of lighting.
The Diffuse shader is used when the object is matt.
Enko
EnkoNyito
Re: Photo rendering test

New configuration for a sky color with enhanced external brightness.


Enko Nyito
EnkoNyito
Re: Photo rendering test
Hi all,
Which background do you prefer?


It will be visible when saving the image after stopping a rendering.
Enko
Which background do you prefer?
It will be visible when saving the image after stopping a rendering.
Enko
EnkoNyito
Who is online
Users browsing this forum: No registered users and 1 guest