Ceiling downlight

This topic has been viewed 34289 times and has 17 replies
Thread status: Active
Share your snapshots made with Sweet Home 3D here [img]http://www.sweethome3d.com/images/flags/en_small.gif[/img]
rontant
Posts: 113
Joined: Wed Jul 04, 2018 2:26 am
Country: Singapore

Ceiling downlight

Post by rontant »

I want to put ceiling downlight but cannot find it in the default library. So I put a incandescent light source instead but that doesn't look like a ceiling downlight at all because it creates a bright spot on the ceiling.

I used Blender to create a simple cylinder with a bottom face removed and import it to Sweethome3D to simulate a downlight housing.

Here are the two images:

Image
Using incandescent light source without downlight housing

Image
Using my simple housing. I know the protuding part from the ceiling is ugly but I don't know how to flaten it without losing the effect of downlight.

Any tips to share on creating a proper downlight?
User avatar
Puybaret
Posts: 9440
Joined: Mon Nov 07, 2005 12:00 pm
Country: Paris, France
Contact:

Re: Ceiling downlight

Post by Puybaret »

Hope this thread can help you...
Emmanuel Puybaret, Sweet Home 3D creator
rontant
Posts: 113
Joined: Wed Jul 04, 2018 2:26 am
Country: Singapore

Re: Ceiling downlight

Post by rontant »

Thanks Emanuelle! That thread indeed is very informative. I'll spend some time reading it. I have a lot to learn.
rontant
Posts: 113
Joined: Wed Jul 04, 2018 2:26 am
Country: Singapore

Re: Ceiling downlight

Post by rontant »

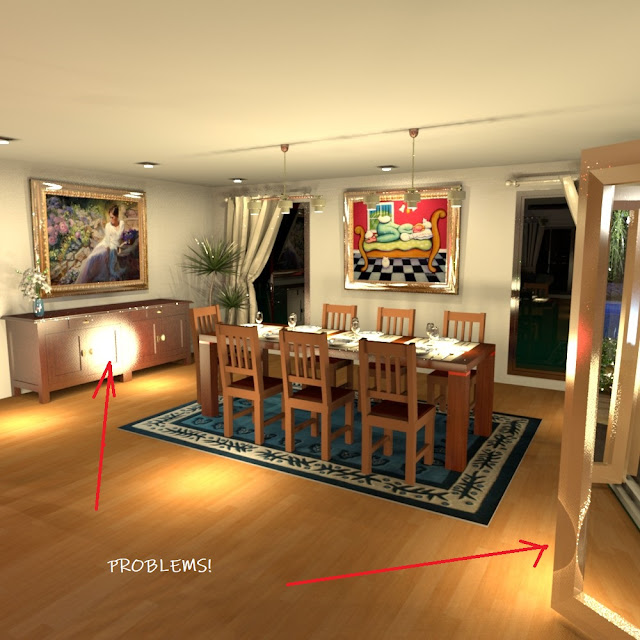
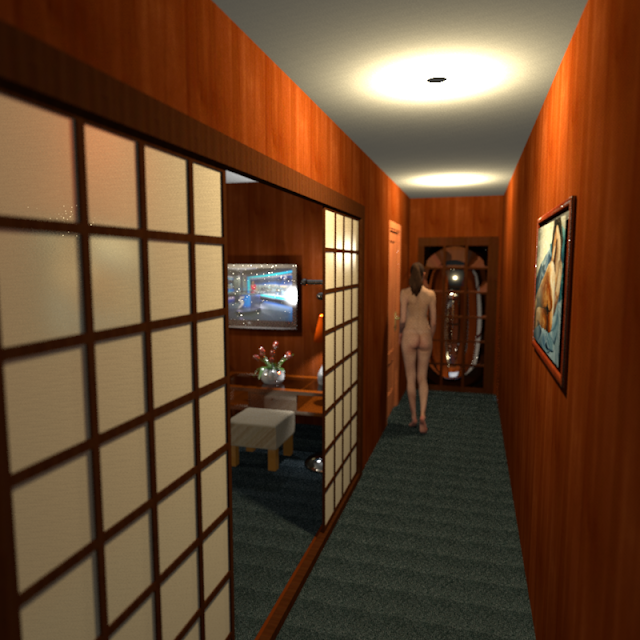
The tips shared in the thread seems too complicated for me but I am deeply impressed with CeciliaB's post where she put light sources on the floor to simulate light beam spots on the floor. So I tried to follow her tricks by putting several light sources with elevation around 5cm to 40cm, but some of the renders seem to give some desirable effects. Please see attached photos.

Image
The round light patch on the left came from the light source (with 5cm elevation from the floor). It looks too harsh and out of place. Then the light source near the girl's right lower leg gave a black patch on it. Overburned?

Image

Image
Look at the dark patches on the door frame.


Any tips on how to avoid these unwelcome ground level light source reflections?
enkonyito
Posts: 607
Joined: Thu May 28, 2015 4:52 pm

Re: Ceiling downlight

Post by enkonyito »

@rontant

When a light source comes in contact with an object, there is a dark mark at their intersections.
To avoid this, I choose the aerial view centered on the selection (light source) and I turn around it in the 3D view to check that there is no contact.

The white dots and reflections of the light sources are due to the fact that the shininessShader parameter is by default on silk.
To correct this, you can decrease the shininess of the parts of the object concerned or put it in mat.
EnkoNyito
rontant
Posts: 113
Joined: Wed Jul 04, 2018 2:26 am
Country: Singapore

Re: Ceiling downlight

Post by rontant »

Thank you very much @enkonyito. I have followed your advices and indeed they solved all the problems. Here is the new Q3 render. You are wonderful.

Image

I really enjoy playing with the lighting.
rontant
Posts: 113
Joined: Wed Jul 04, 2018 2:26 am
Country: Singapore

Re: Ceiling downlight

Post by rontant »

Resized some of light source sphere, ensured no contacts with objects.
Reduced light source brightness.
Reduced shininess of materials.

Image

Image
User avatar
Ceciliabr
Posts: 637
Joined: Sun Jul 07, 2013 3:41 pm
Country: Copenhagen, Denmark
Contact:

Re: Ceiling downlight

Post by Ceciliabr »

Very nice project, and very nice images.

cec
rontant
Posts: 113
Joined: Wed Jul 04, 2018 2:26 am
Country: Singapore

Re: Ceiling downlight

Post by rontant »

Thanks @Ceciliabr, I am glad you like it. I am a great admirer of your works and still trying to learn from you. Hope to see more of your works here.
rontant
Posts: 113
Joined: Wed Jul 04, 2018 2:26 am
Country: Singapore

Re: Ceiling downlight

Post by rontant »

Image

Using Blender, I created a ceiling mounted spot light. Anyone who wants it, feel free to download it from https://sourceforge.net/p/sweethome3d/d-models/496/

Light bulb is not included. [:p]

You need to put in a a light bulb (light source from the library) and resize it to 3cm. Resize the spotlight width to 5cm and 3cm for the light bulb/light.

The elevation for the spotlight should be set to 227cm and 232cm for the light bulb/source inside the housing.

Then carefully put the light source as deep as possible in the spotlight housing.


Test it in a dark room to make sure the light source fit properly. Light should not escape from the back or sides of the spotlight. Once fitted properly, select both light source and the spotlight housing, and group them.
Post Reply New Topic

Who is online

Users browsing this forum: No registered users and 1 guest